I am so excited about this project! I made these pendants using the Pastry Tool, Pastry Mat and polymer clay. Just like all other types of mediums you cut on your Creative Cutter, the possibilities are endless! It’s amazing the detailed cuts you can get using clay! To get started, watch Klo’s Polymer clay video for some fabulous instructions. It is in the January 18th – 21st Marathon classes, sessions 10 & 11. The files I used are found in the Craft Room Library and are listed at the end of the instructions.
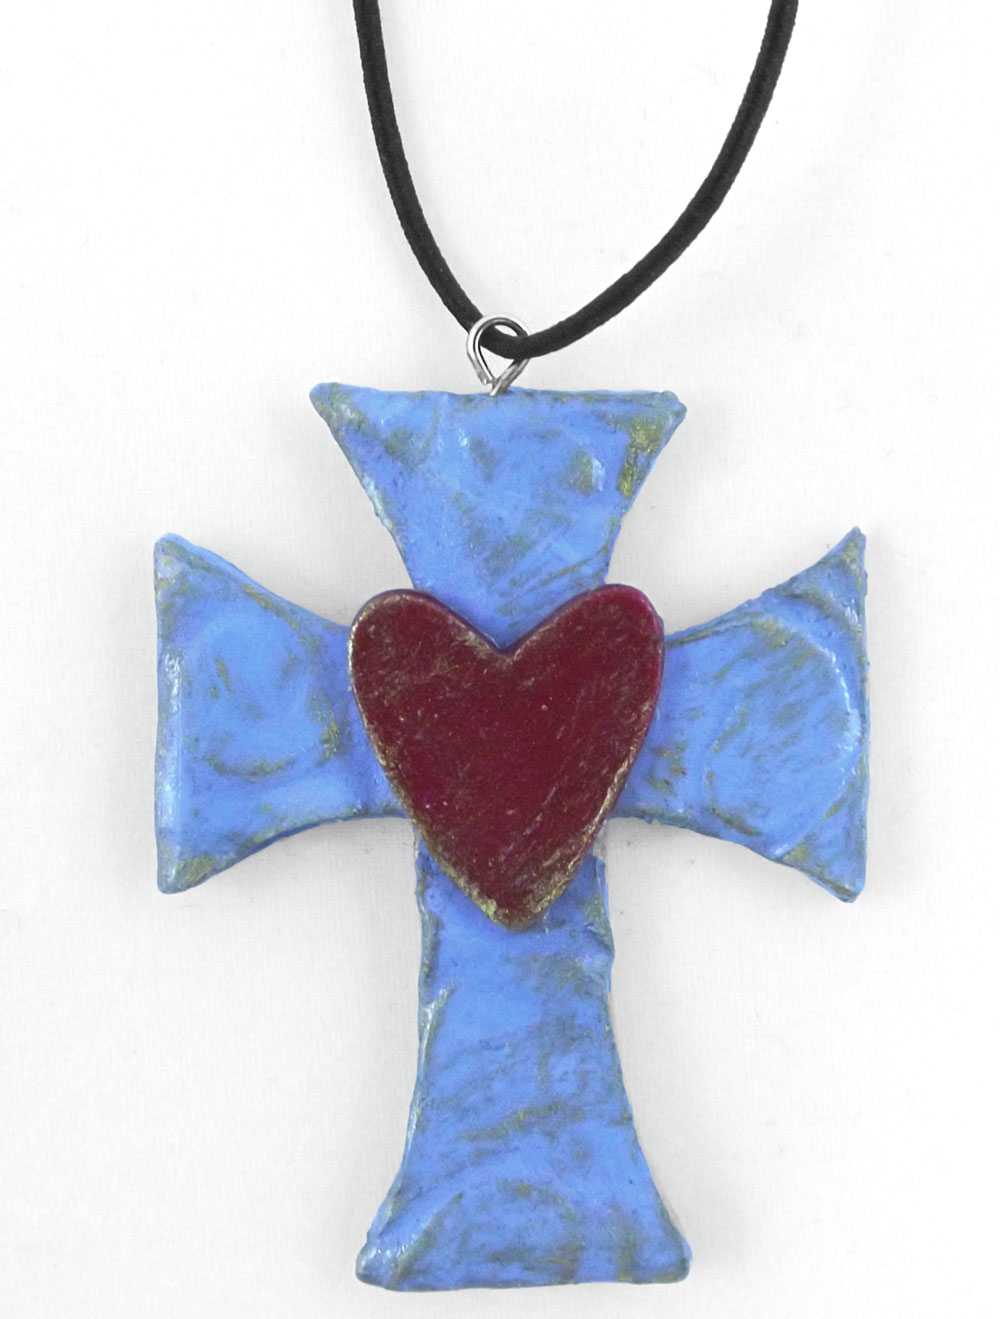
First, I rolled my clay out using a pasta machine using a thickness of 5. I placed my rolled out clay on my Pastry mat and patted it down until I was sure it was firmly stuck to the mat. Then I chose my design and cut it out. I used a pressure of 13 and a speed of 2. The blade is stationary so you do not have to adjust it. I cut two of my design out and layered them on top of each other so I would have the thickness I wanted and also to hide the jewelry pin inside. Two to three layers makes a great thickness. I rubbed the sides of the project with my finger so it smoothed the edges and you couldn’t tell there were layers. I used eye pins and I bent them in a ric rac pattern so they didn’t just pull out after my project was baked. I baked mine in my toaster oven on 275 for 15 minutes. (Be sure to check and follow the directions for your clay.) I let my project completely cool before I pulled it off my plate. I brushed two layers of Sculpy Gloss Glaze over my project, letting the first layer dry before brushing on the second layer. Let your project dry overnight before you use it. You can leave out the eye pin and add a pin back to the back of your project making it a brooch instead of a pendant, or add a key ring to make it a key chain.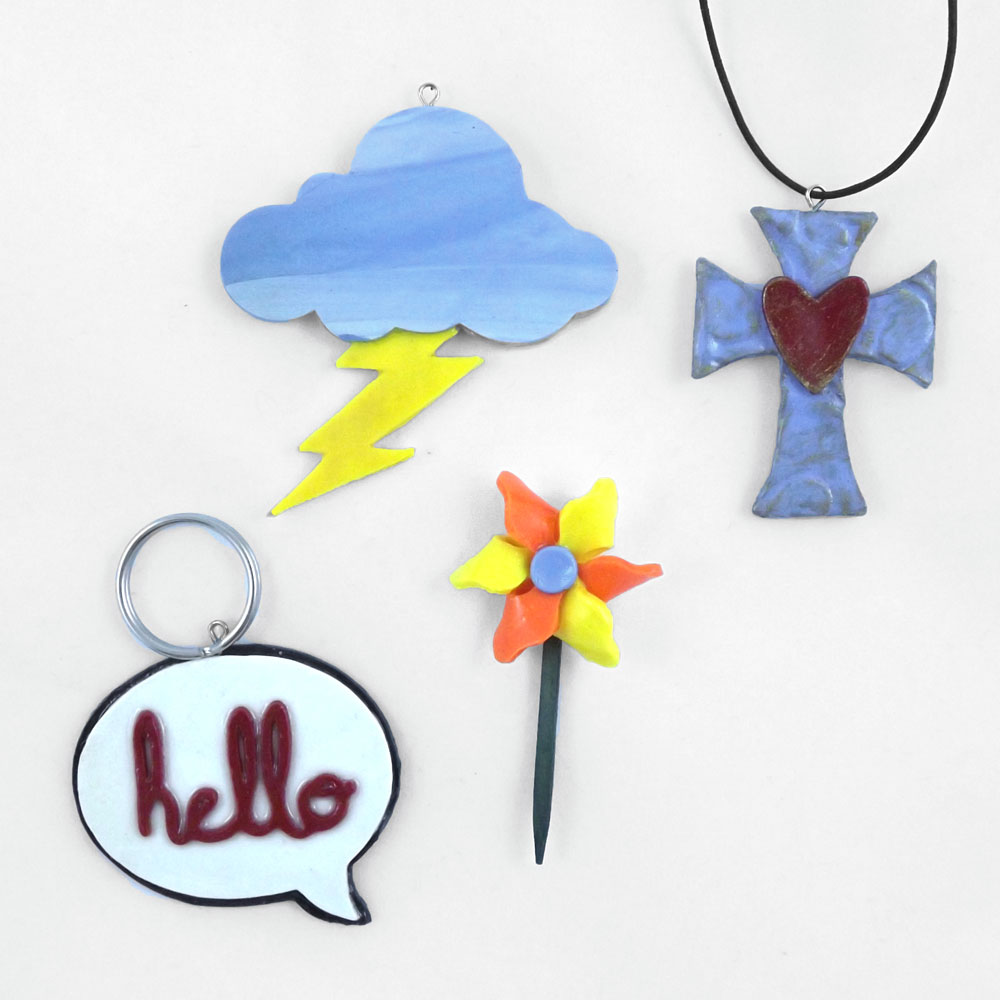
My Pastry Tool and mat have become my new obsession! I am going to make Christmas ornaments and refrigerator magnets next. The Pazzles Creative Cutter cuts Polymer clay like butter! Another great thing about Polymer Clay is if you make a mistake you can just smush it back up and start over. You can’t go wrong!
Tips: (Learn from my mistakes.I made lots of them…lol)
*What you see is what you get is very true with Polymer clay. What you put in the oven, is exactly what you will end up with. If there are any flaws they will be there after baking. So fix anything that you don’t find appealing before baking.
* Do not over process your clay. If you do it will become sticky and will stick to the rollers of your pasta machine, your hands and onto the blade of your Pazzles, basically everything. A quick kneading and a couple of times through your pasta machine is all you need. If you accidently over process it just put it in an air tight container and let it sit for an hour or so.
* Be sure your clay is firmly on your mat and there are no air bubbles. I just use the tips of my fingers to pat it down.
*Be sure to remove your rollers on your Pazzles before you load your mat. They will leave impressions in your clay if you don’t.
* If your project requires using different colors, roll and cut the lightest color first. Wash your hands between each color, as the color rubs off when you knead the clay. (I use baby wipes) Also run a paper towel through your pasta machine to get any excess clay off the rollers.
*Be sure your project is perfectly flat before putting it in the oven. I used the bottom of an oven safe plate, but you can use any oven safe surface, it just needs to be perfectly flat. Note: some metal pans can have a small bend in them that doesn’t look obvious but it will be on your project. Klo suggested a ceramic tile and that’s perfect.
*Chalks work well with Polymer clay. I tried applying mine before baking and after baking. Both ways worked fine, but always before sealing. If you plan to use a lot of chalk on your project I would wait till it’s done baking.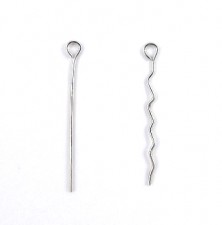
* You won’t need any glue as long as you assemble the clay pieces before baking. The clay adheres to itself in the baking process.
*The eye pins need to be bent in a zig zag pattern before inserting them into your project, otherwise they can slide out after your project is baked.
*Polymer Clay does not sand well. I tried to sand a finished project with a fine grit sand paper. It didn’t look pretty.
* If you are making dimensional projects, like the pinwheel below, use your big oven to cure it, not your toaster oven. The thinner parts of your project will burn before the thicker parts cure.
*I did not have any luck with using other types of sealers not specially made for clay, i.e. Modge Podge, spray sealers…etc. They seemed to almost break down the clay and it never seemed to fully dry.
* A rolling pin will work, but if you’re planning on doing even a few projects using clay I would invest in a pasta maker. I set mine to 5 and it seems to be the perfect thickness. You will have to test yours to see what setting will work best on your machine. (I got mine for $12.00 at Michael’s using a 50% off coupon. It was on the same isle as the Polymer clay.)
*To make decorative impressions in your clay, use a rubber stamp or the bumpy side of an embossing folder. I used both and they worked great. Don’t push too hard as it will compromise the shape of your design. Light pressure works well.
IMPORTANT NOTE: Once you use your pastry mat, pasta maker and blade for clay do not use it for food.
~Heidi

Craft Room Files:
Speech Bubbles
World Card Making Day (hello)
Easter cross
Handful of Hearts
Storm Cloud (Lightning)
Rainbow Cloud
Pinwheel
Supplies:
Pazzles Pastry Tool
Pazzles Pastry Mat
Sculpey Polymer clay
Sculpey Polymer Glaze
Eye pins
Pliers for bending eye pins
Pasta maker
Pebbles Inc. Chalks
Stampin Up Rubber Stamps


These are absolutely stunning Heidi! What a great job! You are just so creative girl.
Super cute, great idea!