
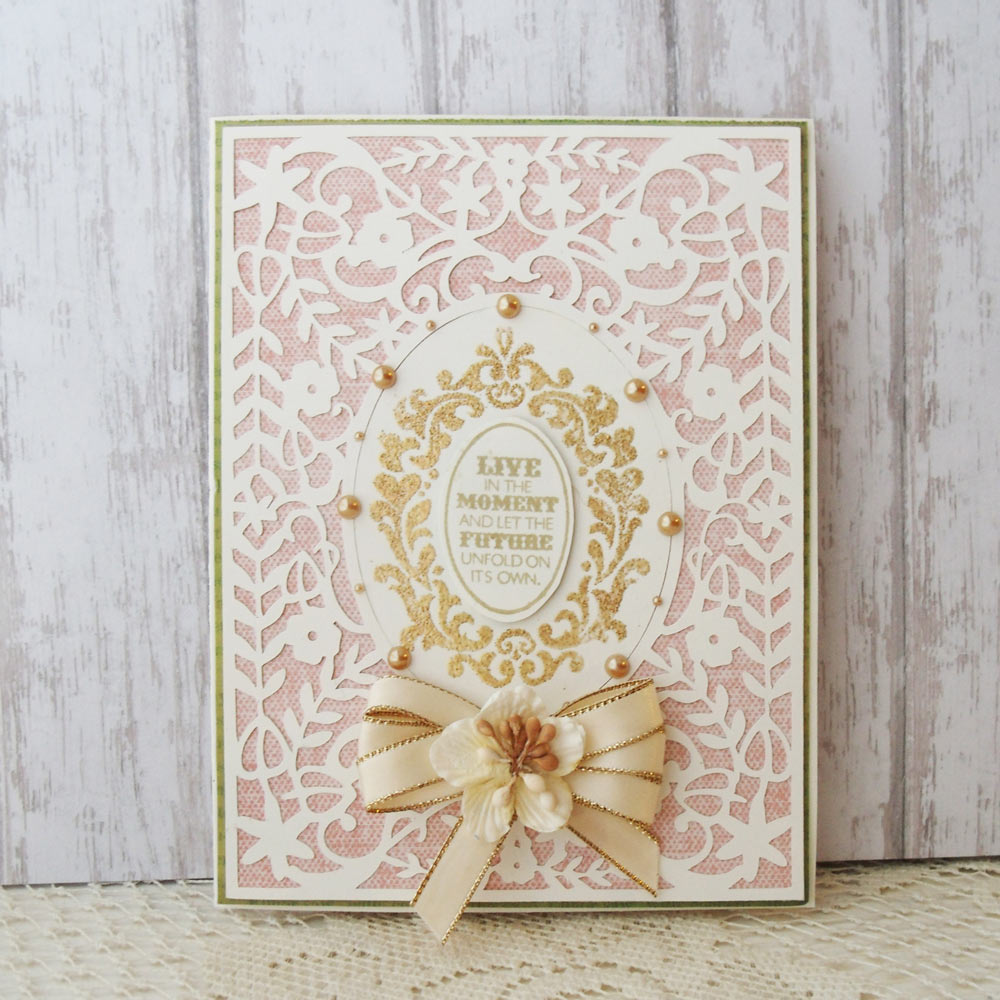
Hello Craft Room friends, Melin here with you today. My assignment was to choose one of the fun projects in the InVue Software and make a couple of projects with the same pattern. These projects are found in the local directory of your InVue Software and you get three free Project Patterns with the InVue software. There are layouts and card projects to choose from. I chose the Treasured Friendship card project. The project starts with a prescribed base. From there you can look in the modifiers folder and find sub folders to change up your backgrounds, sentiments and themed images. It really takes out a lot of the guess work for creating a project from scratch. For my first card I created, I chose to “flip” the base from a horizontal to vertical orientation. I then created a couple of quick layers for the mats. I then chose the scallop edge from the background modifiers folder. The base of the card came with the pennant shape, I just created a couple of layers so that I could cut it in cream, black and more Close To My Heart Yuletide patterned paper. I then chose the layered flowers cut from the themed images modifier folder and cut them in layers in cream cardstock. I inked the edges of the flowers with my Pixie ink and then curled them as I staggered the layers to give them a more dimensional look. I then used some pearls for the centers. For the sentiment, I chose the hello you sentiment from the sentiments modifier folder. I did weld the words together as I wanted to make it easier to apply the title. I then finished off the card by adding some pretty ribbon along the top. It came together easily and helped me create an elegant looking card in a short amount of time.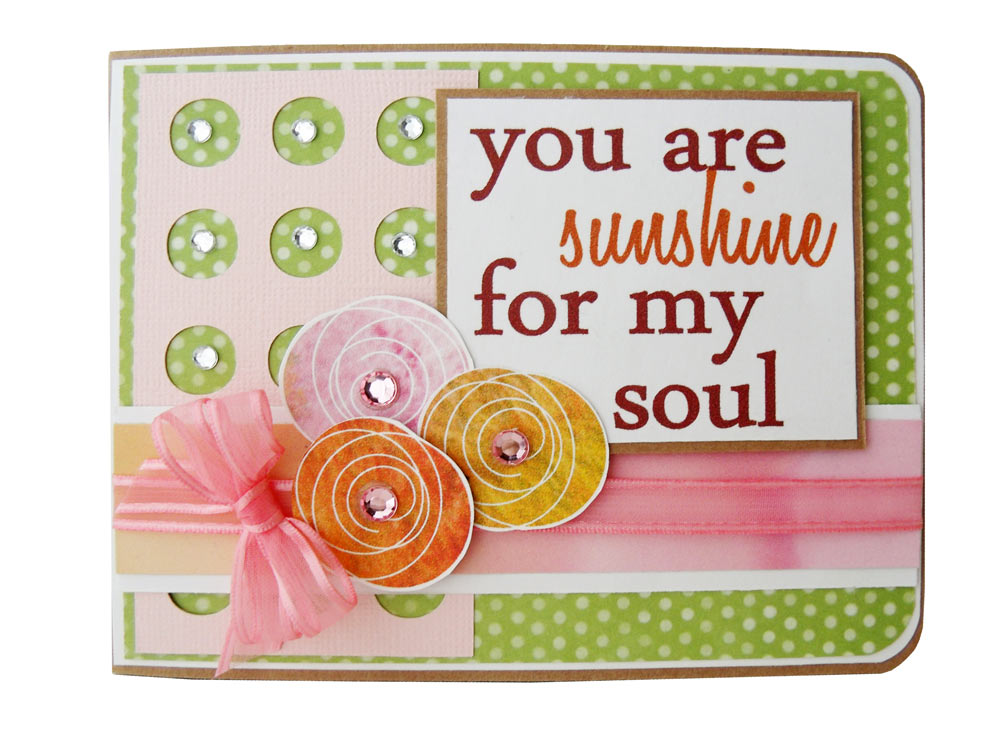
I then created another card using the same InVue software project. For this version, I kept the card the same orientation, which is more of a landscape position. I then cut one of the background modifiers, from pink cardstock. The circle cuts for this background modifier give it a nice clean visual interest for the background. Then I chose the print and cut watercolor flowers from the themed images sub folder in the modifiers section. With the new InVue software, print and cut is a snap. I also chose to make the sentiment a print and cut. I simply added the colors I wanted to the sentiment and created a cut box around it. After printing the sentiment and flowers on my printer, I cut them out and added them to my card. I then finished off the card by adding a border of white and more brushed patterned papers along with some ribbon and gems. Super easy and great results!
~Melin

Very pretty and very fun. I think the Projects will be very useful.
Very pretty Melin–I haven’t tried any of the projects files yet, but need to do so soon.