Each of the Design Team Members have opened up their elf workshops this week and created some DIY Christmas ornaments to share with you. We hope to inspire you to create your own special ornaments this year. For even more ornament ideas, check out our DIY Christmas Ornament Pinterest Board.
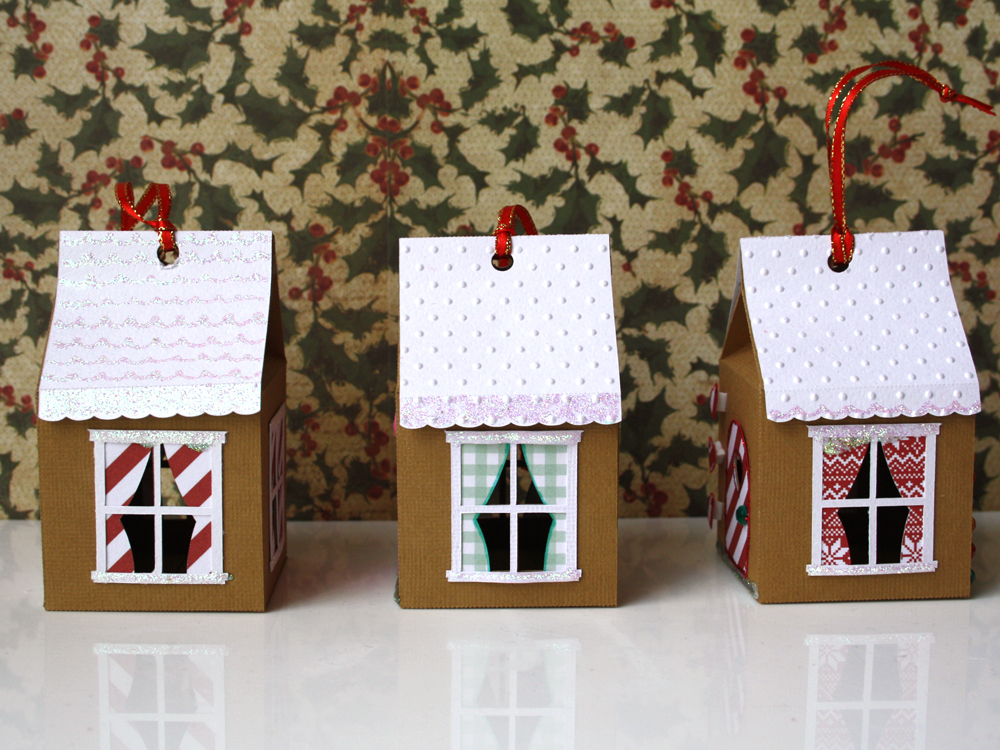
I’m excited to share with you my little gingerbread house ornaments today that you can re-create quite quickly and put your own twist on the decorations. These little houses can be used hanging on a Christmas tree, or from anywhere around the house. They can also be used on a mantel or table as cute decorations. I have even considered using them as place cards for Christmas Day with treats inside. The other thing you could do is pop a battery tea light candle inside for a nice glow.
Using the Milk Carton House cutting file, I resized the entire file so I could fit two houses per 12″ x 12″ sheet of paper. This made them about 2″ x 2″ square at each face. The window, curtains and roof are all grouped together in this file, so resizing whilst these are included is essential to ensuring everything is the right size. Before I cut the files out, I ungrouped the files and then deleted one of the window sets to make room for the door file.
Simple Rhinestones and sequins made really easy decorations for around the doors. The pink door I ran through my embossing machine with a wood grain patterned folder. The door file is from the 1st day of Christmas Gingerbread Cottage files. I then isolated the little heart and cut out several of them to use as decorations around the house. The clear KindyGlitz made good imitation snow for the windows and the roof. I purposely applied it thickly on the top of the windows so it would drip down like real snow as it dried. The red KindyGlitz made a nice finishing touch around the red doors.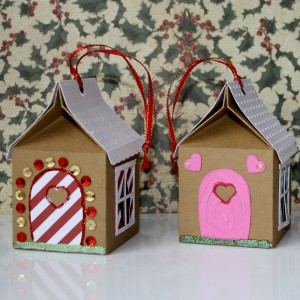
On each roof, I decorated them slightly differently. I’ve done scallops in clear KindyGlitz on one and then embossed swiss dots on the other two. Each one of the swiss dot embossed roofs have glitter applied slightly differently. A simple scalloped edge on one, and completely filled in on the other just at the edge.
As I wanted to have these little houses as hanging ornaments, I needed to fasten a ribbon to the top of them somehow. This was a little fiddly at first, but all came together in the end. I used a hole punch in the middle of each of the four sides of the box. These needed to be cut out individually as the hole punch wouldn’t fit over all the layers! In hindsight, I should have added a small circle to my original cutting file to make life easier. I also needed to cut a hole in the roof sheet of paper so they lined up with the box. Once that was done, I threaded my gold edged red skinny ribbon through and made a pretty loop to hang these little beauties up.
Another nice thing to do would be to use your Pen Tool with a white gel pen to create lovely flourish patterns on the toffee coloured paper to mimic the white icing of a real gingerbread house.
I hope I have inspired some ideas for all you lovely creative people out there.
~Belle

Supplies:
Kaisercraft Cardstock (Toffee, Coconut)

Belle, these are so cute!
This are wonderful. Great detail & I love what you did with each roof (actually, I think that all of the detail is fantastic). Thank you for sharing these.
I love them Belle! They are too stinking cute!
Belle, these houses are darling. Much detail equals much love. I like that the windows have curtains!
SO cute! And a whole lot easier than baking those little houses!
Very cute. Thanks for the inspiration.
Thanks for the lovely comments! These were such a lot of fun to make!
great job