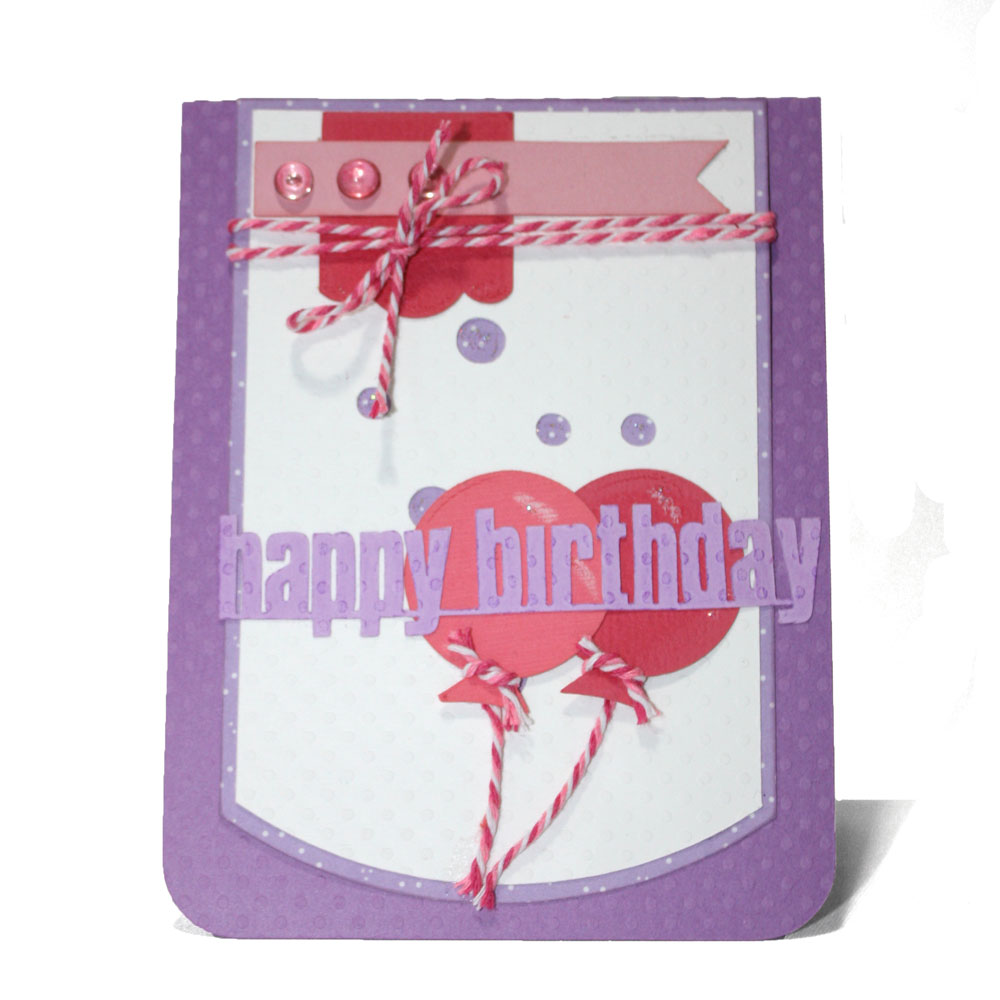
In keeping with the statistics, August is filled with lots of birthdays for my family and friends, so I decided to use the large end of the Pazzles Embossing Tool and some cute files from the Pazzles Craft Room Library to create a debossed birthday card in the Inspiration Studio Pro 2014 software.
The 5×7 inch landscape-oriented card is in five pieces:
1-The 10×7 inch card base (on white cardstock) which folds to 5×7 inch with a kiss cut line.
2-The card front (on sea green cardstock) which is a 0.20 inline of a 5×7 rectangle, debossed with a 0.10 inline and with happy happy happy BiRtHDAY (fonts list at end),
3-The banner mount (on white cardstock), which is the straight banner from the Ribbon-Banners file sized to about 6.6 inches wide by dragging the corner handle, and modified by moving the left pair of kiss cuts a bit to the right to make them the same distance from the left tails as the right kiss cut pair is from the right tails
4-The dimensional sentiment (on teal cardstock) from the Miss Kate Cuttables Celebrate Title, with debossed letters and cut around the whole word (on the largest outline of the word which is darker gray),
5-A star balloon (on teal cardstock) from the Miss Kate Cuttables New Years Balloons file, debossed on the circles and edge accents and cut out with its string.
I created the happy happy happy part of the sentiment with the OCalypso Medium Rhinestone font at a line thickness of 0.10 and a height of about 0.693 and then used the WYSIWYG feature in the Inspiration Studio Pro 2014 software (LOVE this feature!) to create letters that could be inlined for better debossing (all the letters got an inline of 0.02 for this purpose). I typed each of the letters for Birthday from the fonts below, selecting each letter individually thereafter and Welding it to itself so that it became a shape rather than a text element, then I stretched and placed them to fit to the right of happy happy happy and inlined them at 0.10 – I selected and outlined the inner spaces of the letters, such as the centers of the B, so that they would be interior to the letter shape.
I cut out the card base from white cardstock, using pressure 3 for the kiss cut fold line and pressure 17 for the card base edge. To create the happy birthday sentiments (on sea green cardstock) and the celebrate! and balloon accent pieces (on teal cardstock), I used the large end of the Pazzles Embossing Tool to deboss the design into the cardstock. Debossing is pressing the image into the paper on top so that the image goes into the material. It is nearly the opposite of embossing, which is usually the reverse image into the reverse side of the paper piece, making the image stick up. There is a great tutorial in the Pazzles Craft Room about embossing and debossing. I used the large end of the Pazzles Embossing Tool to deboss the card front inline rectangle and the happy birthday part of the sentiment onto the card front (sea green cardstock) with a pressure of about 20-25 and two passes (but experiment with low pressures on scraps of paper so that you won’t tear your project or rip your mat; add more pressure in small increments until you get the desired result, then do your actual project with 2 passes of whatever worked). Without removing the mat, I switched to the Blade Holder and Blade set at blade depth 1.5 and pressure 17 and cut out the card front, checking for a complete cut before removing the piece from the mat. Again, be careful to set your Blade just high enough to cut the cardstock and not your Embossing Mat. I also debossed the Celebrate letters from the Miss Kate Cuttables Celebrate Title file (selecting the colored and gray file layers that create the letters) and the inner highlight/edge shapes of the star balloon from the New Year’s Balloons file onto teal cardstock, again using the large end of the embossing tool. Then, with the mat still in place, I switched to the Blade to cut out the Celebrate outline and the balloon shape. I cut the straight banner from the Ribbon-Banners file (sized and modified as above) from white cardstock, then I inked the edges and dabbed the ink once on the front surface of side tails and used it to mount the Celebrate title on the front of the card below the debossed happy birthday lettering. I attached the balloon with the EK tools ⅛ inch 3D-Dot as an accent.
I hope you’ll have fun experimenting with the Pazzles Embossing Tool on your projects and Happy Birthday to all the August babies!
~Renee

Fonts:
Happy – OCalypso Medium Rhinestone
B – Ache Bd
i – America Bd
R – America Me
t – America Me
H – Antiquite
D – Basket Medium
A – AvenueDuPark
Y – Baute Bold
Supplies:
Pazzles Embossing Tool
Embossing Mat
Studio G pigment ink – teal
Cardstock: White and Teal
Scotch Glue Stick
EK tools ⅛ inch 3D-Dot