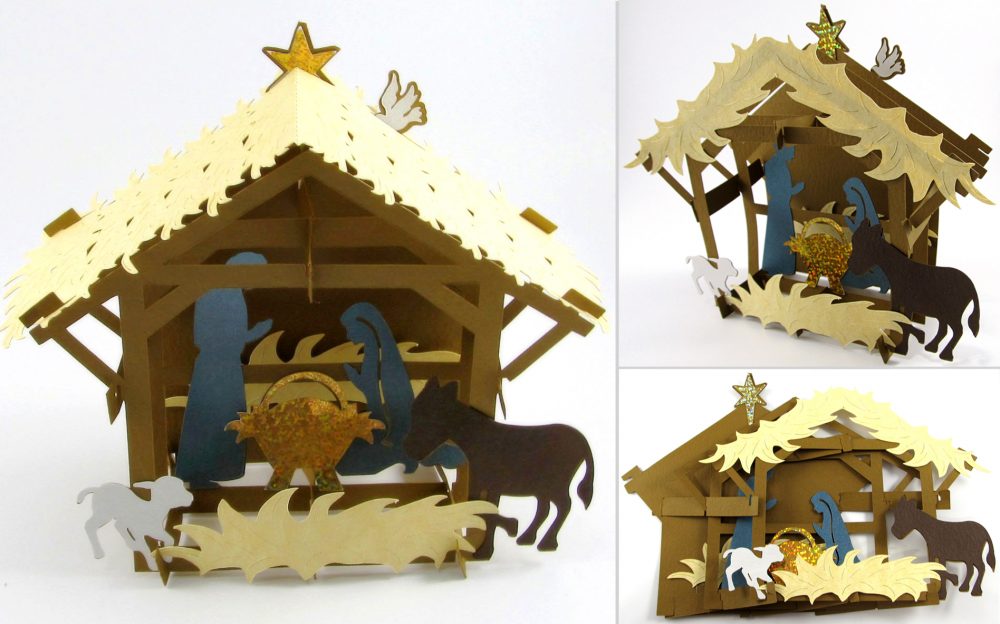
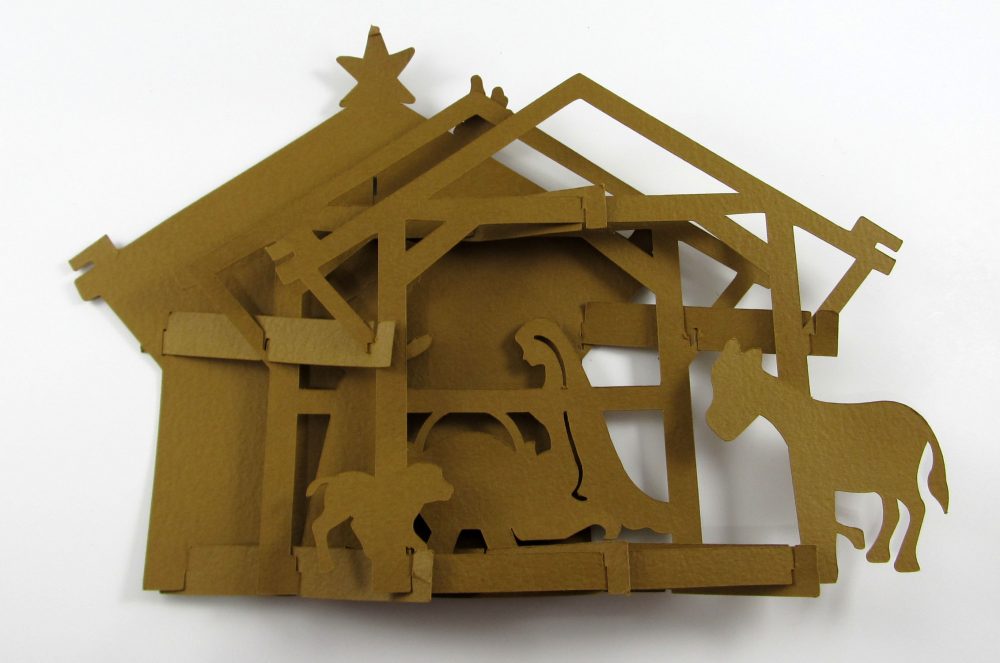
Last year I looked through all of my massive cutting file collection trying to find a 3D Nativity project. I couldn’t find any suitable ones, so I purchased a few, but I wasn’t happy with the way they turned out. So this year I decided to create my own 3D file using a nice layered Nativity Scene that I found in the Pazzles Craft Room.
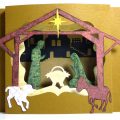
This Nativity contained the primary elements that I was looking for. The stable outline mat served as the back wall, the animals, star, bird, people and manger from that file fit the project nicely, and the stable foreground was easy to edit using the InVue software to serve as the middle and front portions of the project. I used the hay from the Hayride design to create some hay for the back and front portions of the design. It was easy to duplicate and weld more hay to create a couple of different roof pieces.
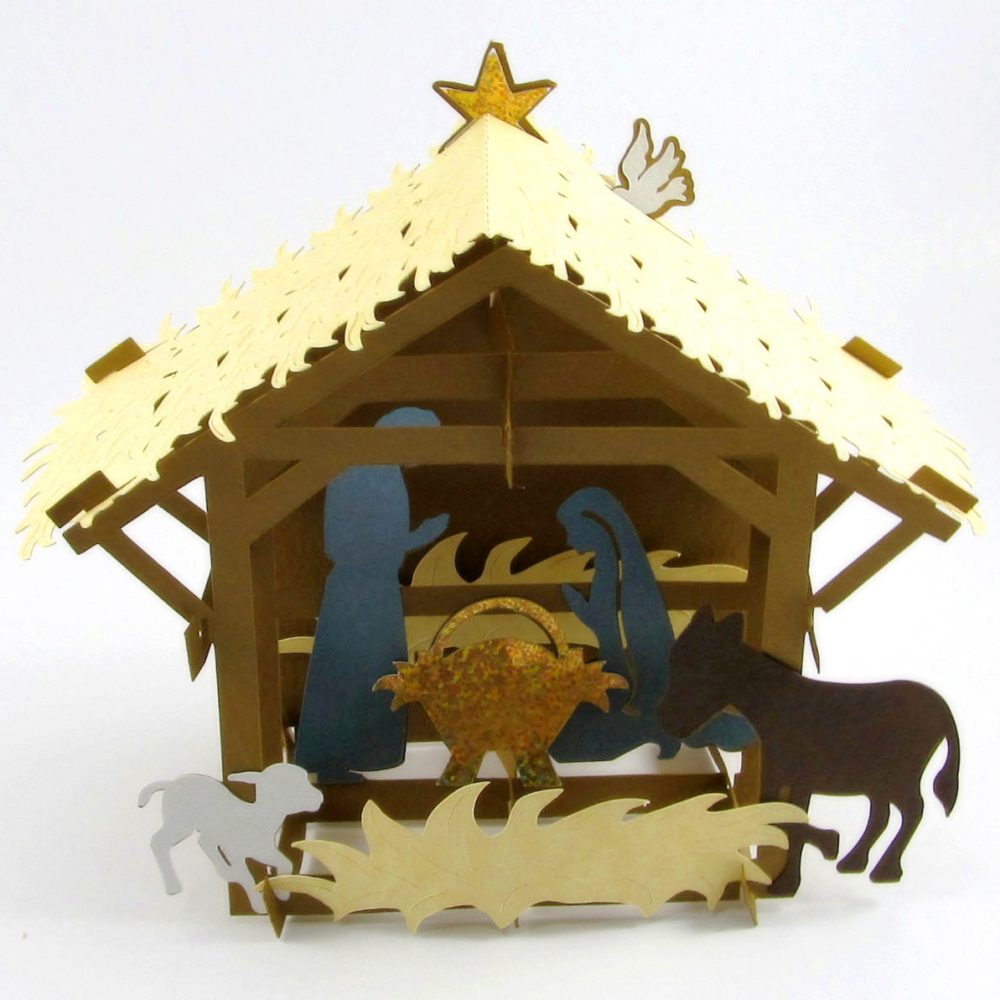
It took a number of attempts to make these pieces work as a 3D Sliceform project that could stand up as a display centerpiece for my table, but would also collapse for placement into an envelope for mailing to loved ones for a special Christmas gift. I was able to create the beam pieces and necessary notches using the editing tools in the InVue software.
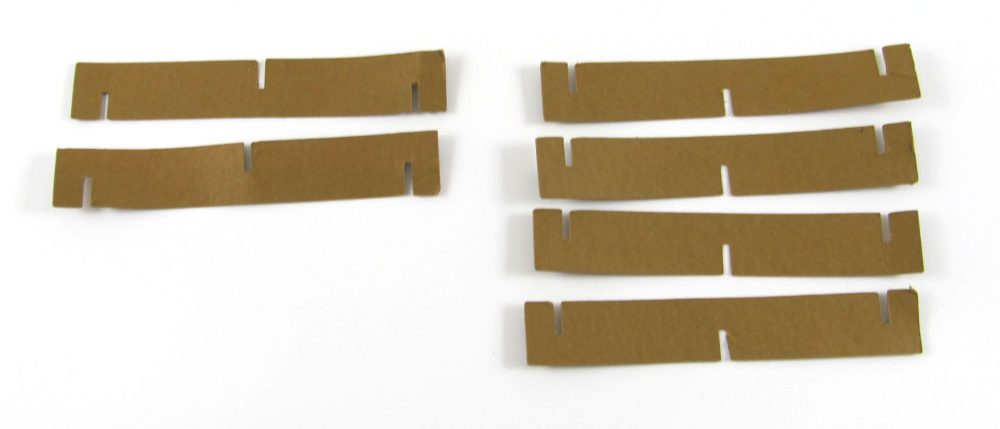
Assembly Instructions: There are 6 cross beams that hold the stable together. Each beam has three slots. The center slot on two of the beams is on the top of the beams, while the center slots on the other four beams are on the bottom edges of the beams. As you remove the beams from the cutting mat, stack them according to the positions of the center slots, 2 on one pile and four on the other pile.
Start with the two beams with the center slots on top. These are the center beams. Hook the end of one of these center beams through the top slot of the back wall of the stable, the one with the star on it. Hook the end of the other center beam through the center bottom slot on the back wall. The center panel of the stable has the people on it. Align the center slots of the center top and bottom beams under these slot. The front panel of the stable has the animals. Hook the top and bottom beams over the center slots of the front panel.
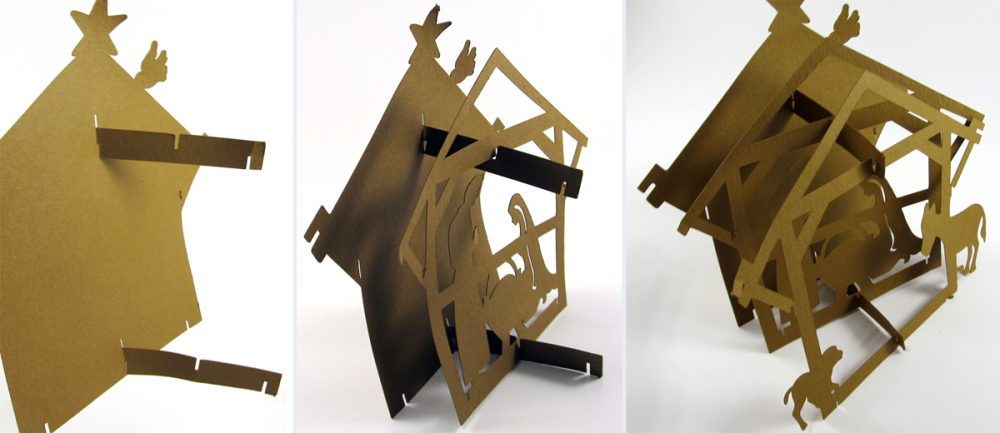
The remaining four beams are for the top and bottom of right and left sides of the stable. The center slot of these beams will be on the bottom edges. Place the center slot of the bottom left beam over the left slot on the center wall, then line up the back slot of the left beam under the lower left slot on the back wall. Insert the end of another beam through the top slot in the right end of the back wall, line up the center slot of the beam with the inside of the center wall, and line up the front slot of the beam under the slot on the right side of the front panel.
Insert the end tab of one of these beams into the upper left slot of the back wall. You may need to fold the tab a bit to insert it, then flatten it out again on the back side. Slide this beam through the eaves triangle on the left side of the center wall, lining up the slots. Attach the front edge of the beam under the eaves triangle of the front wall, lining up the slots.
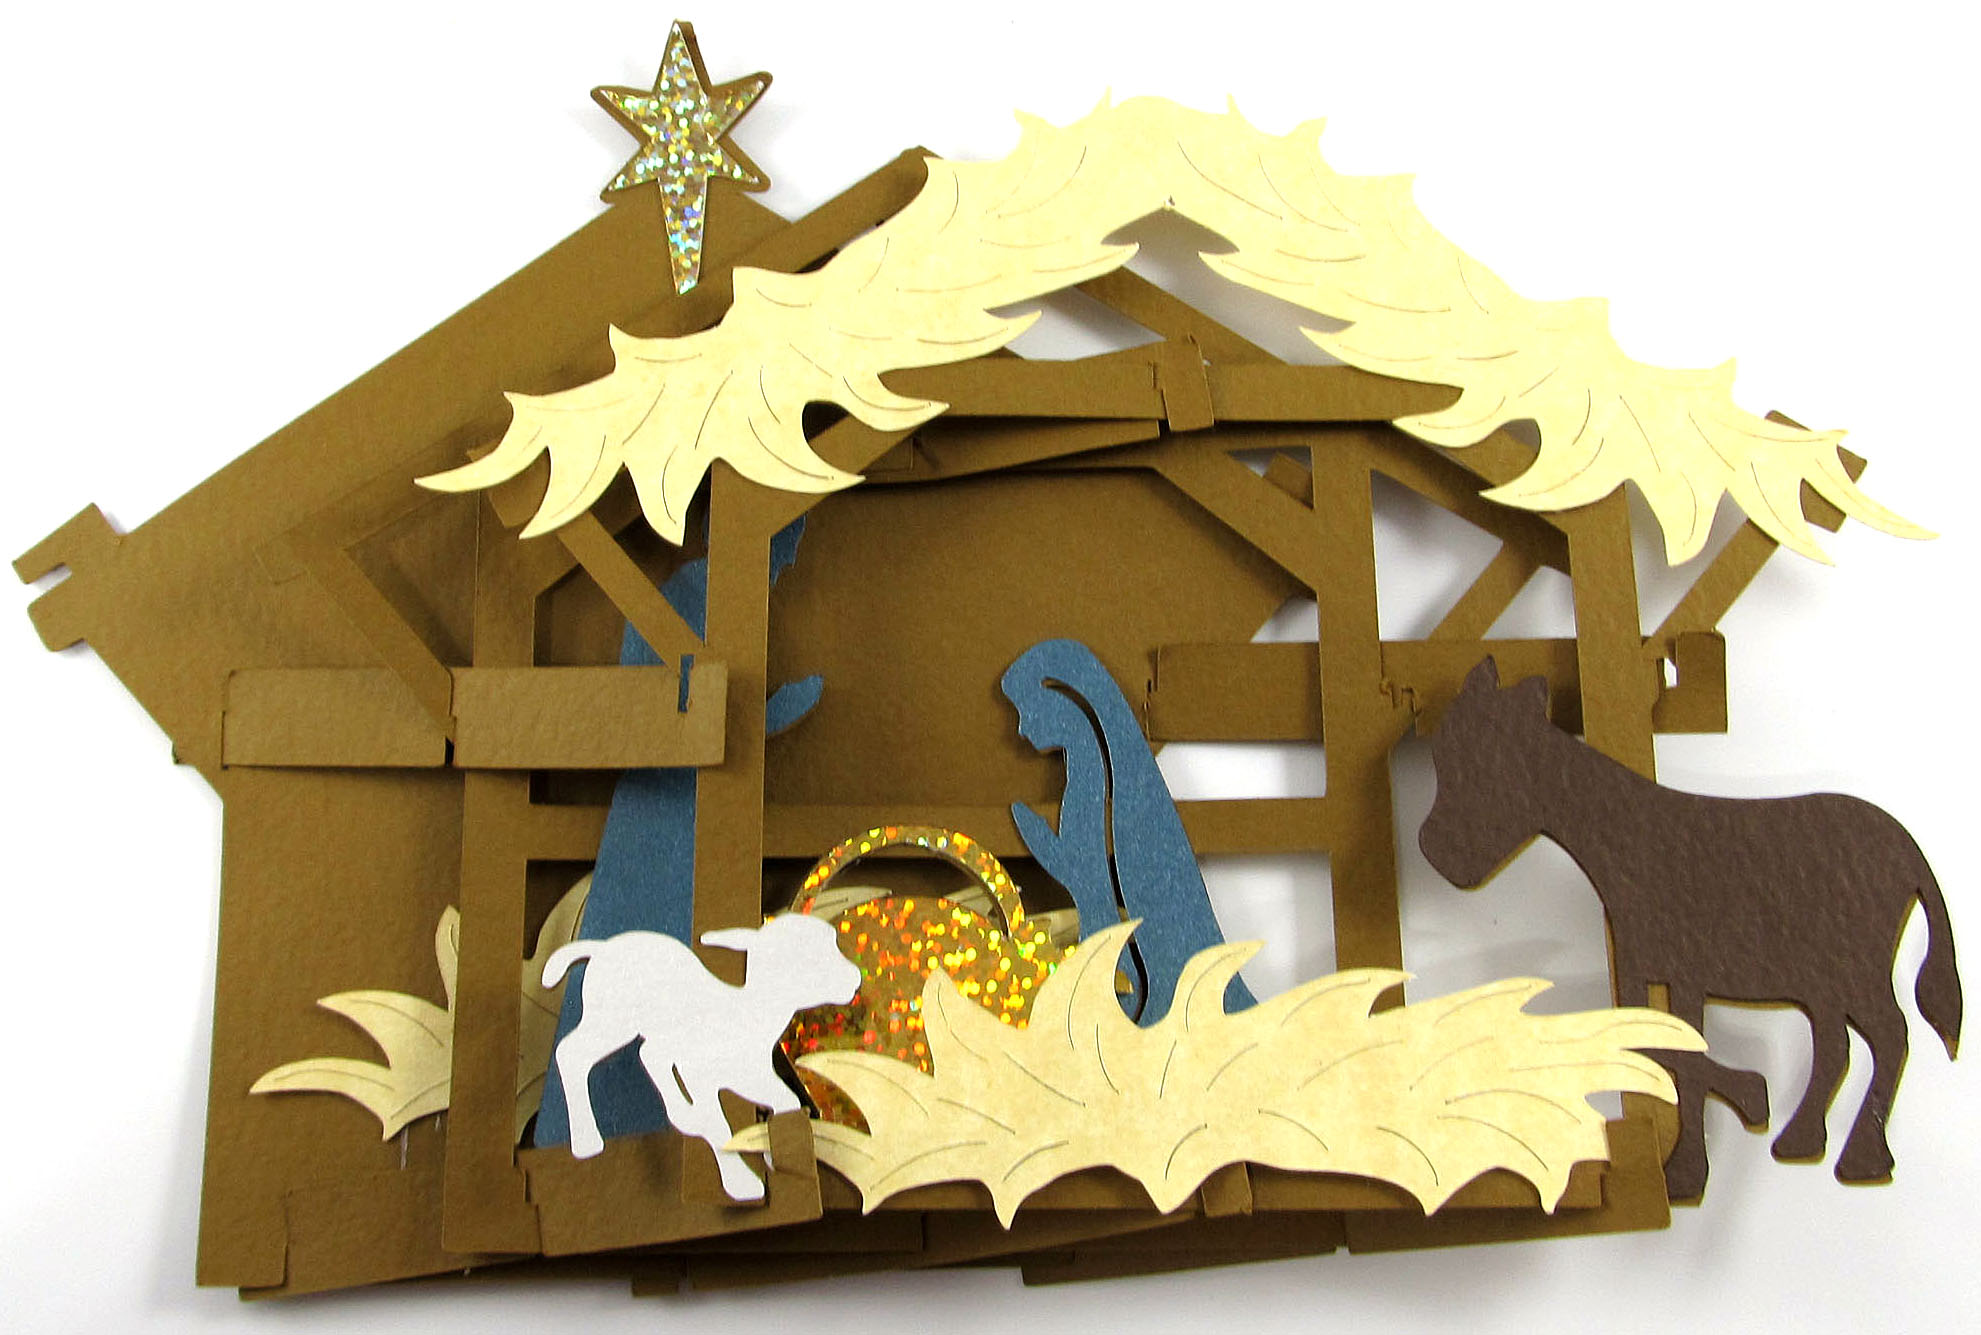
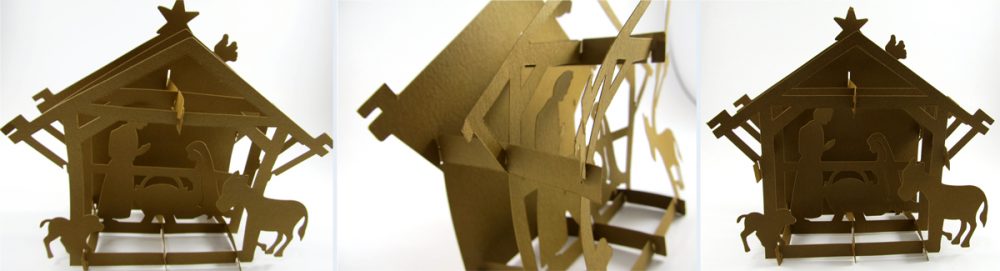
The stable should be free standing at this point. You should now be able to fold the entire stable flat to the table to help with alignments of all parts. If you wish to be able to flatten the sliceform, you may decorate the people, animals, star and bird on each of the panels by gluing colored pieces over the brown ones, and add the hay pieces on the top and bottom of the front and on the lower back panels.

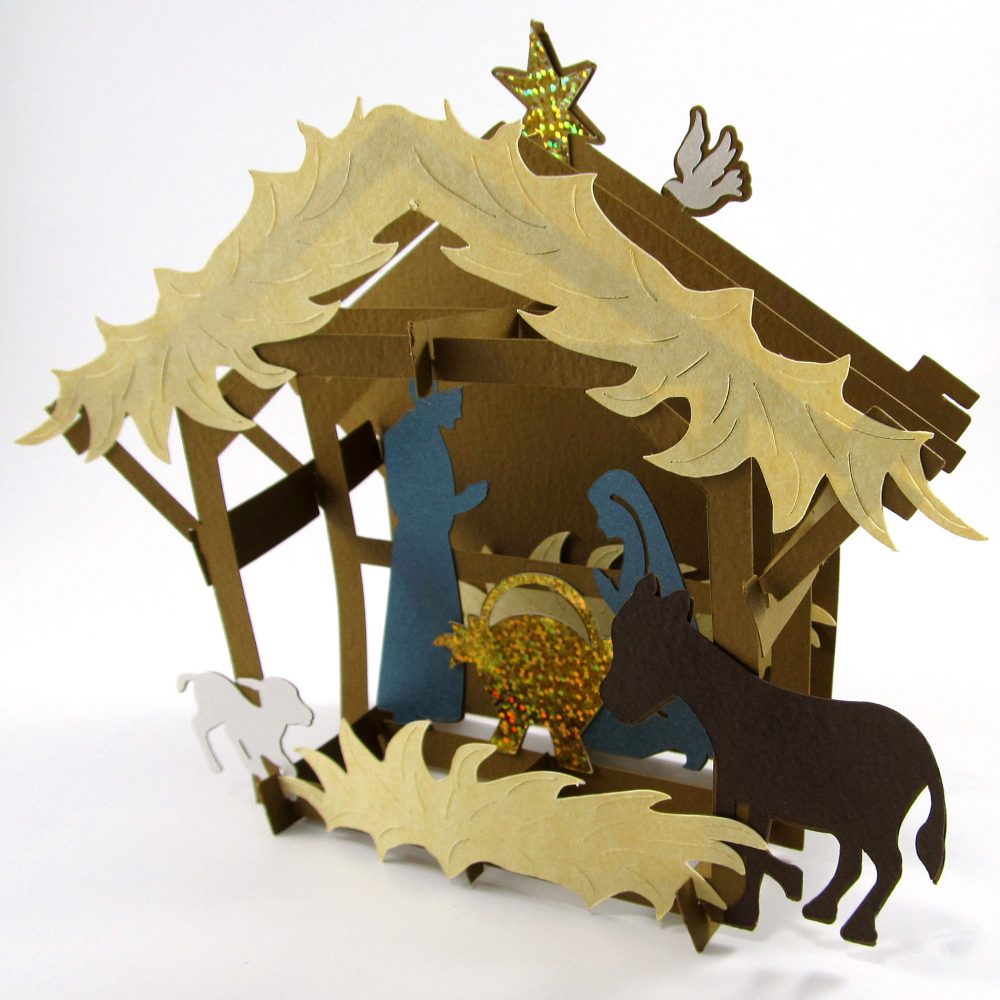
If you wish to use the roof, fold it along the score lines. The roof is designed with slots that slide over the tabs on each corner, and the star and bird on the back panel. The stable will not fold flat while the roof is on. The roof will give the building more stability when it is set up for display.
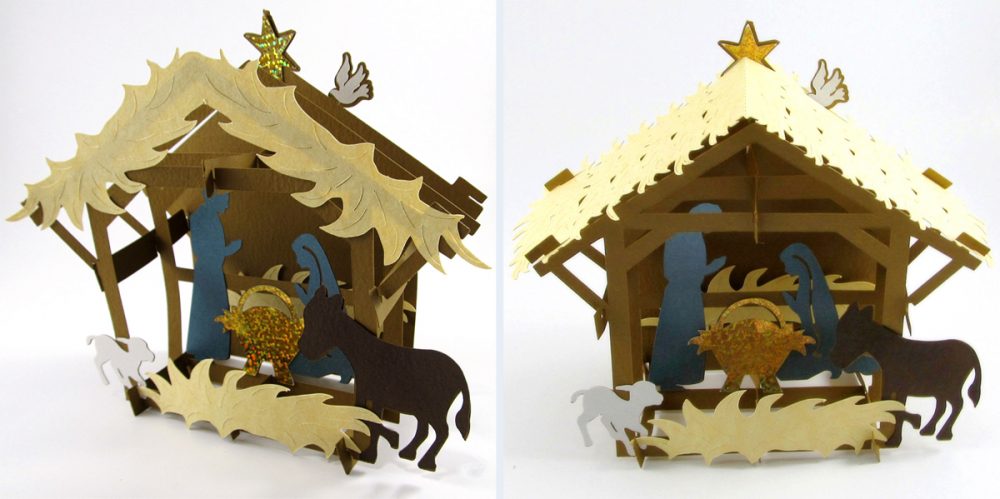
You can use both the roof and hay eaves if you like, but I prefer to use one or the other.
Materials: The manger and star were cut from Recollections Signature Special Foil Paper, Stable from Prism Tawny, medium, hay and roof from Skytone Parchment Champgane Vellum 60# 8.5″x11″, people from Anthracite Stardream paper, lamb and bird from Quartz Stardream, donkey from Tawny dark.
Become a Member!
By becoming a subscriber to Pazzles Craft Room you will have access to this project as well as hundreds of other projects, thousands of cutting files, and so much more!Get Pazzles Craft Room!
Join Now for only $19.95!
This is so amazing! Love it!
Very cute. Great job!
Amazing–love this Julie!
Very nice Julie. I’ve been looking for something like this for a long time.
Wow!excellent job!I like this very much.
Wow this is amazing! Thank you Julie
Julie, this is AWESOME!!!!
Julie, this is incredible. You are a very creatively talented woman. Thank you so much for sharing this special project.
Terri
I am always in awe of your considerable talent. Everything you do is so beautiful.
Amazing, you are very talented Julie 🙂
So Beautiful! Amazing work and vision. Thank you for sharing
This is amazing! You are creatively talented! Thank you for sharing! What a blessing!
This is awesome! Thank you for sharing — your instructions are so clear! What an inspiration!
Just loved it. always looking for the reason for the season. Merry Christmas, And have a blessed day