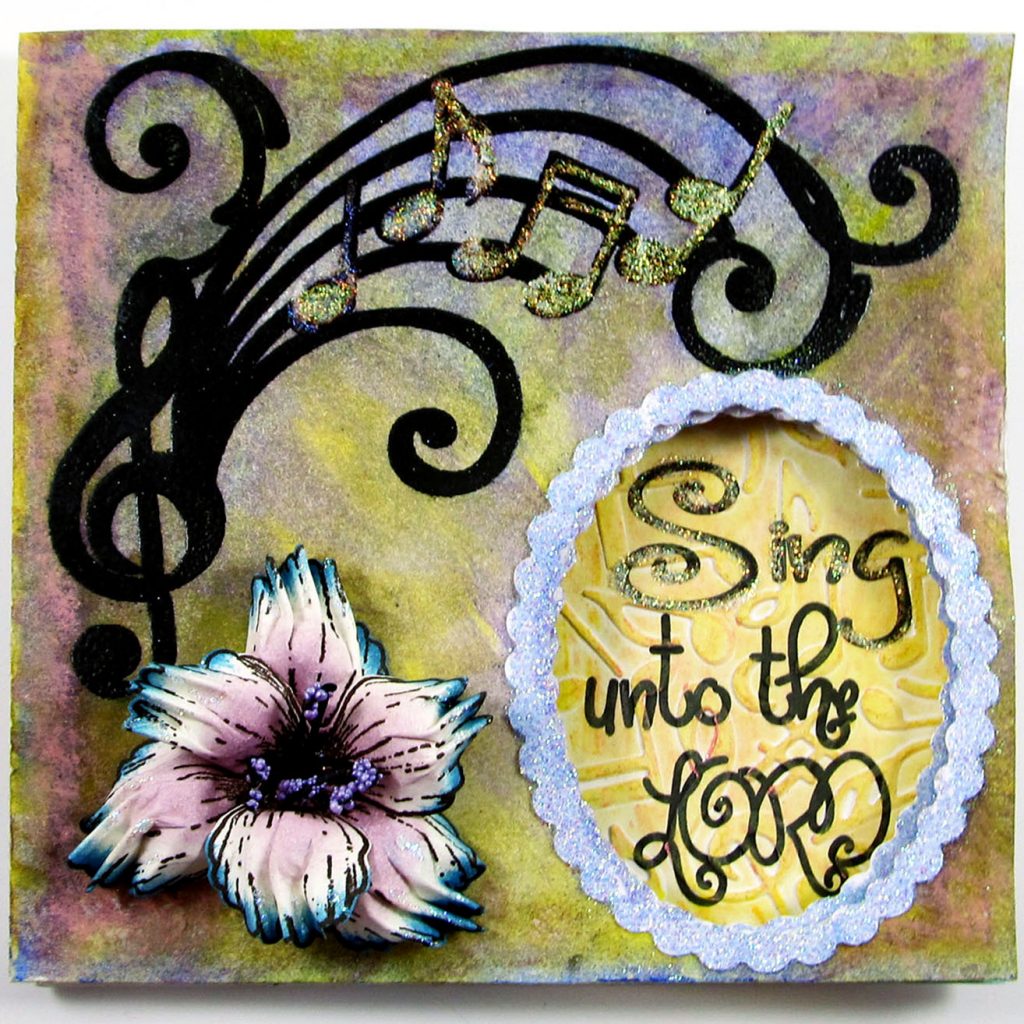
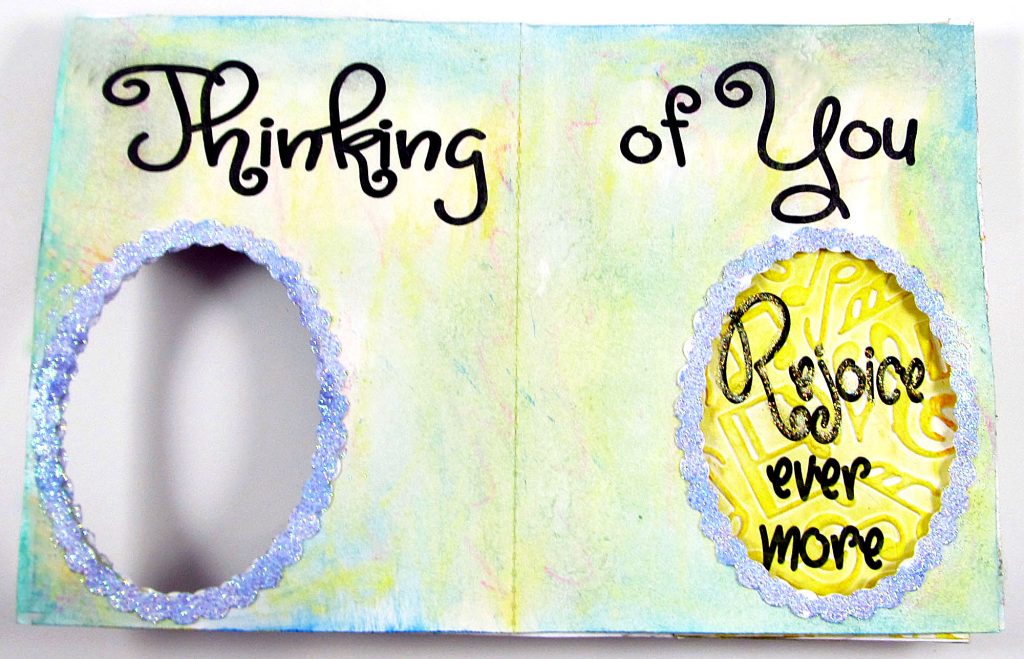
Before I got my first cutter, I was an avid scrapbooker. Before that I was an avid stamper. I got rid a lot of my stamping collection when we retired and moved, but I still have quite a huge “stash”. I haven’t used my stamping supplies for a long time, so it was fun to play with them again. Creating the rubber stamp using my Pazzles Stamp Kit was not the greatest challenge for me – using the stamp on a project was! I have been away from stamping for so long. This challenge forced me out of my comfort zone, and motivated me to play with pigment ink, embossing powder, heat tool, diamond Stickles, lavender ultra-fine glitter, Gelatos, embossing folders, water brush, blending tool, sponges, Heartfelt Creations Poppies stamp and die, MISTI alignment tool, Print and Cut, and to create a fun peek-a-boo card (inspired by a hand tutorial posted at Splitcoaststampers.) When closed, there is a sentiment showing in the window. When the card is opened, another sentiment appears in the window.
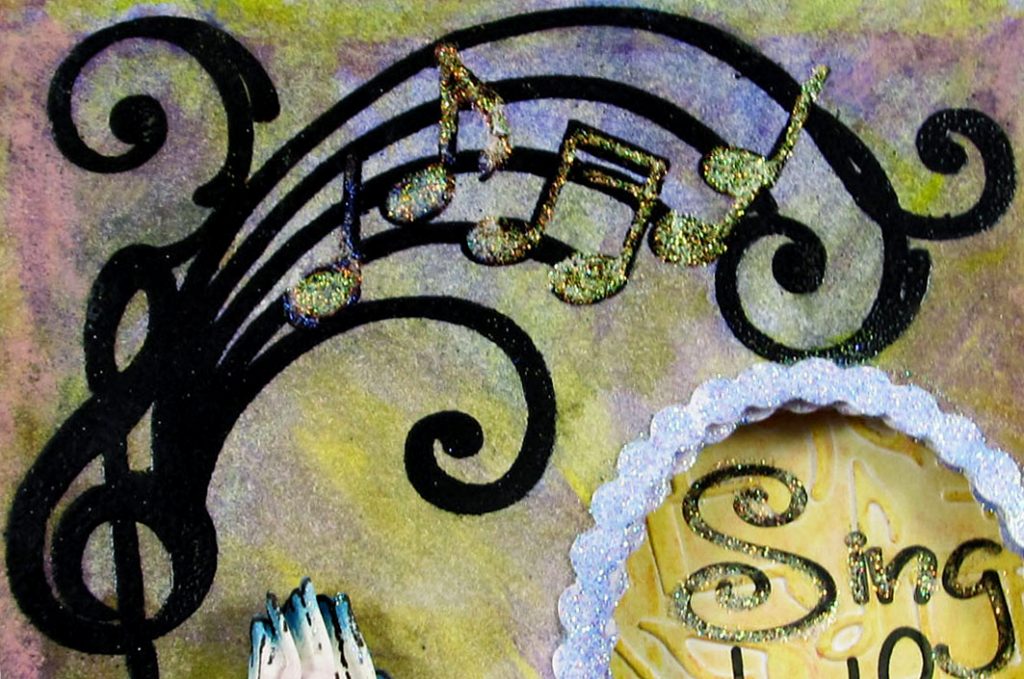
I was inspired by one of my musical embossing folders to create a stamp with a swirly music staff. I like the embossing folder, but thought it would be nice to have a stamp with that type of design. I had fun combining a treble clef, swirls, and curved lines using the Pazzles InVue software. Creating the design and stamp was not difficult. The cutting files are included here. One of the files is an 8.5”x11” layout to be used for printing the text in the project. The other 12”x12” file contains all of the remaining pieces of the design. You can change the sentiment to suit your purposes using your favorite font. I used PN Honeydew. For printing, only the text should be selected to print. The registration mark should print with the text automatically. Use the Print/Cut option in the cutting window, and select only the blue lines for cutting the pieces that go with the text.
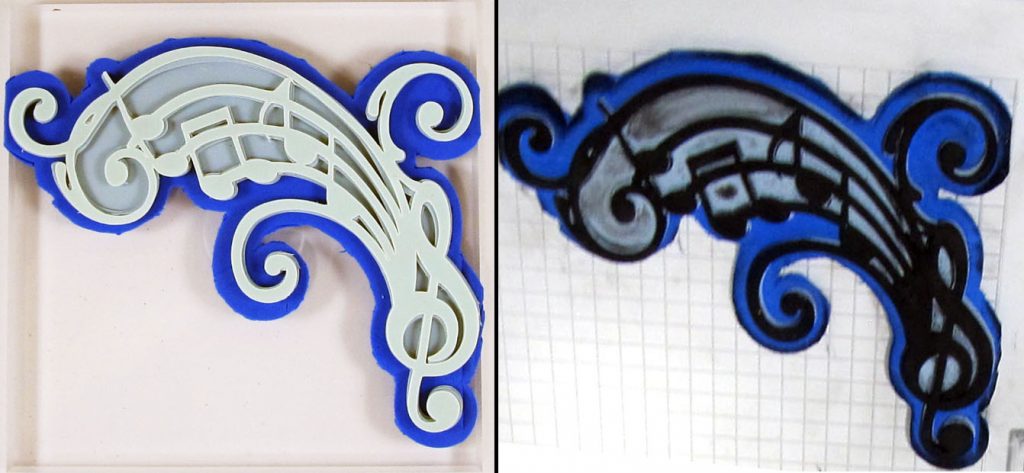
There is a tutorial in the Video Section of the Pazzles Craft Room that provides excellent instructions for using the stamp kit. I’m glad I watched it because it reminded me that a stamp should be made with the mirror image. I’m grateful that I didn’t waste any of my stamp material before viewing the video! This stamp used 5 different layers as described in the video, with the top layer being the lighter green rubber.
I decided to sand the rubber well before cutting, hoping to remove the silicon layer from the rubber that can interfere with getting a good stamped impression. Once the stamp was cut and assembled, I sanded the top layer again with a sandpaper block my husband made for me. My first impressions using Stays on Ink and one of the acrylic blocks in my Pazzles Stamp Kit did not turn out well. Using the MISTI to make multiple impressions in exactly the same spot with the black pigment ink allowed me to get a much better impression with my new stamp. If you don’t own a MISTI or other stamp alignment tool, you might want to watch some of the YouTube videos on how to make a simple one from common household items. After stamping multiple times, there were a few tiny spots that needed to be touched up, so I used my Versamarker pen on those spots. Then I covered the inked impression with black embossing powder, and melted the powder using my heat tool.
Here is what my stamp looked like before inking, and after stamping with the MISTI.
I watched some YouTube videos on using Gelatos with stamped and embossed images, and thought that would be a fun technique to try on this card. I used Gelatos and the tools included in the kit to color the front and inside of the card, and to add some color to the dry embossed designs on the inserted tags. The paper was white Georgia Pacific cardstock. Baby wipes served as nice blending tools for the colors.
I used my Fiskars Fuse with adapters, and a music embossing folder to give character to the printed sentiments. Adding Stickles to the musical notes and key words of the sentiments provided some dimension and bling to the project. I put some glue on the scalloped oval frames, and sprinkled them with glitter to accent the cutout windows on the card. The final touch was adding a 3D flower made using a die and matching stamp.
To assemble the card, print the text on cardstock then cut the blue cutting lines. Cut the curved treble staff pieces from rubber stamp material. The colors in the cutting file correspond to the color of the stamping materials in the Pazzles Stamp Kit. Assemble the stamp by layering the filled-in blue rubber piece on the darker mounting foam. The next layers to add are the two blue rubber pieces with the intricate detail. Finally, add the green layer on top of the others. Use a stamp alignment tool to stamp the design in the upper left corner of the front of the card several times as needed to get full coverage of the design with the ink. Reink the rubber after each stamping. Use Pigment ink and stamp firmly with a stamping mat under the paper. A better impression will be made if you hold the stamp firmly on the paper for a bit to allow absorption of the ink into the paper.
Sprinkle the stamped image with embossing powder, replacing the excess into the jar. Use a small paint brush to remove any bits of embossing powder that are not on the design. Use a heat tool to melt the embossing powder.
Decorate the card as desired. It is best to add the glitter, embossing, Stickles, scalloped oval frames, Gelato or other colors, etc. to the card before assembling it. Allow the Stickles to dry completely.
Fold the card with the two oval windows in half, with the printing on the inside, making sure that the ovals line up. This is the inside of the card. Line up these ovals with the oval cut out from the front of the card. Glue one side of the non-printed side of the inner card, to the back of the card front. The printing on the inside of the card should be visible when you open the card. Glue the narrow glue tab to the back side of the inner card, and fold it back. This is the back of the card.
Glue the Sing text to the lower right corner of the back (square piece.) Line up the right edge of the text paper with the fold line. Glue the Rejoice text to the back side of the narrow edge of the card front, lining up the edges of the printed paper with the bottom, edge and fold line of the card. Fold this flap back and tuck in front of the card back. This flap slides when the card is opened to reveal the Rejoice text in the oval on the inside right. When the card is closed, the Sing text is visible in the window.

Julie
Supplies:
Pazzles Stamp Kit
pigment ink
embossing powder
heat tool
diamond Stickles
lavender ultra-fine glitter
Gelatos
embossing folders
water brush
blending tool
sponges
Heartfelt Creations Poppies stamp and die
MISTI alignment tool
Fiskars Fuse
Become a Member!
By becoming a subscriber to Pazzles Craft Room you will have access to this project as well as hundreds of other projects, thousands of cutting files, and so much more!Get Pazzles Craft Room!
Join Now for only $19.95!