
-
» Home » Design Team » Design Team » Sticky Canvas Slide Show -

 View Larger Image
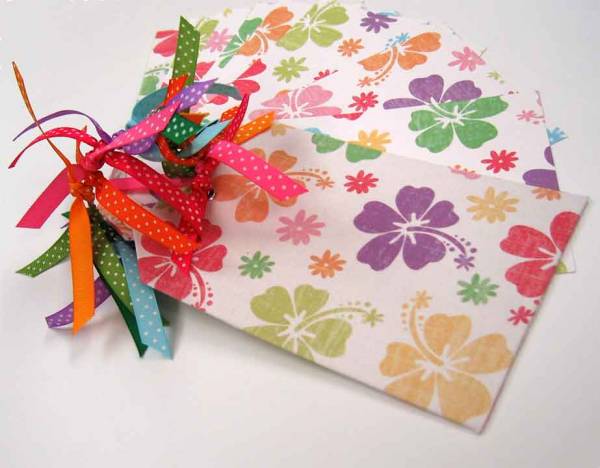
Canvas Tag Book
Sticky Back Canvas Hybrid Tag Book
By Mary Kerr, http://www.anangelsart.com
What do you get when you combine digital scrapbook paper with the Creative Cutter? A fun hybrid
scrapbooking project that can be customized for any theme or occasion!
Materials Needed:
(2) 12x12 White Sticky Back Canvas Sheets (1) 8.5x11 Chipboard; Paper Accents
(4) 8.5x11 White Cardstock; Paper Accents (1) 8.5x11 Thin Chipboard; Paper Accents
(16) 6” Pieces of Assorted Ribbon (1) 2” Book Ring
(2) Silver 3/16” Eyelets Crop-A-Dile Tool, We R Memory Keepers
Computer and Color Printer
Digital Scrapbook Paper Design (MultiFlowers design from www.scrapgirls.com was used on the
sample, but you can use anything that you have or want to use)
Your first step is to prepare the canvas and the cardstock for your project. Using a guillotine type paper
cutter or a scissors, trim the two sheets of sticky backed canvas down to 8.5”x12” so it will run through
your computer printer. Set up your digital page to legal paper size (8.5”x14”) and paste the digital paper
design onto the digital page with the design at the top. Print the paper design onto the canvas sheets.
Load the white cardstock sheets into your printer. Adjust the page size to letter and print all four sheets
with the same (or a coordinating) paper design on both sides as desired.
Load the chipboard onto your cutting mat and cut two of the basic tag shape for the book covers.
Load the printed sticky backed canvas onto your mat and from one sheet of canvas, cut two of the fabric
cover design with the tabs around the outer edges. From the other sheet of canvas, cut two of the basic
tag shapes for the inside covers.
Load the printed cardstock onto the cutting mat and cut two basic tags from each sheet for a total of eight
double sided printed tags.
Carefully trim any attached strings around the edges of each canvas cover piece. To cover the tags, begin
by laying the canvas with the tabs sticky side up, and place one tag so it is centered on the piece with
even tabs all around. Wrap the tabs around the edges of the tag, starting with the smallest sides first and
working up to the longer sides. Take one of the plain canvas tag shapes and adhere it to the raw side of
the chipboard tag so it covers the tabs leaving a neat appearance on both sides of the tag. Repeat this
with the other canvas pieces and tag to create two covers. Set the covers aside for the moment.
Take one of your page pieces and use it as a positioning template and punch the binding holes through
both cover tags (right sides out, plain tag shapes on the inside) using the Crop-A-Dile tool. Use the tool
again to set one silver eyelet into each cover hole, right sides out.
Line up the pages as desired inside the book covers. Bind the book with the 2” book ring. Tie the ribbon
pieces to the ring, alternating colors as desired. Add photos and additional embellishments to your mini
book to complete it to your liking!


-
Photo Details
-
See all User Photos0
Date: 9/11/09
-
-
-
