The Fundamentals
Welcome to the Fundamentals tutorials! If you are a new Creative Cutter owner or are just wanting to strengthen your skills with the software this is the perfect place to start! Please be patient when opening videos as their loading speed can vary depending on your computer and the size of the video. If you don’t know where to start, we have put our videos in their suggested viewing order so just start at the top and work your way down. Enjoy!
Please note that these videos may require you to install Adobe Flash Player and/or Apple Quicktime. You can find Adobe Flash Player here. You can download Quicktime from Apple here.
Saving Images
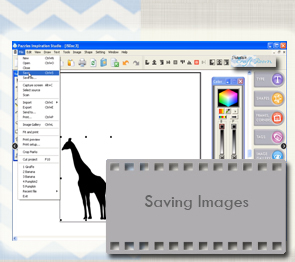
Once you have created an image you will want to save it so you can keep it for future projects. This tutorial will show you have to save your image on your computer, and also how to create new categories in your image gallery and save images in your gallery.
Caring For Your Mat
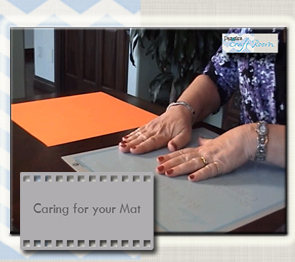
Taking care of your mat properly from the very beginning will make your mat last longer and make your cutting better. This tutorial will teach you how to prepare your mat from the moment you take it out of its packaging. You will also learn how to clean and store your mat for greater longevity.
Inspired Titles using the Inspiration
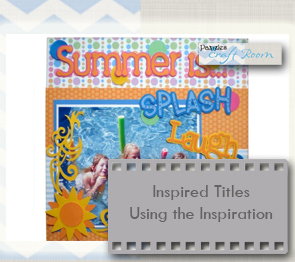
Searching for a title to fit your scrapbook page can be a fruitless and frustrating effort. You waste time, money and energy but still come up empty handed. The Pazzles Inspiration can help you create the perfect title every time. No need to purchase cartridges either. The Inspiration Studio Software recognizes all True Type fonts. You can also alter the font by adding to it or taking away elements from the font. Watch this video to see how the Pazzles Inspiration Cutting System can Inspire you to greater creativity!
Making Shaped Cards
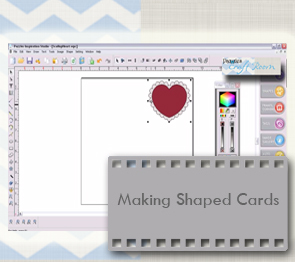
Shaped cards are a wonderful way to express any sentiment to someone special. Since they are so versatile and easy to make, this is one of the first projects that you will want to master. Using a few simple tools you will learn how to transform basic shapes, text, and paper piece designs in to shaped cards for any occasion.
How to Save Craft Room Files
In this tutorial you will learn the best way to save the cutting files you download from the Craft Room Image Library. You will learn how to organize the files into folders and how to save an image along with the cutting file.

Cutting Projects
Designing is a blast! But what do you do when you are ready to cut your project? Once you have completed your project and are ready to cut, you will need to make your final settings in the Cut Control Panel before sending your project to the Inspiration. This tutorial will explain the different settings under this window and how to use each one.
How to Resize Images
Learn how to resize your images two different ways. You will learn how to use the bounding boxes to resize images by sight. You will also learn how to use the Condense feature to choose a specific size for your image.
Using Dingbat Fonts
Dingbat fonts are fonts that use images instead of letters and numbers. Those designs can be a valuable resource for cutting files. Learn where to find dingbat fonts on the internet. You will also learn how to make a dingbat viewing template so you can see all the images in the font. Often it is better to convert the dingbat from a text format to the more editable image format. This tutorial will show you how to do that and when it is advantageous to leave them as text.
Determining Blade Length And Pressure
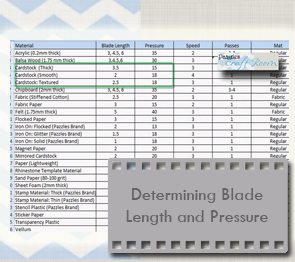

If you only watch one video tutorial, this should be the one! How to find the correct blade length and pressure is one of the most common questions Inspiration users have. Finding the right settings is critical to making clean cuts. In this video you will learn the difference between blade length and pressure, tricks for finding the correct blade length and pressure, and how to save your settings for future reference.
How to Open Cutting Files
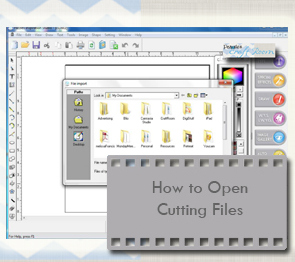
This tutorial will show you how to open cutting files in several different ways. You will also learn how to assign a Pazzles logo butterfly to all of your Pazzles cutting files.This tutorial will teach you how to associate .wpc files with the Inspiration Studio Software. After doing this process you will be able to click on the cutting file and it will automatically open in the Inspiration Studio software.
Construction Points
If you are creating your own designs or you want to be, you won’t want to skip this video! Construction points are part of every design. Understanding what they are and how they work will help you as you begin creating your own designs or when you want to modify an already existing design.
Understanding Points, Segments and Paths
Points and Segments are the building blocks of all cutting designs. A Path can be the design itself or just a portion of the design. Understanding what they are and how they are used gives meaning to a multitude of tools in the software. This tutorial will explain what points, segments and paths are and how they relate to one another. Learn how to find a point on a line and what it is used for. You will also learn what the difference is between an open and closed path. Finally, you will understand why it is important to make sure there are no unnecessary gaps in your cutting designs and how to close them.
Grouping And Ungrouping
One of the most common problems you may encounter when getting started in the Inspiration Studio is understanding how to select multiple images at the same time, and the difference between a grouped and an ungrouped image. This tutorial is a must see.
Kiss Cut Accents
Kiss Cut lines are also called perf lines, dashed lines or stitch mark lines. This tutorial uses a cute tulip card project to teach you what Kiss Cuts are and how to use them. Learn how to create fold lines for cards and boxes using the Draw Kiss Cut Line tool. Turn any line or shape into a Kiss Cut accent by learning how to use the Kiss Cut button in the Color Palette Window. You can also choose from two different sizes of Kiss Cuts and this tutorial will show you how. This tutorial will have you adding quick and easy accents to your projects in no time!
Pazzles Craft Room Tour
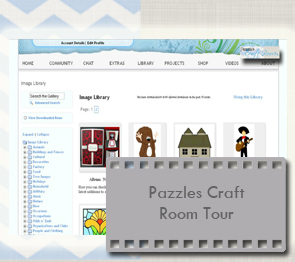
Every crafter wants a place where you can relax and escape to enjoy the things you love. A place you can be inspired, learn, create and share. The Pazzles Craft Room, Pazzles’ subscription website, is that place. Discover the incredible value of a Pazzles Craft Room membership that will give you access to blogs, live classes, one-on-one chats with designers, forums, galleries, monthly challenges, thousands of cutting files, and hundreds of video tutorials
Welding: Shapes
Learning how to weld shapes together is one of the most useful techniques you can learn in the software. This tutorial will teach you how to weld shapes, some of the common problems that can arise when welding, and how to fix those problems. This tutorial is the second in a four part series.
Installing the Removable Rollers
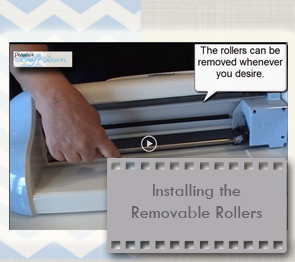
Learn how to install and remove the removable rollers for the Inspiration. In the video you will learn how easy the process is. You will also find out why this amazing innovation will make creating with your Inspiration better than ever!
Changing The Blade
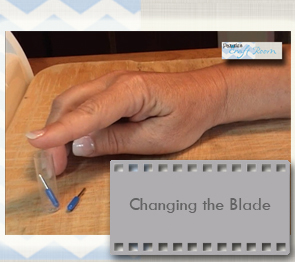
Has your blade suddenly started tearing your paper or just plain not cutting cleanly? It might be time to replace your blade. Replacing your blade is a cinch, let us show you how!
Making Duplicates
In this tutorial we will teach you several ways you can make a copy of your design. We will also show you how you can make a mirrored or rotated copy of your design. These are simple tools that can be very handy when you are designing your own project!
Basic Shapes
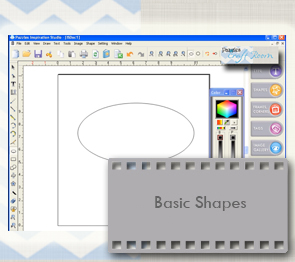
Did you know that you can make perfectly proportioned basic shapes in the Inspiration Studio? This tutorial will show you how you can create perfectly shaped circles, squares, stars, arrows and more all with just a few clicks!
Using the Rotation Tools
This tutorial will teach you how to rotate shapes and letters using the Rotation Tools. Learn how to the find the two main rotation tools in the software: free rotate and rotate by degrees. You will also learn what shortcuts to use to bring up the tools quickly.
Rounding Corners
Rounding corners is as easy as one click in your software using the round corner tool! In this tutorial we will show you where to locate the Round Corner tool and how to use it to create perfectly round corners for your designs.
Inverted Corners
Inverted Corners curve into the square rather than round out. By inverting the corners you can give a distinctive look to your layers and designs. In this tutorial you will learn how to invert corners on squares and rectangles. You will also learn how to choose the correct size for your inverted corner and how to avoid errors. Finally, you will learn how to use the inverted corner feature to make designs that go beyond a simple square or rectangle.
How To Select Parts Of a Design
The Select Elements tool is an important tool that every beginner should know how to use. This video lesson will show you how to use the Select Elements tool to choose a shape or part of design. You will learn how to select a single image, how to choose several images together and how to choose images or pieces while eliminating parts that you do not desire.
Welding: Intro
In this tutorial we will introduce you to a feature called Welding which can magically join shapes and letters together. If you have ever had two shapes you wanted to be able to join together and cut out as one piece, or would like to cut out a title where all the letters are joined together then look no further! This tutorial is the first in a four part series on welding.
Welding: Words
Learn how to words together to create beautiful titles. In this tutorial you will learn how to weld words together and some tips for dealing with certain types of fonts. This tutorial is the third in a four part series on welding.
Welding: Words Advanced
Once you have learned how to weld words together you may have a few questions about how to make a particular font work the way you want it to. This tutorial will show you several tips and tricks you can use during welding so that you can always achieve the look you want. This tutorial is the fourth in a four part series on welding.
Making Shaped Bags
Making shaped bags can seem very intimidating, but the truth is that you can make stunning bags out of almost any shape even if you are a beginner! Watch this video to get a detailed step by step instruction on how to use some basic tools in the software to make shaped bags out of any shape you want!
Creating A Title
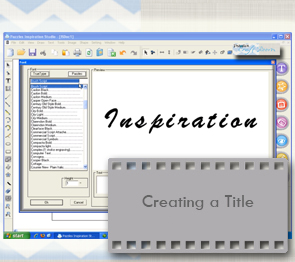
When you are first getting started probably one of the first things you will want to do is create a title. This tutorial will walk you through creating a word, welding a word, welding a shape to your word, and creating a shadow mat for your title by using the outline feature. This tutorial uses many different tools in the software and is a great way for you to see some of the software features in action while learning about one of the most popular projects in our software.
Difference in Fonts
Learn about the different font types available for use with your cutter. In this lesson you will be shown what font types you can use and when to use them. You will learn what a Journaling font is and why it is different from a standard font. This tutorial will help you understand why some fonts work better than others and alternative ways to use a font that is difficult to cut.
Understanding Text
Learn what text is and how to manipulate it. This lesson will show you how to break text into lines, words and letters so that you can create custom words and phrases. You will also learn what Convert Text to Path is and when to use it.
Creating an Outline
Learn how to make outlines around any shape or title with just a few clicks. Outlining is the perfect tool for creating shadow mats, making frames out of shapes, or when you want to add a little something to your cut out using one of the Pazzles tools. This feature will quickly become a staple for you so don’t miss this video!
Pen Lines and Fills
Understanding pen line colors and fill colors is incredibly helpful when you are creating paper piecing designs or shadow mats for you designs. This tutorial will teach what pen line and fill colors are, how to change their color, and how you can use them to help you make beautiful paper pieced designs that are easy to cut.
Using the Positioning Tools
Learn how to move your design elements to the front, back or somewhere in between. These tools are essential when trying to manipulate or edit your design. If you have ever had trouble selecting a line or lost a shape only to find it is hidden behind another, this tutorial will show you how to solve the problem.
Distortion
Take your titles and shapes to the next level using the distortion feature. In this tutorial you will learn how to distort. If you want to arc your title, squeeze your flower, or anything in between then you won’t want to miss this tutorial.
Making Monograms
Monograms add a classic look to your projects. In this tutorial you will learn how to make block or script monograms in several different styles. You will also learn how to use the distortion tool to shape the monogram to fit inside of a frame.
Italic Tricks
The Italic tool gives you greater flexibility than the ordinary italic option seen in word processors. The Italic tool allows you to angle your word left or right as much or as little as you desire. In this video you will learn how to use the Italic tool with your words and titles. You will also learn how to use this feature to change the look of images.
Machine Maintenance
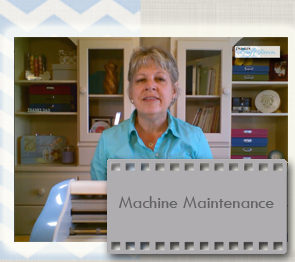
Watch this video to learn how to take care of your Inspiration Electronic Cutter. You will learn what to use to clean the Inspiration and what areas of the machine are especially important to maintain. Following the steps shown in the video will ensure that your Inspiration will be performing at its very best.
Cards
Cards are the perfect way to express any sentiment. With your Pazzles software you can create a card of any dimension using a few simple tools. In this tutorial, you will learn how to create a card of any dimension with a fold mark directly down the center. You will also learn how to create window cards and get a perfectly centered window every time!