
-
» Home » Design Team » Design Team » Sticky Canvas Slide Show -

 View Larger Image
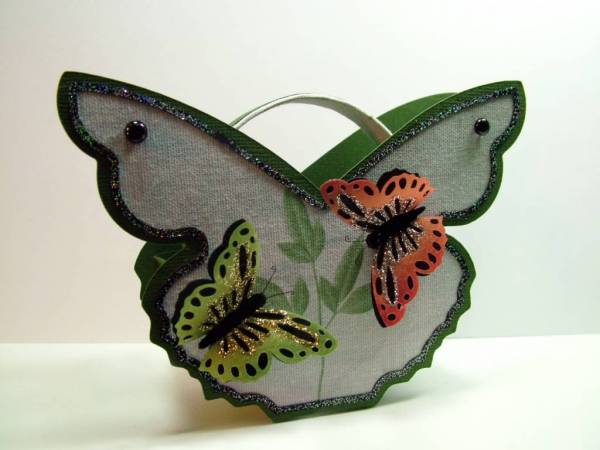
Butterfly Basket
Butterfly Basket
by Pam Conner
For my project this month, we were supposed to incorporate some Ranger “Claudine Hellmuth Studio Stick-Back Canvas” sheets (12”x12”). After quite a bit of experimenting I decided to use a background paper and some leaves from a free digital scrapbooking kit named “Misty Morning” by Joni Gray. If any of you would like the kit, it is free and can be downloaded from her blog at this link: http://jonigray.blogspot.com/search?q=Misty+Morning She has quite a few other free kits at her blog and they are all lovely! I then printed the background paper and the leaves on the canvas using my Epson R280 inkjet printer. Sometime back I had designed a butterfly to cut using my Pazzles “Inspiration Digital Cutter” and I decided to use that design to make a “butterfly basket box” for my project. I cut the “inner” panel of each side of the box out of the printed canvas and I also used some of the printed canvas to cover the handle that cut from a cereal box (you can also use chipboard). When I adhered the canvas panels I noted a bit of unraveling, so I cut a black border, covered it with VersaMark and then some glitter embossing powder, set it with my heat gun and adhered it to the canvas panels…that took care of that problem. I used my original butterfly design to cut some butterflies for embellishments, added some Dew Drops and a black satin bow!
Here are a couple of notes about my project. The “Dew Drops” I used were clear but I colored them black using a Bic marker, to match my project. My butterfly design includes the antennae, but I snipped them off and made some with very tiny wire!
Supplies List
Papers: Bazzill, Canson “Effects Papercraft” (Plum Iridescent, Kiwi Iridescent and Papaya Iridescent for the butterflies) and Westrim Crafts black cardstock (for border and butterfly bases)
Ink: VersaMark “Watermark”
Embossing Powder: “Star Dust Transparent” by Stamp-n-Stuff (for glitter)
Martha Stewart “Smoky Quartz”, “White Gold” and “Florentine Gold” glitter & glue
Doodlebug, Black “Crushed Velvet Flock” (for the bodies of the butterflies)
The Robbins Nest “Clear Dew Drops
“Black Brads” by Spare Parts
“Black Satin” ribbon by Offray


-
Photo Details
-
See all User Photos0
Date: 9/11/09
-
-
-

-
Comments