
-
» Home » Design Team » Design Team » At the Zoo Slide Show -

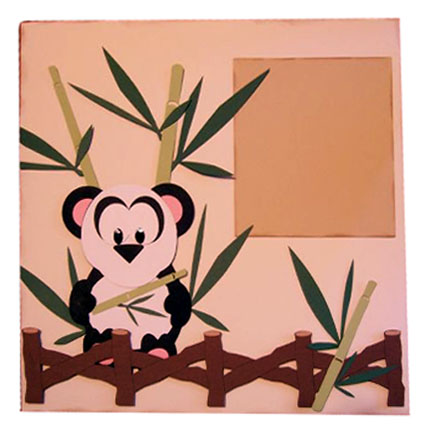

Zoo Page 2
Zoo layout pages
by Loretta Mateik
Supplies:
Pazzles cutter
Pazzles ‘Zoo’ CD
Cardstock colors used: black, white, tan, 2 shades of brown, 2 shades of green, pink, 2 shades of grey
Misc. supplies: basic scrapbooking supplies, chalk, Ranger Glossy accents (optional)
Instructions:
NOTE: With so many pieces layered in this layout, be careful when going to cut that
all the pieces to be cut are separated and NOT touching. What I did, was to copy all the pieces I wanted to cut out in the same cardstock color to a new page. I did this for every color I was cutting. Then, when I went to cut, all the pieces for each color were on the same page to be cut out. Later when I went to assemble my pages, I referred to the 2 page color layout for placement.
1). Cut out all the pieces for the animals shown (or other animals you desire). Please note that for my animals, I chose to make a ‘mat’ on which to layer my pieces.
2). Cut out the bamboo stalks and leaves from whatever green colors you prefer.
3). Cut out the fences from brown/tan colors of choice.
4). Cut out the ‘At the Zoo’ title from color of choice.
5). Cut out the photo and journaling mats from colors of choice.
6). Select the background color cardstock for you layout. Chalk the edges. Chalk the edges of the photo and journaling mats too.
7). Refer to the color layout and assemble your pages. I used pop-up dots on the fences to give some dimension.
8). I applied Ranger Glossy Accents to the animal eyes and brushed some onto some of the bamboo leaves for interest.


-
Photo Details
-
See all User Photos0
Date: 9/10/09
-
-
-

-
Comments
-

christine
Loretta I always love what you do. I just went to the San Diego last month and I have Panda pictures that would look awesome with this page. Great Job! #1 4/22/10 11:37am
#2 6/18/10 6:55pm
-