
-
» Home » Design Team » Design Team » White Wash Paper Slide Show -

 View Larger Image
My Girl
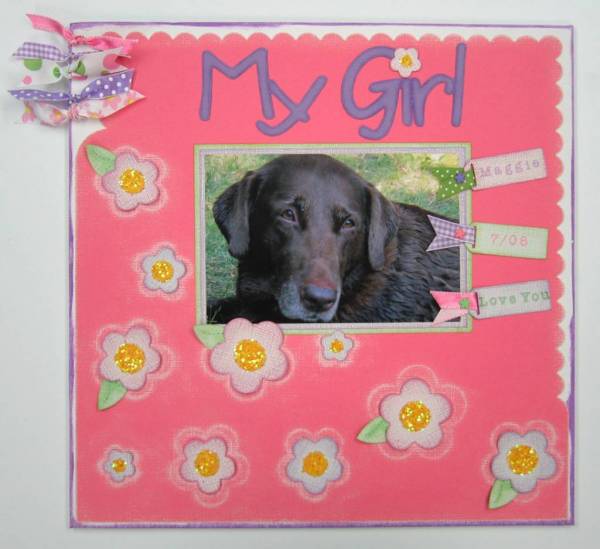
My Girl Canvas Wall Hanging
By Mary Kerr, http://www.anangelsart.com
If you’ve got a special girl in your life, you’ll love this fun glittery project to celebrate her!
Materials Needed:
(1) 12x12 Master’s Touch Artist Canvas Panel (1) Scrap Yellow Cardstock
(1) 12x12 Core’dinations In The Pink Cardstock (5) 6” Ribbon Pieces, Assorted
(1) 12x12 Thin Chipboard (3) 3” Ribbon Pieces, Assorted
(1) 8.5x11 Thin Chipboard Crop-A-Dile Tool, We R Memory Keepers
Sandpaper Purple Chalk, Craf-T Products
1” Wide Terrifically Tacky Tape, Provo Craft Purple Fine Point Marker, Zig/EK Success
Inkpads in Purple, Pink and Green and letter stamps, Close To My Heart
(1) each: Mini Flower Brads in Purple, Pink and Green, Making Memories
Bumblebee Yellow Chunky Glitter, Doodlebug Designs Purple Paint and Foam Brush, Making Memories
(1) each: 12x12 Core’dinations White Wash Cardstock in Pickle Barrel (green), Jelly Cupboard (purple), and Corner Hutch (pink)
Using the foam brush and purple paint, lightly dry brush the edges of the canvas panel with paint and allow to dry. Load your In The Pink Core’dinations cardstock onto a mat, and cut the scalloped outer edge design using the Creative Cutter. Set this piece aside for the moment. Load the letter sized chipboard onto the mat and cut the flowers in all sizes using the Creative Cutter. Using the photo of the finished project as a guide, securely adhere the outer chipboard flower “rims” to the 12x12 chipboard piece, noting where the decorative edges of the pink cardstock will be. Position the decorative pink cardstock over the top of the chipboard with the flowers glued to it, then sand over the top of the flower designs with sandpaper until the designs “pop” and the lighter colored core of the paper shows through. With the white side of the White Wash cardstock face up, cut the following pieces with the Creative Cutter.
From pink: a set of flowers and one tag.
From purple: a set of flowers, one tag, and smaller photo mat.
From green: five leaves, one tag, and larger photo mat.
With the colored side of the remaining purple White Wash cardstock face up, cut the title “My Girl”. Sand the edges of each flower and each tag with sandpaper to reveal the colored core. Shade the edges of the title words with purple chalk. Adhere one of the smallest flowers to the title. Stamp your text onto the three tags with pink, purple and green ink and 1/4” letter stamps. Adhere Terrifically Tacky Tape to the front side of a scrap of yellow cardstock leaving the plastic release film adhered to the face of the tape, and cut one set of flower centers from this piece. Once cut, remove the release film from the face of the flower centers and dip the adhesive side into the yellow glitter. Use the photo as a guide to match up the flowers with their centers, and adhere them in place. Curl the petals and leaves slightly with your fingers to give the flowers a dimensional effect. Adhere the completed flowers at the center of the design only to the base page over their sanded counterparts creating a halo effect as shown. Adhere one leaf to five of the flowers by applying adhesive to the back side of the wider end and slipping it under the flowers as shown.


-
Photo Details
-
See all User Photos0
Date: 9/16/09
-
-
-

 She was a real sweetheart and we miss her terribly.