
-
» Home » Design Team » Design Team » Boxes and Bags Slide Show -

 View Larger Image
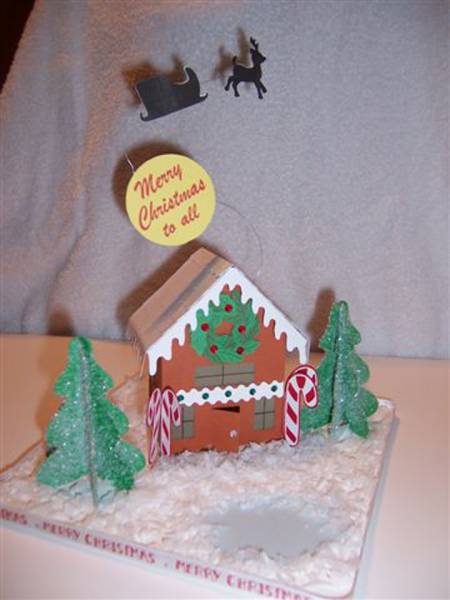
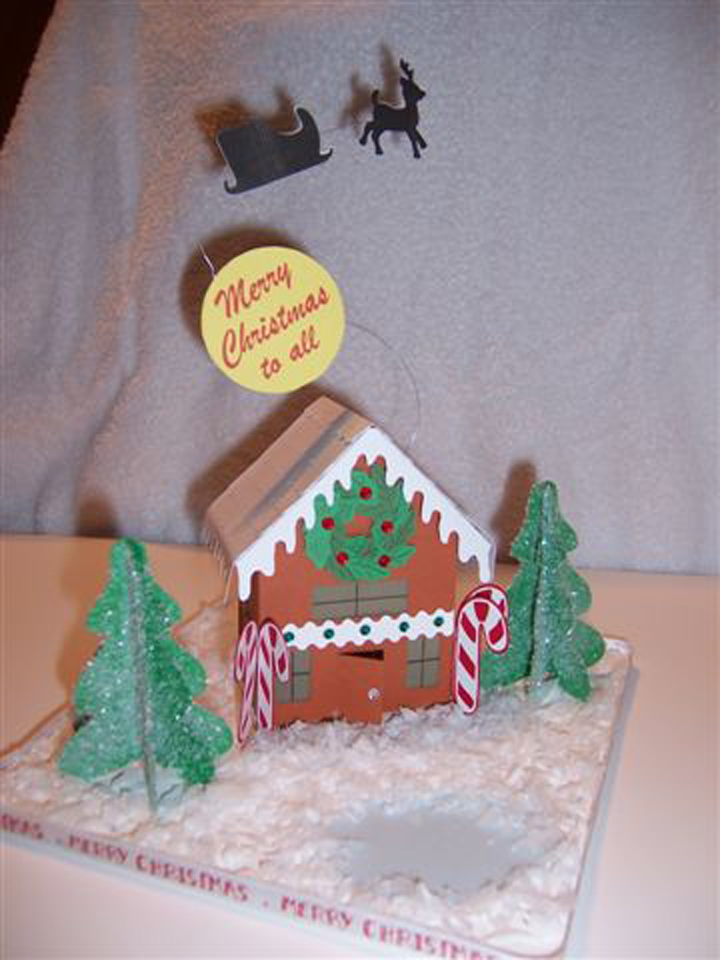
Gingerbread House
Gingerbread House Box
By Loretta Mateik
Supplies Used:
Pazzles CD #17: Boxes and Bags
Pazzles cutting machine (Pro was used); pen tool
Cardstock (generic): Terra cotta color (house)
Two shades of green (wreaths)
White (all roof pieces, trim on house)
Yellow (moon pieces)
Black (sleigh, reindeer)
Yellow, blue vellum (inside windows, ‘ice’ on small scene)
Rhinestones: red, green, clear (3/16”)
30-gauge silver wire, ½” button
Adhesives, pop-ups, double stick tape, removable tape, spray adhesive, glue dots
Printer
White glitter
8” x 8 ½” piece of white foam core; ribbon for edging; village snow; battery tea-light
Notes and Cutting instructions:
Main house: Cut house/roof from Terra cotta color cardstock.
Roof trim: Cut all roof pieces and hanging snow/icicle pieces for front/back and sides of roof from white cardstock.
Wreaths: Use pen tool to add vein lines to holly leaves. Then cut 16 holly leaves from two colors of green cardstock for each wreath. Cut one wreath base for assembly of each wreath. Make two wreaths and add red rhinestones. Adhere to house using pop-ups before assembly.
Inside windows: cut windows pieces from yellow vellum. Adhere to inside of house before assembly.
Outside trim: Cut trim pieces from white cardstock and cut to fit sides as needed. Adhere to house before assembly. Add green rhinestones to front piece.
If making the small scene:
Moon: cut two moon shapes from yellow cardstock. Print moon outline onto white paper with printer. Adhere cut yellow shapes to printed outlines with removable tape. Run through printer again and print out message using red ink.
Sleigh and reindeer: Cut two shapes each from black cardstock and set aside.
Candy Canes: cut one red piece from red cardstock and two white pieces from white cardstock for each candy cane. Adhere a white piece to each side of the red piece. Make as many as desired.
Trees: Cut 3 tree pieces for each 3-D tree. Fold two sections in half and adhere to both sides of the third piece along center line. Spray with adhesive and sprinkle with glitter. Set aside.
Assembly:
Assemble house but do not permanently seal bottom shut….just fold up for now. Fold roof and adhere front and back hanging icicle sections. Adhere hanging icicle sections to the two roof sides. Add the scalloped side sections beginning at the roof side edges and work to the roof top. Add the top scalloped section to overlap both sides last.
Using a straight pin, poke a hole through the roof in the middle of the right side.
Cut approx. 20” of silver wire. Thread one end through holes in the button a few times to secure the end. Thread the free end through the hole in the roof from the inside to the outside and secure button to inside of roof with glue dots. Bend wire into a gentle ‘S’ shape. Glue the two moon shapes together with wire in between, as shown. Glue the two sleigh and reindeer shapes together in the same manner as shown. Before trimming any excess wire, be sure the wire length can support the items. If wire bends too much, shorten the overall length and distance between pieces.
NOTE: If using this house as a small gift box, you can stop at this point or even eliminate the wire from the roof. Fill box with small gift or goodies and securely seal the bottom. You can also spray the roof with adhesive and sprinkle with white glitter.
If making a small scene with the house: cut an 8” x 8 ½” piece of white foam core for the scene base. Trim edge with ribbon. Add a battery operated tea-light to the inside of the house before closing bottom if desired (do not permanently seal bottom). Adhere candy canes to front corners of house. Place house on base. Tear or cut a small blue oval from blue vellum to resemble a pond and place on base. Add trees as desired. Sprinkle entire base with decorative snow. (Remember to turn off the tea-light!)


-
Photo Details
-
See all User Photos0
Date: 9/10/09
-
-
-
