
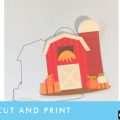
One of the new additions in the Inspiration Vue is that it comes with an optical eye for print and cutting clipart. If you have our previous model, the Inspiration, that doesn’t mean that you are out of luck, though! The Inspiration will do an incredibly accurate cut around a printed design and the process is simple and surprisingly fast once you understand how it is done.
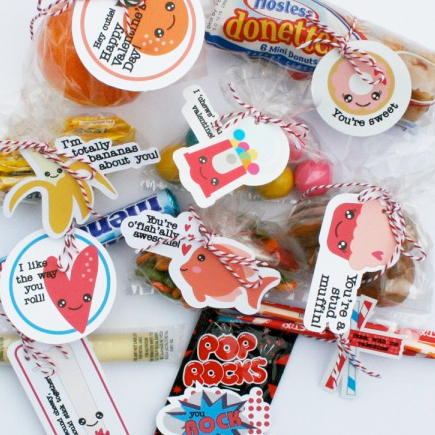
Some of you may wonder why anyone would want to cut around clipart. We do have, after all, the best cutting machine around and we can cut anything out of paper. I am a lover of paper piecing and would rather use layered paper designs than clip art and stickers for most of my projects. But, I will admit there are times when clipart is the better alternative. If I have to make 50 valentines in a hurry, I do not want to use paper pieced designs. Either I will resort to something simple or I will use clipart. If I had to cut the clipart out by hand I would probably end up in Walmart to buy inexpensive cookie cutter valentines. Instead, I can find a cute clipart, print it out in multiples and let my cutter do the cutting for me. Add some cut out hearts, words and flowers; glue them down with pop dots and voila! handmade valentines!!
Perhaps I want to make birth announcements with the baby’s picture. But I want to have the baby’s picture cut in a circle. I could get out the old circle cutter or I could print out the photo in multiples on photo paper. Then use the print and cut method to cut circles accurately around the photos. I am sure that you can think of many other ways that print and cut would be useful.
The process is so simple and takes only a few steps. First, import the clipart into the Inspiration software. Next, trace around it using the hand vectorization method (or use Edition vectorization). Print the clipart and cut a template for positioning it. Put the clipart on the template and cut! While the process is not hard, it is more easily learned if you see it done. I have created a video tutorial that shows how to do Print and Cut. It will also teach you how to use the Edition vectorization function. It is a little known method for tracing around the outside of clipart. (I am also including the Fairy Clipart I used in the tutorial.) Once you have tried Print and Cut, I would love to hear how you are using it.
You can watch the video below or you can find the Print and Cut tutorial in the Video Library under Advanced Techniques.
A Craft Room Membership is required to access additional content. Please Join Now or
Login! This tutorial will show you how to import your clipart in to the software and create a cutting template. You will learn how to use the Edition method of vectorization to automatically trace around the outside of the clipart for a cutting line. Finally, you will learn how to use the template to position the clipart for a great cut. After learning this technique you will be even more in love with your Pazzles cutter and it will change how you look at clipart forever!
Print and Cut Practice File

What a cute little clip art. I am glad that you made a video on this because when I run into people who are interested in the machine, I am almost always asked if the machine can do this function. The ones who usually want to know are the stampers. They want to stamp, copy and cut mass amounts. So this is great…now I can tell them to join and watch! LOL! Thanks…
Oh yeah…Klo had told us groupies about a site where this is taught…and the person teaching suggested scanning in the back ground paper, outlining the image with a thick line of the background paper’s color….and then cutting. What a difference this extra step makes! That way, if you are slightly off…it doesn’t matter because it is hard to tell! I wish that I could remember her name so that I could credit her here…maybe Klo would know…but what an incredible difference!
Thank you so much Christine! What a wonderful tutorial. With all the paper piecing I do, I don’t really venture into too much else. But this is SO something I am going to do!!! Thank you again so very much!
Thanks Victoria! We were just discussing that I had omitted the option of thickening the outline and making it black. I will probably go back in to the tutorial and add that in!
What a great idea to make a thick outline around the clipart that matches your paper!
Thankyou, so so much, I have wanted to do print and cuts for a while but it didn’t seem very easy. It surely does now. I Can not wait to give it a try. Thankyou again. Dana
I used to stamp a lot when I had my retail store, so I’m no stranger to stamping! When it comes to cutting out stamped images in multiples, the easiest way to do it is like this. You stamp your image in black ink on white paper and scan that into the computer. Import the image into the cutter software and trace only the outline of the image, either by hand or auto trace, which ever will work best for the design. (If you want a small border of white around your stamped design, add an outline of maybe .06 or so and delete the original.) Select just the outline you want to cut and duplicate it to fill the page. Load the paper you want to stamp on and cut just the outlines from the paper.
Now, instead of pulling the cuts off of the mat right away like you normally would, leave them stuck on the mat and use a stamp positioning tool (or use clear stamps on a clear block, I love the clear stamps for this!) and hand stamp inside each cutout outline with the ink of your choice. Leaving the cuts on the mat while you stamp makes it so much easier to get the images in the right place on the cuts. When the ink is dry, pull the stamped cuts off of the mat. Voila! Stamped and intricately cut images without the hand cramps!
You could also do the print and cut technique with white full sheet sticker paper stock to make your own cutout stickers with either clip art or stamped images. How cool is that?
As a big fan of paper piecing myself, I just thought of something else you could do with this technique. If you like the look of paper piecing but don’t want to work that hard to make multiples of a pieced design, how about making ONE finished paper pieced design, scanning it in, and using THAT as your full color clipart?
You could even scale it to any size before creating your cutting line. Duplicate the design and print it out in full color, and proceed just as if you were using regular clipart. I bet if you printed on high quality photo paper, most people would have to feel it to tell it wasn’t the real deal.
Just a thought!
Many many thanks for this video. Will find many uses for this now that I’ve seen exactly how to do it. These videos are the best! If possible would love to see a video on using the embroidery tool too.
Well now I feel sheepish Mary! I used to do that in my early Pazzles days and sell page kits with my paper piecings printed and cut around! How could I forget? Baa Baa!
I tried it. I Love, love, love it! Thank you. I can finally print/cut. Whew! I can’t wait to put this to use on so many different projects!