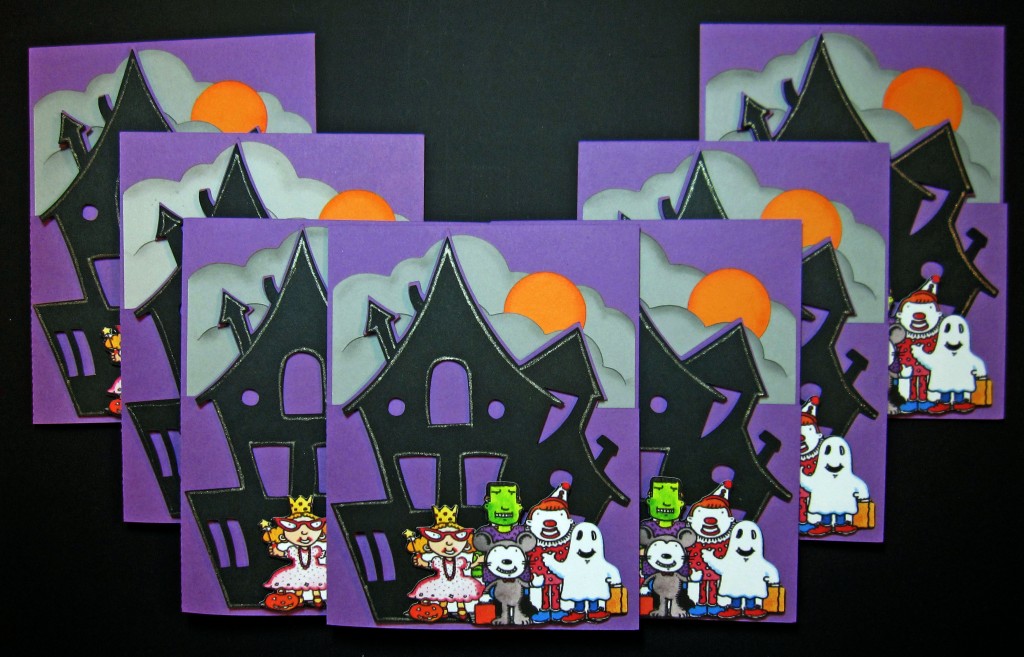
There has been a lot of buzz lately about Print and Cut. Everyone is asking, “Can the Inspiration cut around clipart?” ”Do I need to get a special cutter and printer?” I am proud to say that here at Pazzles we have been cutting around clipart for years without any special laser eyes or registration marks. I honestly don’t understand the fuss; the Pazzles method is so easy and very accurate.
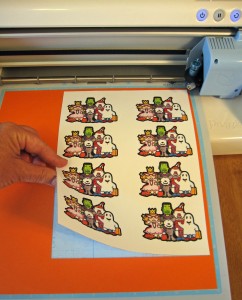 Even though I love piecing together layers of paper, I have REALLY seen the advantages of using clipart once in a while. When I need multiples of a project and don’t want to spend all that time gluing everything together, print and cut saves the day. Did you know that you can also create your own clipart in the Inspiration Studio Software?
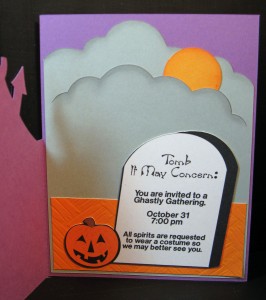
This Halloween Invitation is a perfect example. I could make the haunted house easy enough but I didn’t want to glue together a bunch of tiny pieces to make the Trick or Treat kids. I searched the internet and came up with this cute clipart that would work perfectly. However, I needed to give all the spooky information on the the inside of the card as well. I used the drawing tools to create the tombstone and pumpkin. Then I added some spooky text. Next, I converted the design into clipart using the Convert To Image tool in the software. By converting it to an image, I eliminate all the extra cutting lines that I don’t need. I added an outline to the newly created clipart and multiplied it across my page. Finally, I drew a rectangle around the images to make my placement guide. Once I printed the page out, I was ready to cut.
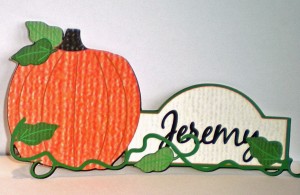 This is a great way to make placecards for dinner or name tags. Choose a graphic, add a name, convert to clipart and cut it out. If you have the new Inspiration Studio Pro Software you can even add paper texture to your design. How fun is that?!
I have created a video on Create and Cut Clipart so be sure to watch it. I also included the cutting file for the Haunted Invitation and a PDF of the instructions. Download the files by clicking on the links below.
create-and-cut-clipart
Create your own custom clipart in the Inspiration Studio Software. Then print it out and cut around the clipart for a fast and easy addition to any project. This video will show you how to create clipart using the drawing tools in the software and/or designs available from Pazzles extensive library. Learn how to convert cutting projects to images for printing and how to set up the template for cutting around clipart.If you would like the cutting files for Tomb It May Concern click here.
If you would like the Instructions for Tomb It May Concern click here.


Boy did I learn something new today. Once again, you have shown me that I don’t need one of my other programs to do some of the things that I want to do! You have eliminated yet another step. I didn’t know about the easy wand to encapsulate the clip art. The only thing that confused me though is when I tried it on regular clip art….it copied the outline to the side like it did in your video. But, there were two images on the page that I wanted, and when I clicked the wand on the second image, it surrounded the image ON the image….and not smoothly like the first one. I am doing something wrong or leaving out a step. But, I am so psyched! Oh yeah….one more thing…from learning that step…my clipart had hair color that I didn’t like….so I used the wand, changed the color of the hair, hid the outlines, printed….and then cut….and I was able to change the hair color without going to another program….Christine THANK YOU!!!!
I am not sure why it surrounded ‘on’ the image, I will have to explore that issue. The jagged outline probably has more to do with the quality of the second image. You can always select the cutting line, go to the shape menu and choose Simplify Path or Change to Bezier Curves and Segments.
What a great idea to use the Edition tool to create a mask on the clipart to change the hair color!!
Love this! I have a 12×12 printer so do I have to change my paper size to 8 1/2 x 11 or can I still do this on 12×12. Thank you
I don’t have a 12 x 12 printer but from what I can tell, you can leave your page size at 12 x 12 as long as you have set that size of page in the Print Setup window.
You can also go to the View menu and select Show Printer Page. This will put a dotted line to show the position of the actual printing area on the workspace.
I wish I had a 12×12 printer…. I honestly didn’t know they had one for personal use… hmm time to call the hubby lol
Toni, I have an HP B8550. It prints from 3×5 to 13×19. I bought it from QVC. It was less than $200 but it is no longer available on there now. It makes beautiful prints. I buy the 13×19 paper and cut it down to 12×12 when I do digital scrapping. It prints beautifully on 12x 12 cardstock also. Ink usage is comparable to any other printer. You can buy the ink at wal-mart but i usually buy once a month from HP so I can get the XL cartridges. It uses 3 colors and 2 blacks. I have printed out several 13×19 photos for family and to hang in my home.
Toni,
I have the Epson Stylus Photo 1400….my husband got a deal right from the Epson.com site…next day delivery…no shipping costs. I can tell you that I have used it to create my own scrapbook pages….the printed background paper…as well as digital scrapbooking and the results are great. So, if I can design in the Inspiration Studio and then print what I created…then you should be able to print and cut with it as long as you set up the Studio to use your printer and have 12 X 12 chosen in the printing set up.
I buy the photo printer paper on the roll and then cut it down to size as needed. I have found this to be more economical whenever the rolls are on sale. HTH
Thank you so much its awsome and so inspiring I cant wait to get started with my own projects. I just love this because you can personalise it and not just have someone elses work. Not that someone elses work is not special and great, but it is good to have your own sometimes.
I played the video and over again until I was able to write down all of the steps and then I typed them in word. This has definitely taken my creativity to another level. Thanks so much!