Plastic spray stencils are everywhere. They come in basic shapes and trendy patterns, like chevrons and hexagons. And as cool and trendy as some of them are, I always put them back on the shelf, thinking, “why buy it, when I can cut it with my Pazzles Inspiration?” Time to put that idea to work!
I’ve seen lots of great scrapbook layouts lately with a lot of white space, and a really tiny photo and headline, off-center. Some of these layouts, like this one from Studio Calico, use a large circle of embellishments to take up some of the white space, and drive the eye in to the focal point.

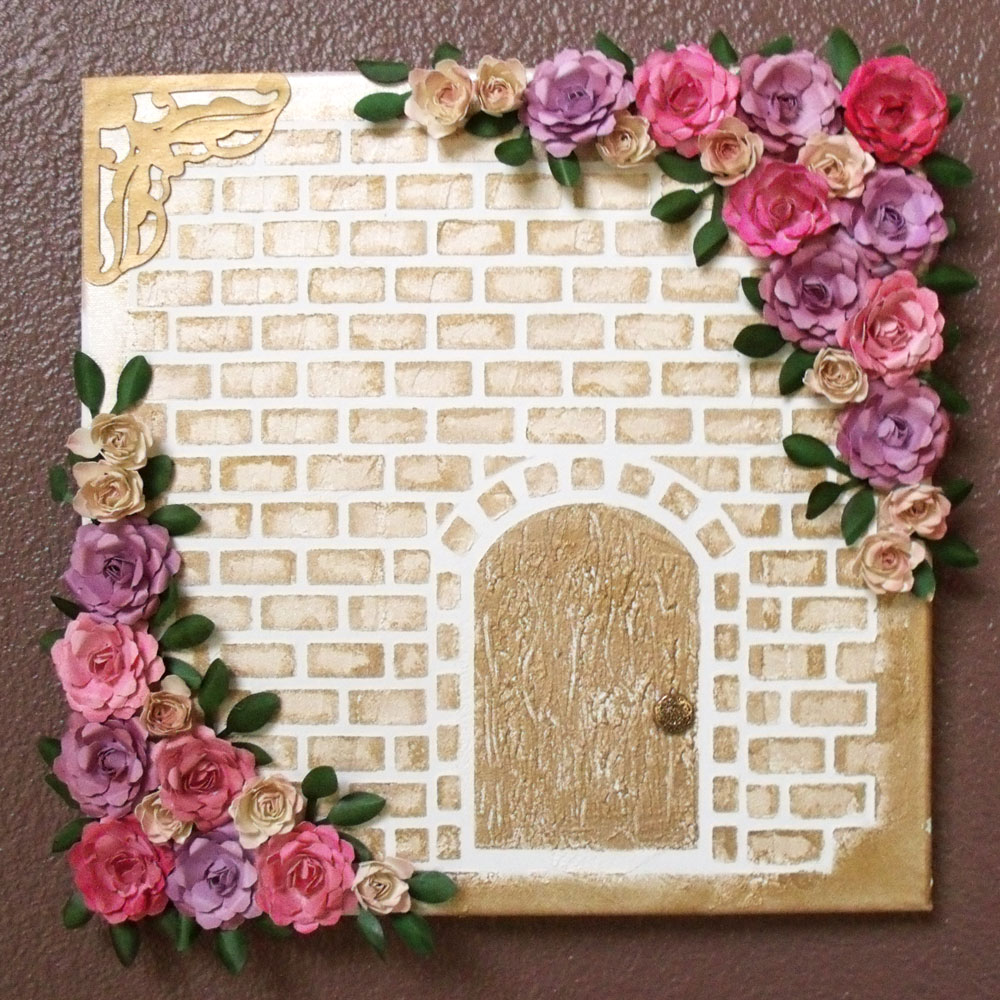
I decided I wanted to create a layout like this for myself, but instead of a giant circle and a ton of embellishments, I wanted an outline of a heart shape. It’s the same kind of curved shape to draw the eye around the page, but I used a custom sprayed background to subtly fill some of the white space. Rather than buy a 12 x 12 background stencil for $5 or more, I cut my own from a piece of Pazzles Stencil Plastic and one of the hearts from the “Handful of Hearts” file in the Craft Room Image Library.
I picked the heart I wanted from the file, and enlarged it to take up about 75% of my 12 x 12 mat.

I used the Outline feature to make a 1″ outline around the heart. I used the Distribution feature to center the heart and its outline on my page. Then I cut it out of the stencil plastic. The result is three pieces: a heart, a 1″ thick heart border, and a 12 x 12 square with a heart-shaped hole. I can actually use any of my three pieces as a spray stencil!
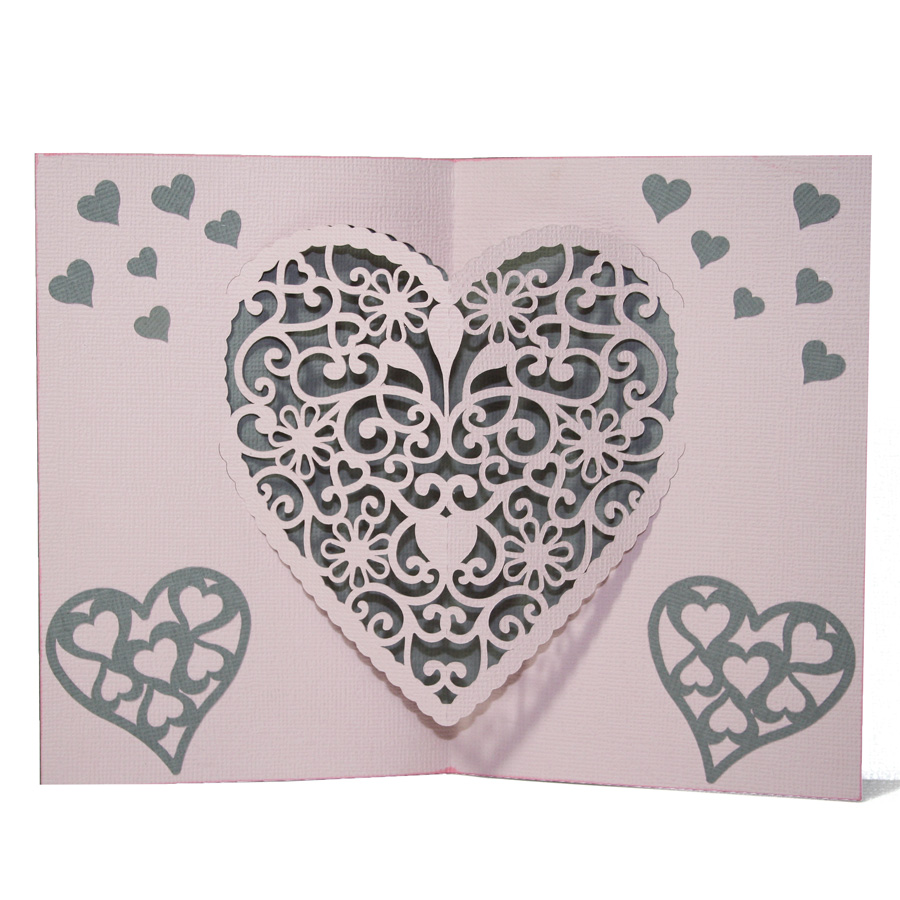
For my project though, I wanted the 1 inch heart outline. I laid my stencil at an angle directly on top of my paper, and sprayed to my heart’s content [pun intended].

Check out my results! It’s subtle, but distinctive!
I managed to get three different heart stencils from one piece of plastic. Our stencil plastic is 12 x 12. If you cut backgrounds for A2 sized cards, you could get 4 different styles out of one piece of plastic.
Let’s do the math. If one A2 stencil at the store costs $2.99, four would cost $11.96. If I can get 4 stencils out of one $2.00 piece of plastic, I just saved $9.96!! That’s a couple of lattes and a pastry right there!
Need some stencil files? No problem! Search the Image Library for “paper lace” to find circles, herringbone, or the super-trendy chevrons (in two different styles). Not a Craft Room member? Get the “Paper Lace” Image CD in the Pazzles Store.
I bought a pack of Recollections Clear Craft Plastic to use for an invitation. I need to cut it out to look like a glass, but I don’t have a lot of extra pieces to “practice” with before I go for the real thing. Do you have any advice as to a starting point regarding blade length, pressure and speed? I know there will most likely be some adjusting, but the least amount of trial and errors the better since I’m low on stock. Thanks!
I would say compare the thickness and density to the cardstock you have that is most like the plastic, and start with those settings. You can get through our stencil plastic in one pass if your blade is fresh, but it’s probably better to do two passes.
I think that will be what you want to do, is do more than one pass. Cut slower, tape your corners down so you don’t have any shifting, and gently peel one corner up to test the depth after your first pass. You might be able to ‘punch’ or ‘pop’ it out after one pass. (It seems like once you’ve etched stencil plastic with the blade it will split on that etch line, even if the cut isn’t all the way through.)
If you can’t pop it out easily, notch your blade up one click and run a second pass. I have the feeling this will be really easy for you, Jennifer! Don’t be nervous! 🙂