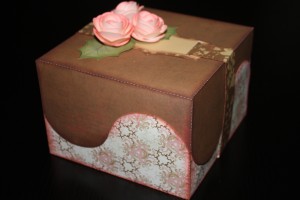
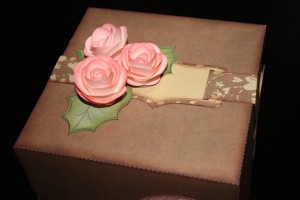
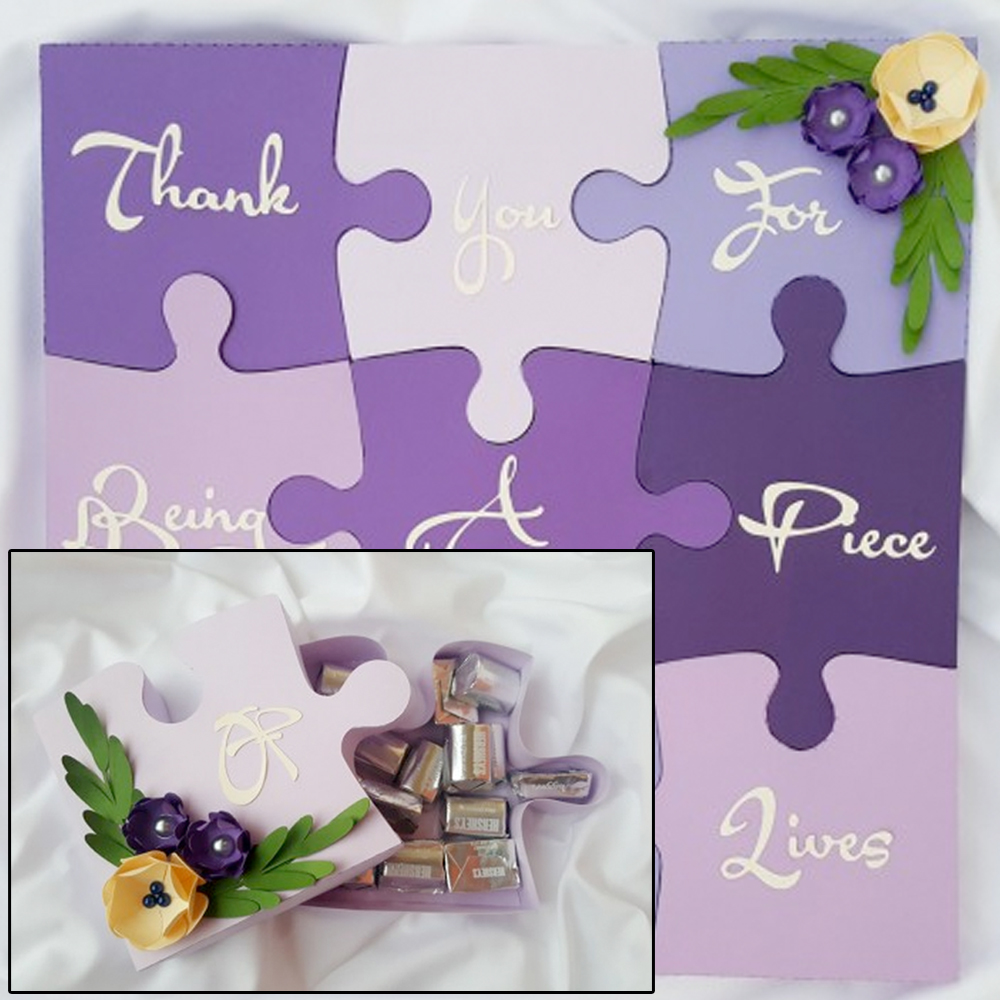
Have you ever needed a last-minute box? This very simple box is fast and easy to make, but looks like it takes hours.
Do you recognize those beautiful roses? They are from the Twirled Flowers that Amanda did last year. They are a great addition to this project, but you could leave them off for a more masculine look.
Here is the recipe and cutting files for this project!

Wow…so pretty…love it THANKS!!!
love the boxes keep them coming
Beautiful, can’t wait to try this one. I have trouble with my fold lines going too deep and then they are more like a perferation than a fold line. So I make a regular line and use the thinnest tip of the embossing tool. Or just make little cut lines on each side of the fold line. Any suggestions?
Wow, this is brilliant Klo, I love it. Thank you.
Gloria,
It depends on whether you want to use a second tool to do your fold line. I usually just use my blade and cut in two passes.
I make sure my fold lines are a different color than the cut lines. I select the fold lines first. The first pass is REALLY light, say a 11 or 12 pressure and a 1/2 or 2 blade. When that is done I go back to the cut control panel and I select only the outline color, not the fold line. I change my blade to the correct depth and pressure and cut again. This usually works for me.
Other people like to use the engraving tool to score the fold line. Obviously, that involves changing out the blade holder. I am kind of lazy that way so I rarely do it! 🙂
I do the same as Christine does, although, if I have something that will be opened and closed a lot, I will sometimes go to the engraving or embossing tool for my fold line.
What wonderful tips ladies! Thank you for them. I will have to remember this!