Hello crafty friends,
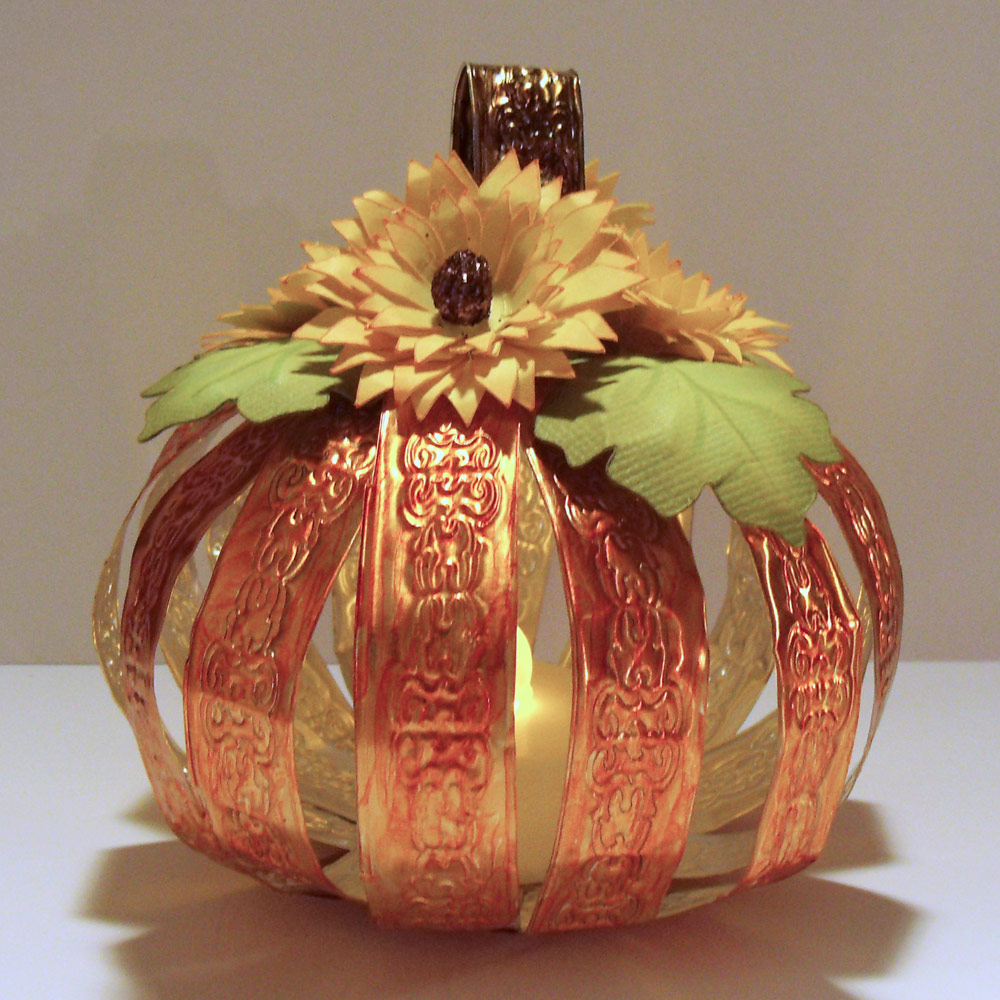
Melinda here with you today, and I have a super fun project to share with you. As I looked around my craft room, I spied some of that fun metal craft I had used on a previous project. I decided that I wanted to do something with it, but what? I headed over to Pinterest to see what would spark my creative juices. I was going through some pins….Like most crafty hearts….I can really get lost down the rabbit…err Pinterest hole! But then it hit…inspiration. I saw these wonderful little “pumpkins” made out of mason jar lids….HERE. I didn’t have the Mason jar lids, but I had my craft metal and my Pazzles!!! So I went to work designing the pattern for the embossing. I didn’t just want to cut the metal into strips. Once I finished designing the strips, I used the Pazzles Embossing Tool and embossed the pattern and then cut them out. I cut out a total of 8 strips. You can find the file for this project here: Pazzles Craft Room 3D Pumpkin File.

I then used some Craft Glue Dots to adhere them at the bottoms on angles. Because the metal is very thin and easy to bend, I simply bent them up to the center and added more craft glue dots. For the stem, I just cut a portion of the 8th strip and bent it into the shape I wanted. I adhered that to the top. In order to be able to remove the tea light I added to the inside, I left two of the strips un-bent. When the time came to bend them up and add them, I used a removable glue dot so that they would detach easily. Because my metal was silver, I decided to use my Copic markers to color the strips and the stem. I then cut out my sunflowers and leaves and added them to the top. This adds a pretty decoration and also hides the “mechanics”.
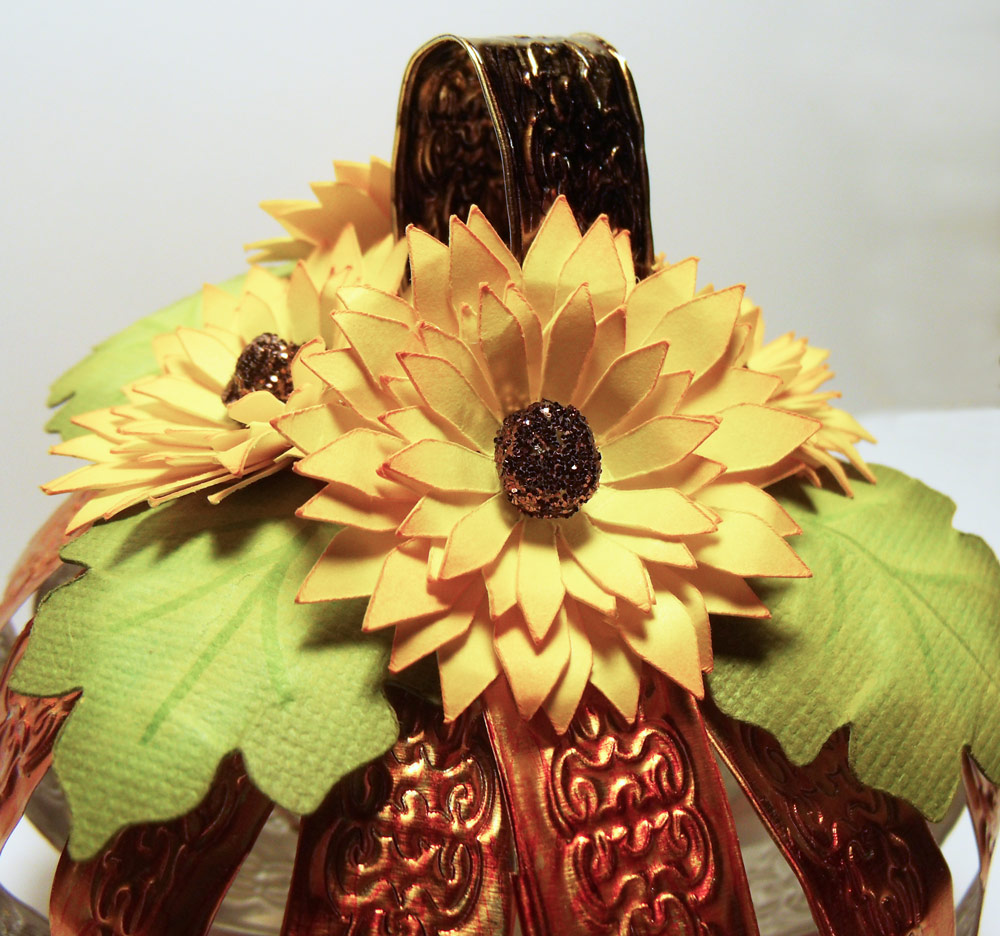
For the centers of the sunflowers, I used a 3D glue dot and “rolled” it into a bit of a ball. I then sprinkled some brown glitter onto it. This gives the centers of the flowers some pretty dimension. I also inked the sides of the leaves and used my McGill flower shaping tool to give them a little dimension so they would naturally curve with the shape of the pumpkin.
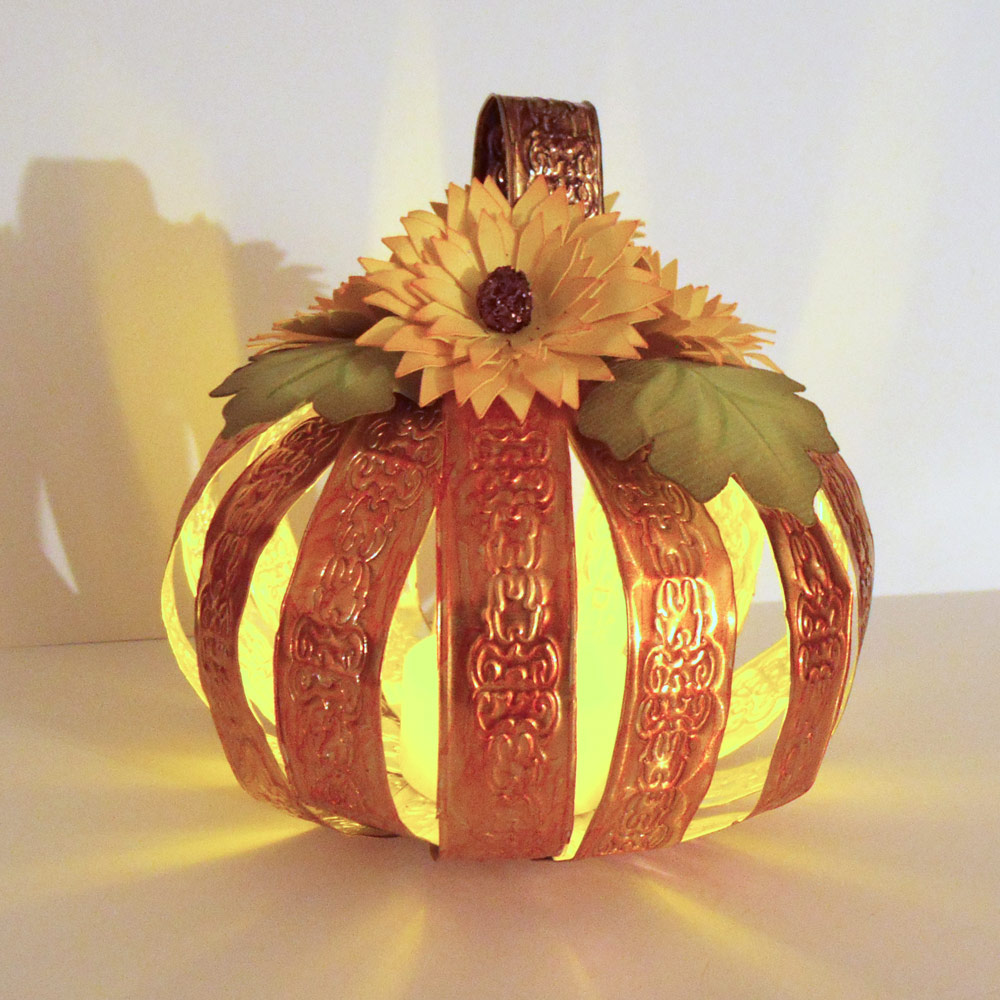
The last step was adding the battery operated tea light to the center. My beloved hubby helped me here. He actually went to the store and got them for me! I was so proud of him. The craft area of the store is like asking him to go into a highly contagious zone or something…lol! I thought it came out super cute and love the soft, warm flicker of the tea light. It will be a welcome addition to my fall decorations! I will have to make a few more!
~Melin

Supplies
Pazzles Embossing Tool
K&S Aluminum Metal
Copic Markers (Sanguine and Copper)
Glue Dots Regular, 3D and removable
Yellow and Green Bazzill Cardstock
Rain Forest Set and Wood Grain Set Cat’s Eye Ink Pad Sets
Brown Glitter
Thanks, looks like fun way try my embossing tool and work with aluminum
Stunning project which is a labour of love.
Thanks so much for this LOVELY project! I look forward to making this!
Oh Melin, this is awesome! The embossing is beautiful. Love this project!
THIS IS AMAZING!!!!!!!!!!!!! I hope I have some crafting time this weekend