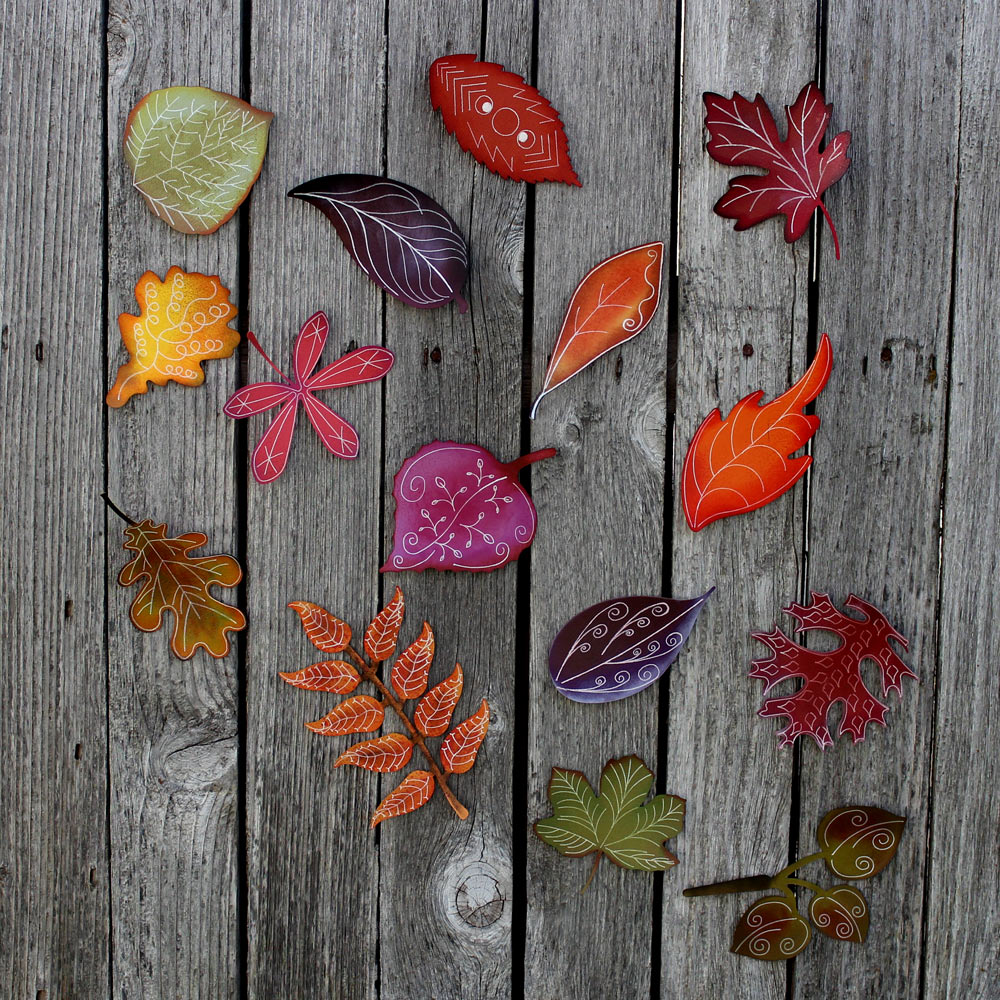
Autumn is my favorite season of the year, with cooler temperatures and gorgeous fall colors. The leaves with their multiple colors, shapes and textures always garner my attention. This month I wanted to try my hand at making stamps with my Pazzles Inspiration Vue, inspired by the wonderful fall leaves.
Pazzles stamp kit contains everything you need to create stamps—two different thicknesses of special rubber, cling mounting foam, a sanding block and acrylic block to mount your stamps. The Pazzles Craft Room has a video that clearly explains the entire process from finding an appropriate design to putting the stamp together.
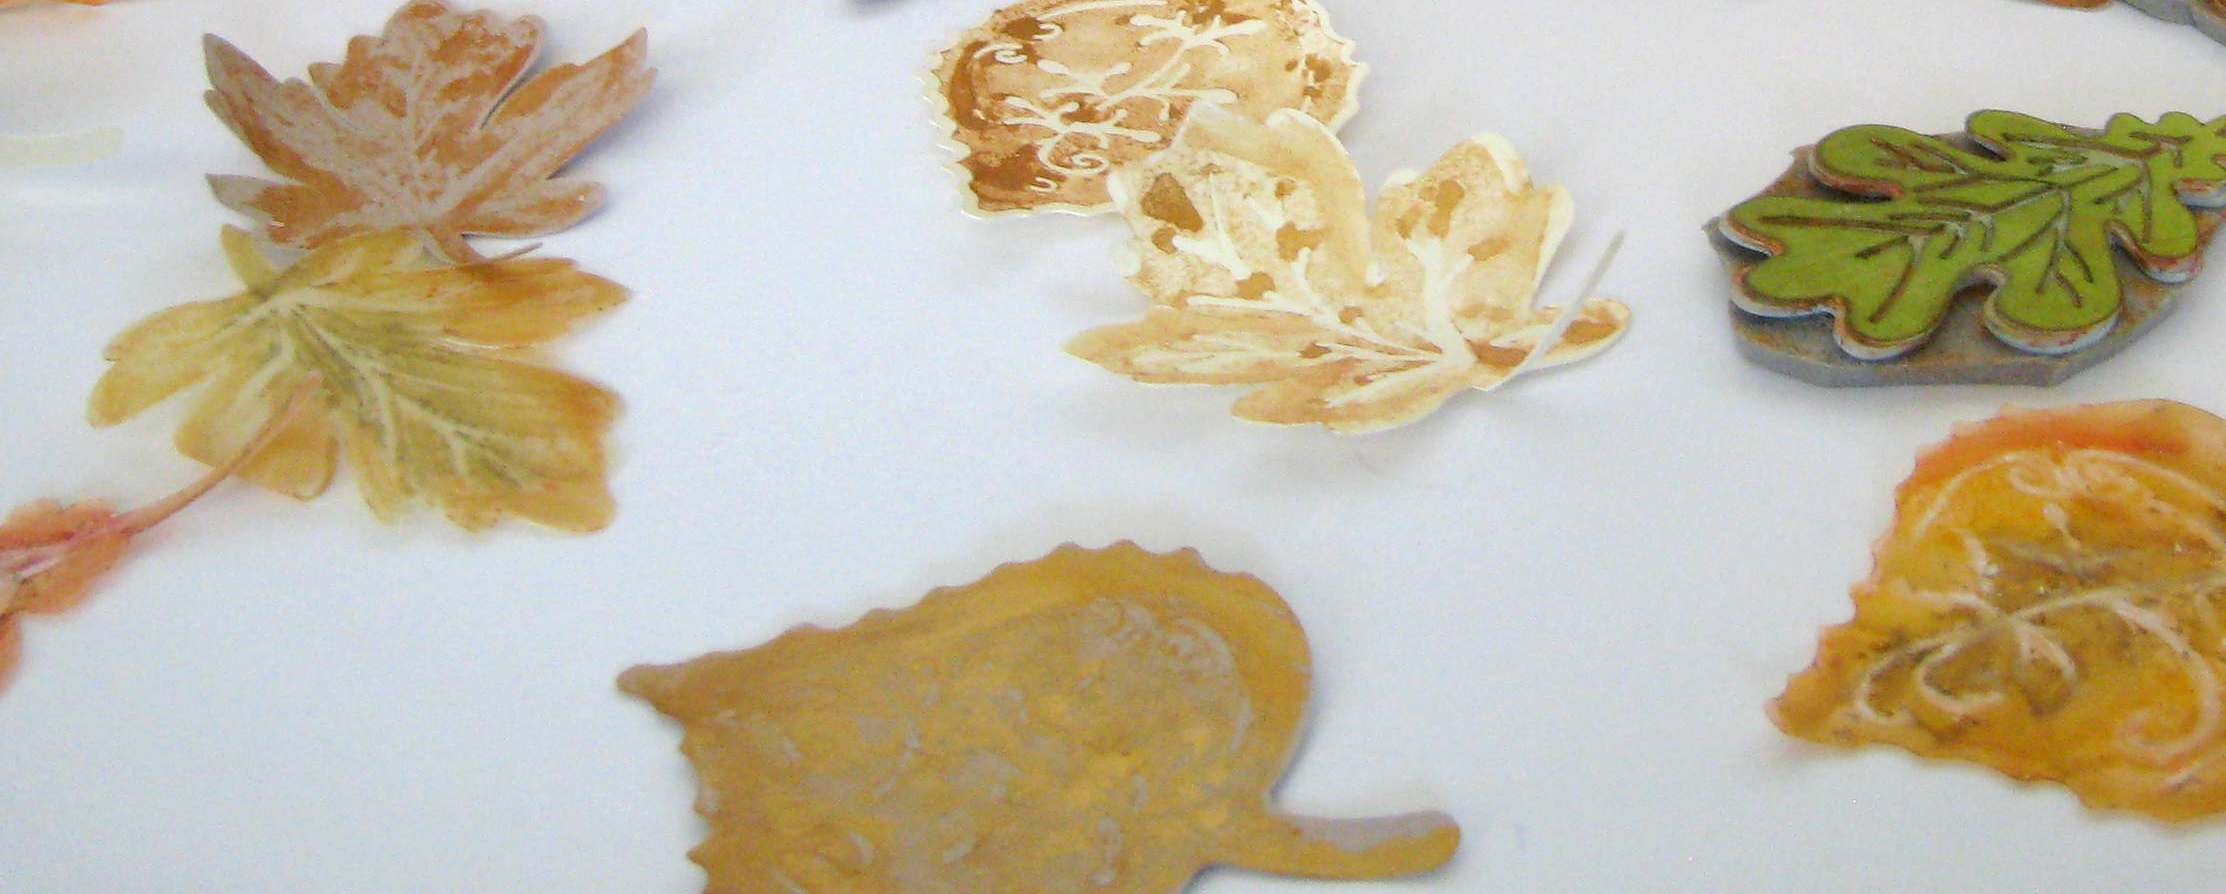
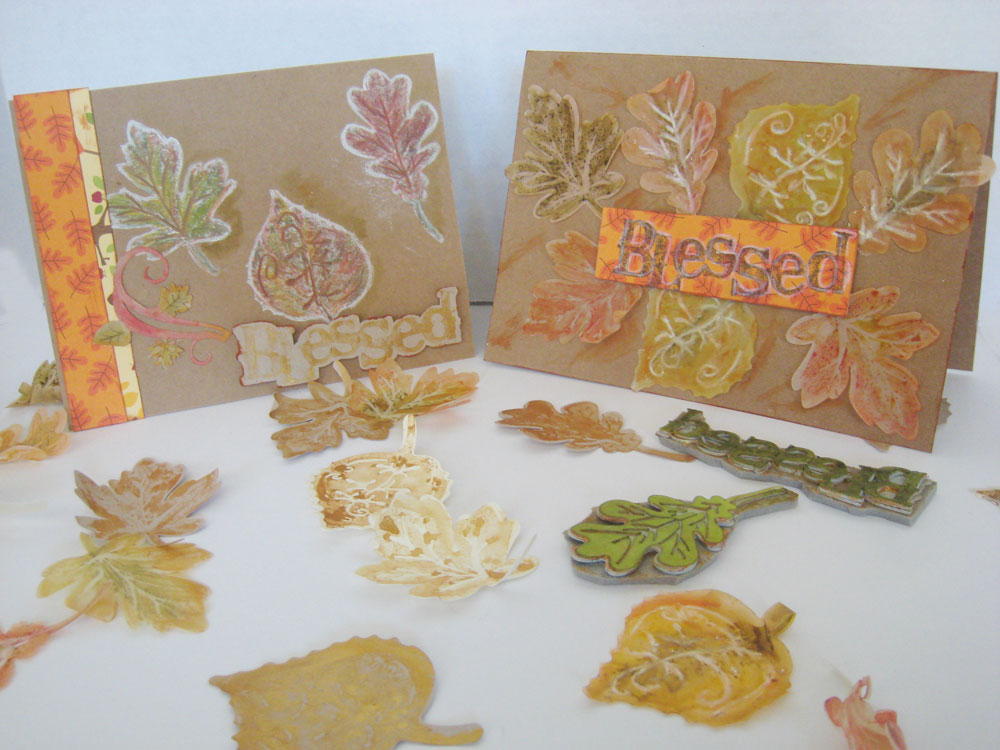
The Pazzles Craft Room Library has a collection of Falling Autumn leaves, and unable to decide which one to use, I chose three–Falling Autumn Oak, Falling Autumn Sugar Maple and Falling Autumn Swirl Aspen. Fall Word Titles contained the word “Blessed” which is perfect for a word stamp. It may be used for many projects and cards throughout the year, so I eliminated the leaf tail for the stamp. It can be added later for autumn themed projects. Creating outlines for each stamp was quick and easy, using the contour tool. I test cut leaves and sentiment outlines from vellum, toned tan drawing paper and regular cardstock, but preferred the texture of the drawing paper. The leaves were colored with watercolors, distress inks and white pigment ink.
The tricky part with stamps is figuring out what you want to stamp-the entire image, just an outline or create layered stamps. As a novice, the hardest part was trying to decide the preferred style and how many layers of each rubber to use. Pazzles rubber stamp material is easy to cut using the setting in the cutting window for the thick and thin stamp material. Increasing the pressure by 2 points for a cleaner cut worked best in my dry desert climate. Per the video, be sure to remove the excess material and use clear packaging tape to help assemble the layers. After some experimentation, I found that 2 layers of the thicker rubber and a final layer of detailing on the thin rubber gave me good results.
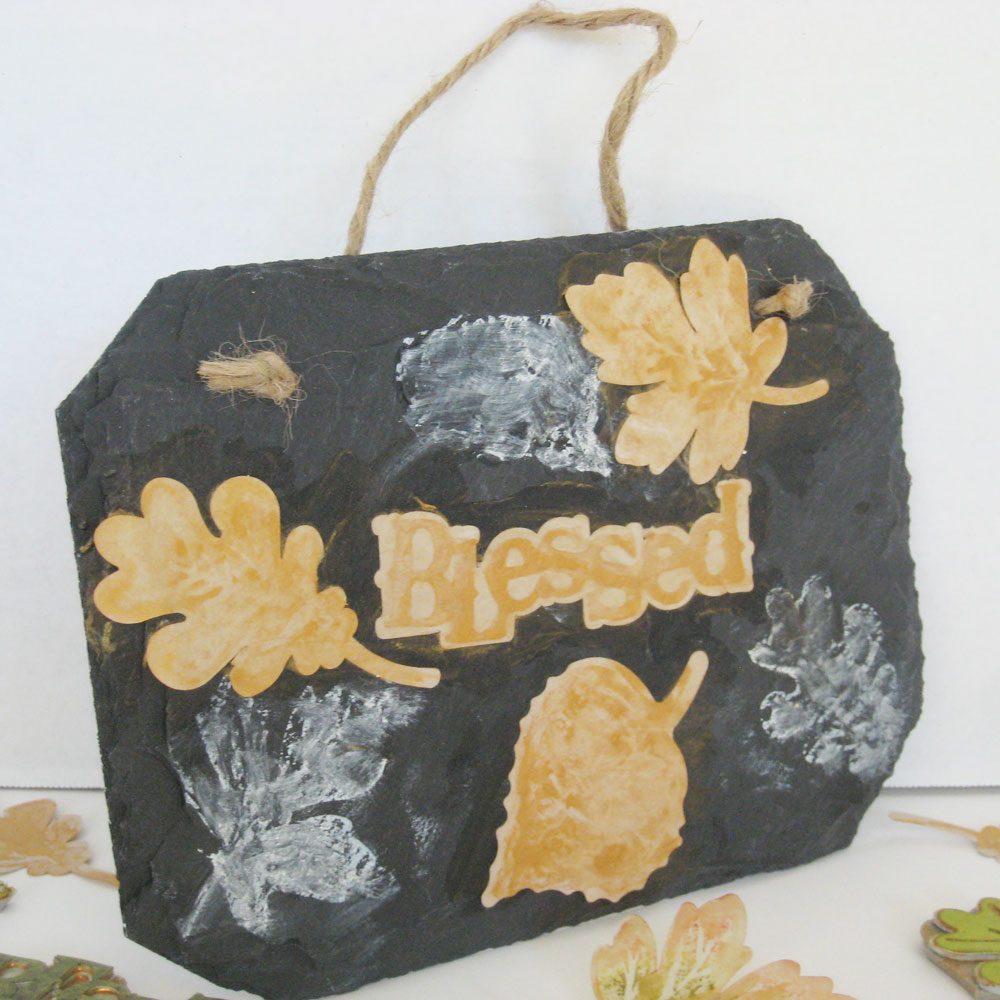
Cutting and assembling the stamps was the easiest part of the entire process, deciding what to make first was more difficult. A craft store sale slate hanger purchased last spring would make a great fall themed wall hanging. A chalkboard effect can be achieved by stamping directly on the slate with white pigment ink. The leaves were stamped using gold metallic water color paint on the toned tan drawing paper. The negative space of the word outline functioned well as a place holder for the positive piece. Lining up the word perfectly was a little tricky, but made manageable using the negative of the sentiment outline. Use gel medium to adhere the title and gold leaves to the slate background and seal the white stamping.
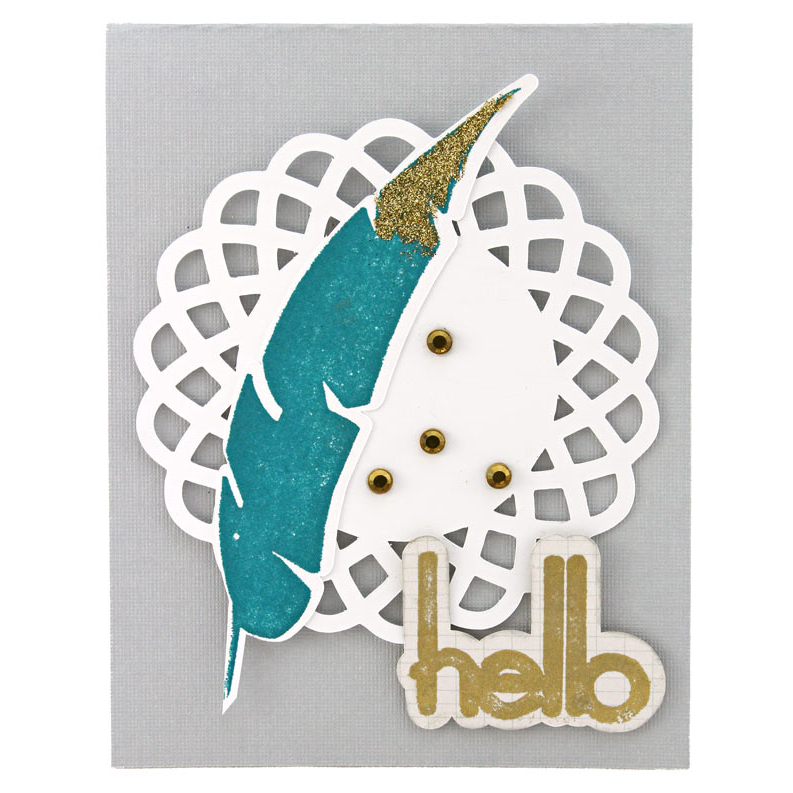
Leaf stamps are so versatile, especially if cut in a size that would work on cards as well as larger projects. Included in this post is a photo of two cards made using these stamps. I had a delightful time coming up with different ways to stamp and color leaves, creating a lovely pile on my work table, no raking required!
~Sheri
Supplies:
Pazzles Rubber Stamp Kit
Slate hanger
Hero Arts white pigment ink
Distress ink
Strathmore Toned Tan drawing paper
Gansai Tambi starry water colors set
Dina Wakely Gel medium
Kraft cards
Fall themed pattern paper scraps
Thanks for the detailed instructions and references to previous tutorials on cutting the Pazzles stamp material. I look forward to playing with this soon!
Wow! Thanks for show us this possibility. Love your leaves stamps. Now I want to have one of these kits.
Very nice! I haven’t stamped in a while. I think I may need to try this again.
Very Nice job. I have only cut out the stamp material one time. This is something I need to experiment more with.