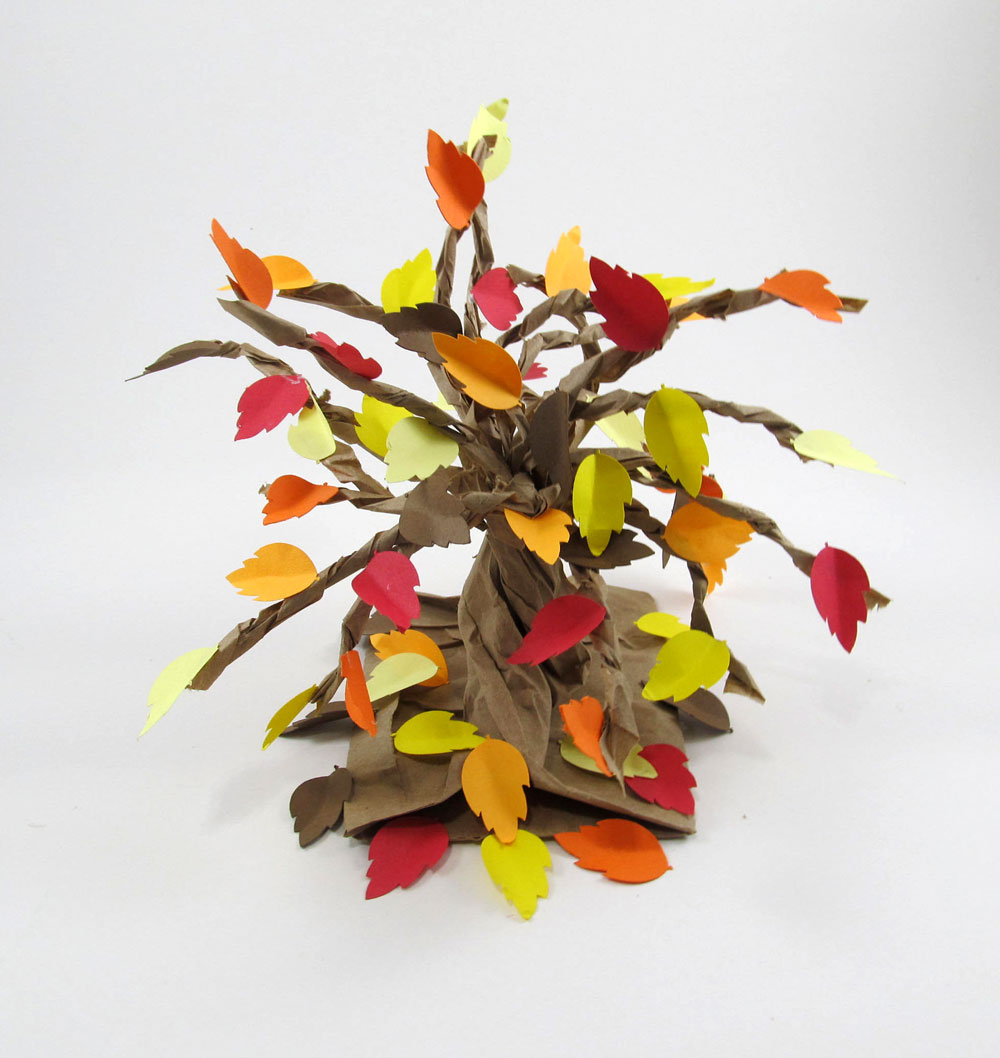
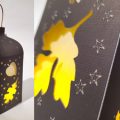
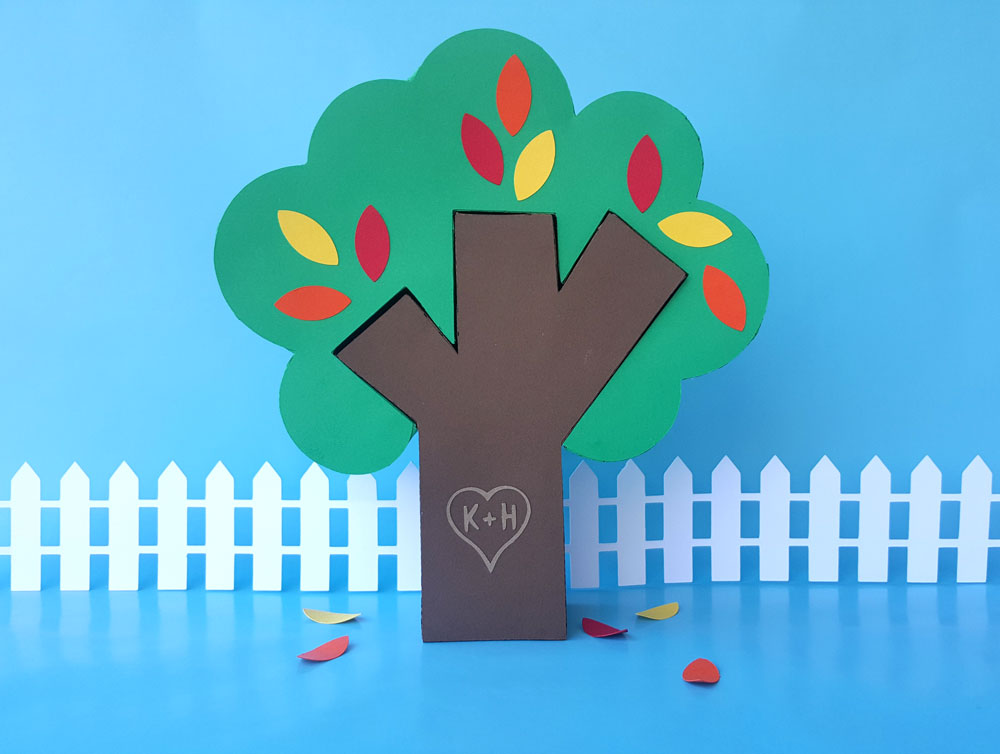
This versatile 3D Fall Tree design can be used as room décor for a variety of occasions. Cut in craft paper, it makes a nice centerpiece for the entire Fall season. It may be fully decorated with colorful leaves, or it may have bare branches with leaves scattered at its base. Cut in black, it becomes a spooky tree that can serve as host to numerous critters from the Craft Room Library, such as the spider, web, black cat, and bat used here.
The project starts as a 3D Lunch Sack from the Pazzles Craft Room, made out of light weight paper in your color choice.
My first tree was made from recycled craft-colored mailing paper. My Vue cut the bag and slits, which ultimately become the branches. The bag is cut from two 8.5”x11” sheets of lightweight paper, and glued together at the sides. I love how I can cut one piece, without the outside line, using the entire sheet of paper, then replace with another sheet, and use the repeat cut button on the machine for cutting the second piece, which is identical to the first. There is a tab on the left side of each sheet to which adhesive is applied. Here you see the two pieces glued together.
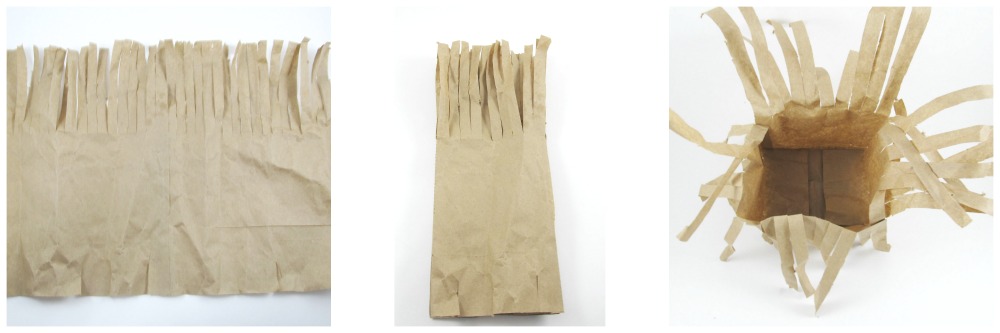
Next, the right side is wrapped around to overlap the tab on the left, to which adhesive has been applied. It begins to take shape as the score lines forming the sides are folded. The side center line is a valley fold, while the other two lines on each side are mountain folds. It is beginning to look more like a lunch bag with a mane!
To form the bottom of the bag, I pinched the angled score line next to each slit to the inside. I applied adhesive to the inside of the remaining two bottom flaps. Folding the bottom edge in towards the center on the score line, all the way around, formed the bag bottom. With a hand inside of the bag, I was able to press the bottom pieces into a box shape for the bottom of the bag.
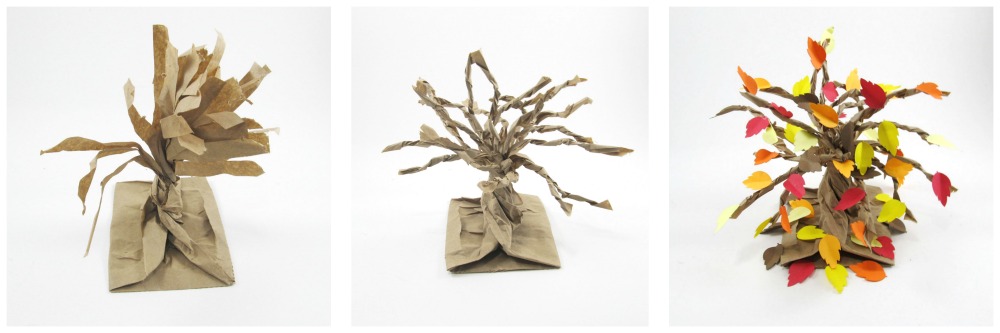
The bottom of the bag serves as a sturdy base for the tree. With one hand I held the bottom of the bag firmly in place on the table. With the other hand I bunched up the uncut sides of the bag, and twisted to form the “trunk” of the tree. The tree started taking shape!
The cut strips became the tree branches. I took two strips at a time, pinched them in half close to the trunk, and twisted them together, all the way to the tip of the strips to form a branch. I found that lighter weight paper was easier to twist. Stiffer or heavier paper often tore branches off at this stage. Not to worry, though, because I was able to continue creating branches using the strips that tore in combination with the strips that did not come off. Pinching them in half at the base of the branch and twisting them together made the branches stronger.
Now the tree can be used plain, or it can be decorated. I found an appropriate leaf to use in the Pazzles Craft Room, cut off the stem at the base of the leaf design using the scissors tool in the InVue software, resized it to about 7/8” high, and cut ten in each of six different colors of text weight Astrobright papers. Again, I cut a group of 10 leaves from one color paper on my Vue, switched to the next color, and used the repeat cut button to cut again, for each of the 6 colors. To give these leaves a bit of dimension, I folded several of them at a time in half, loosely. I added a dot of glue on the base of each leaf and glued it in place on one of the branches. The variety of leaves filling the branches produced a very colorful fall tree.
Cutting the design from black paper makes a spookier tree that can also be used bare, with lots or few leaves, and added seasonal characters if desired. My experiments with papers of different colors and weights produced quite a forest of trees!
I’ve included the files for the tree below.
~Julie
Become a Member!
By becoming a subscriber to Pazzles Craft Room you will have access to this project as well as hundreds of other projects, thousands of cutting files, and so much more!Get Pazzles Craft Room!
Join Now for only $19.95!

Great job Julie–I’m going to have to try this, would have never thought to use a paper bag pattern!
Thank you so much Julie. I have always wanted to make these trees but hadn’t stopped to find out how. Now I know 😀