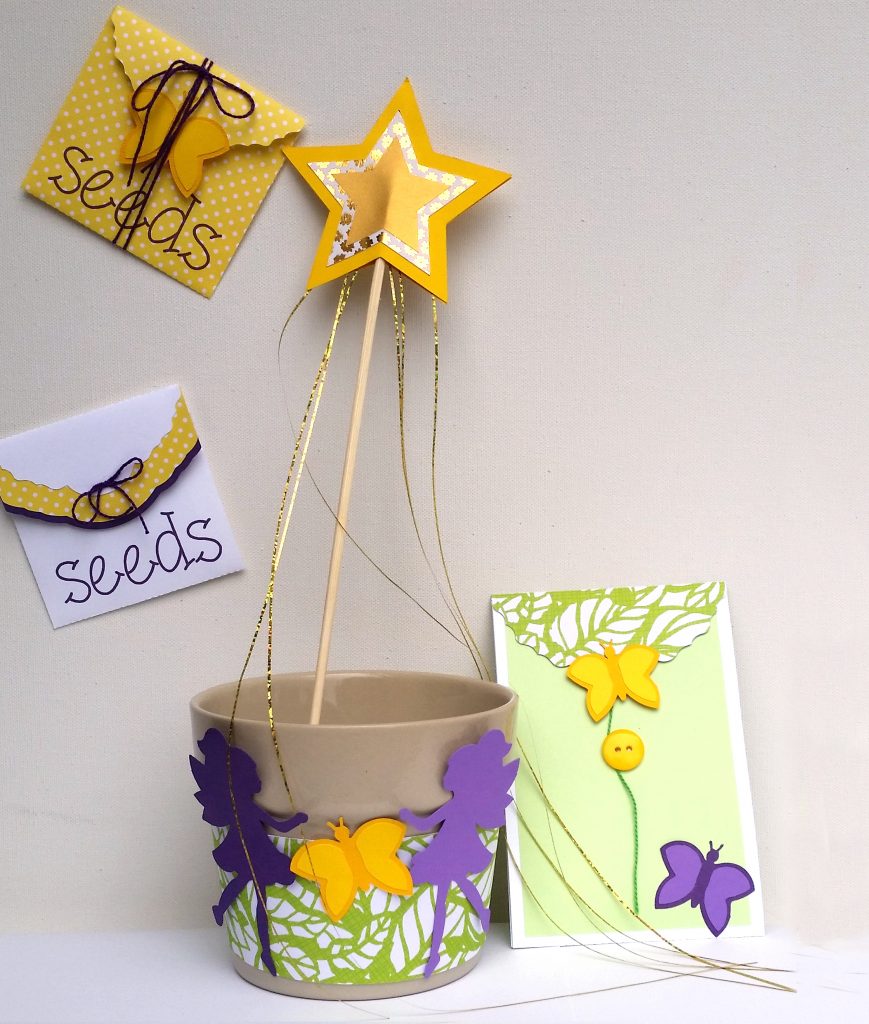
Create a wonderful Magical Faerie Garden Party for a special young green thumb in your life! With Invitations, decorated Seedling Pots, Magic Seed Packets, and Magical Faerie Wands and a little potting soil, your child’s guests will be ready to make and take a fun party favor that you can customize with your choice of papers and seeds (I recommend nasturtiums or marigolds!).
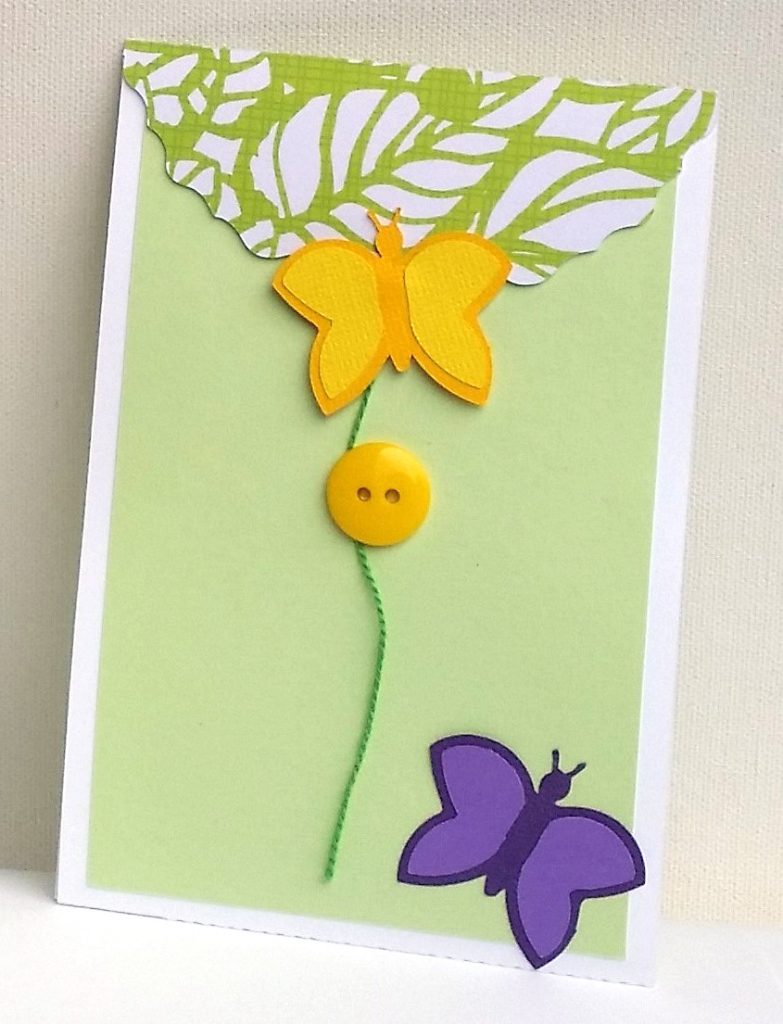
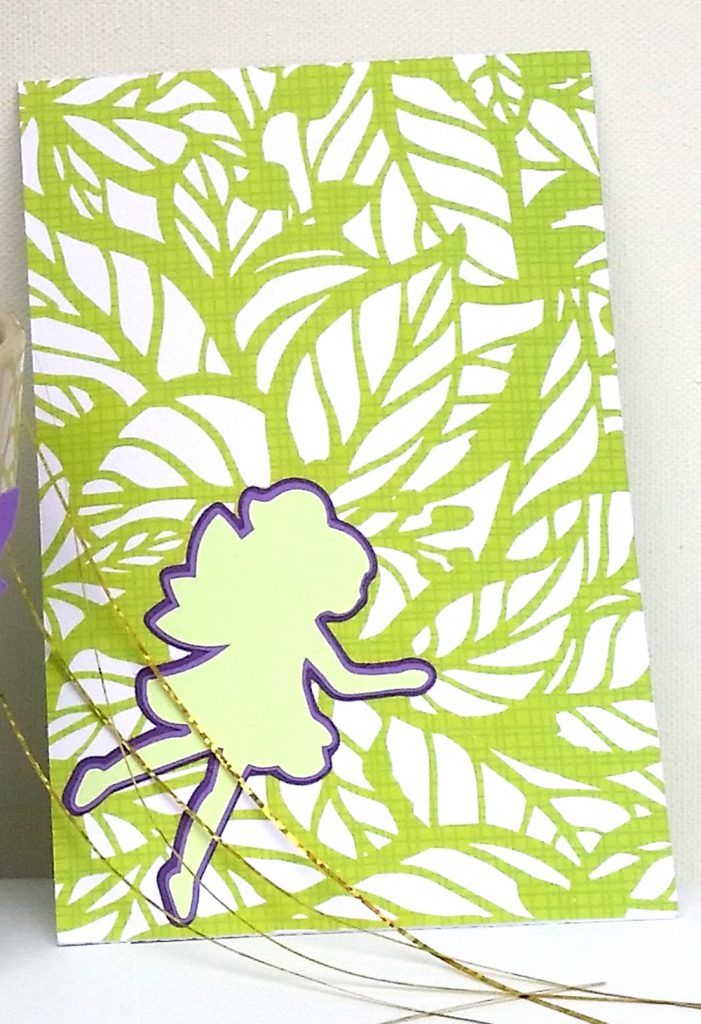
Invitation: Give your guests all the details with an invitation made from the Scrolled-Flap-Envelope file. For the outer Invitation, I resized the entire file so that the main area of the liner/insert with flap was slightly smaller than 4” by 6” so that the finished Invitation could fit into a standard envelope for 4” by 6” cards. I cut this piece (the one with the flap) from green leafy paper from the “Boho Tropical” Paper Pad from Craft Smith using Pressure 13 for the cut lines and Pressure 6 for the fold/kiss-cut lines. As an embellishment, I selected the fairy from the Pop Up Fairy Card file, made her all one color and welded her together. I sized her to fit on the outer Invitation in the left corner and outlined her at 0.03, then outlined the outline of her also at 0.03. I cut the two outlines out of purple and lavender cardstock from Craft Smith and the fairy from lime cardstock from Pazzles. I adhered the fairy and outlines to the outside of the invitation with Scotch Permanent Glue Stick.
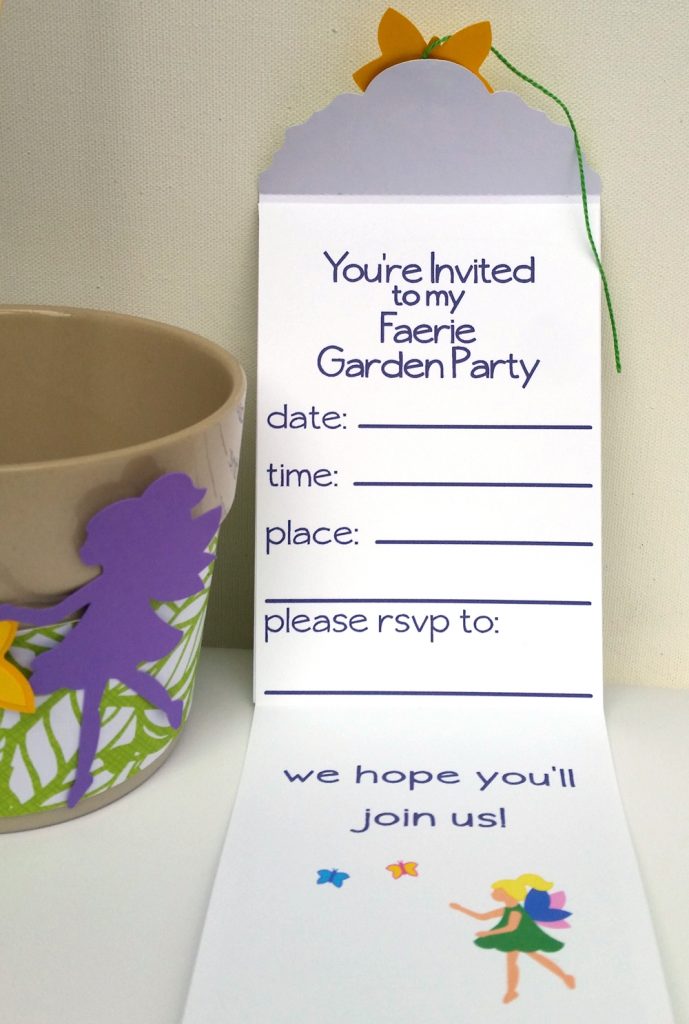
For the inner Invitation, I adjusted the card/insert (rectangle without flap) so that the top section was this same size as the outer Invitation (excluding the flap), placing a kiss-cut line marking the bottom at nearly 6 inches, then extending the rectangle downward to 11 inches so that the date, place, time and rsvp information can be printed on this piece on 8.5” by 11” paper and then cut. To the bottom portion, I added the fairy from the Pop Up Fairy Card file after modifying her with colors from the Color Pallette tools. I duplicated the head/body piece from which I created a hairline by opening the paths at her nose and neck and connecting them to look like her bangs and side hairline (discarding the rest of the original head/body lines). I outlined her new hair with a 0.008 outline in yellow so that it would be sure to overlap the head/body portion of the image. I added butterflies from the same file, which I shrunk and colored using the Color Pallette. I added a cut line at the left and right side of the rectangle that I had used to form the inner Invitation (so as to use as few cut lines as possible, utlizing the top edge of the paper), then discarded the rectangle and grouped all; I then used the Multiply Tool to make a copy without space added to the right. Then I ungrouped the new set on the right and deleted the left cut line since there is one on the other grouping on the left. I also added registration boxes to help with aligning the Inspiration Pro. I Print and Cut the inner Invitation (using Pressure 6 for the kiss-cut fold line, then 13 for the cut lines) and then adhered the date portion to the plain side of my outer Invitation so that the printed fairy and butterfly portion of the inner Invitation can fold up and the flap of the outer Invitation can fold down over it to form a tri-fold style card that fits into a standard envelope for 4” by 6” cards. I added an inline rectangle (0.18 inline from the approx 3.746” by 5.54” surface area of the card without the flap) of lime green paper to the front side of the inner Invitation. I made a decorative “seal” for the flap with another butterfly from the Pop Up Fairy Card file using a glue dot to adhere the embellishment to the flap and a dab of Scotch Permanent Glue stick to the card base (this tends to make the embellishment stick more to the flap than the card panel when the recipient opens it). A ripped bit of washi tape would also be cute, with or without the shaped embellishment(s). I made another butterfly with the same shape but different paper for the corner.
For the inner Invitation, instead of using Print and Cut, you could also choose a Single Stroke font and use the Pen Tool for a lovely effect, or use Print and Cut for the “form” and fill in the information with a Single Stroke font using the Pen Tool. You can also handwrite the information on the lines. You can write the guest name on the outside panel with either the faerie or the butterflies.
Flower Pot Sleeve: I used the cup sleeve from the Double Cup Coffee Carrier file and enlarged it as big as I could fit on a 12” by 12” cutting area in the software (fitting it diagonally to utilize the most space). I then duplicated it and rotated it to more-or-less horizontal orientation (with the curves arcing up) just to work with it. I clicked on the shape and then used the Zoom Selected tool, then I used Open Path on the lower-leftmost and lower-rightmost points of the cup sleeve shape and then selected the separated bottom piece and moved it up about an inch (100 clicks of the up arrow, in this Zoom Selected view). Then I lined it up with the left and right edges of the shape and reattached it. This made a larger and shorter version of the cup sleeve for my Pot Sleeve. I bent the curves a bit more using the Move Point Tool to get it to curve better to my particular pot. You can make similar adjustments to fit whatever pot you’d like to decorate. I used a 4 ¼ inch pot from IKEA. I cut the Pot Sleeve from a leafy paper from the “Boho Tropical” Paper Pad from Craft Smith.
I made the fairy (welded as above) and butterflies embellishments from the Pop Up Fairy Card file and cut them from cardstock from my stash. I adhered them to the Pot Sleeve with Glue Dots. These could be made ahead or you could give the components (pre-assembled butterflies and faeries and the sleeves) to your guests with glue dots or sticks to adhere them how they would like; either way, I would recommend putting them on the pots after they plant the seeds and the pots have been wiped off so that the dirt doesn’t get on the paper; you’ll also need to use a couple of glue dots (or tape in the back) to keep it from falling down the pot.) Also, you could coat the sleeve and pieces with Mod Podge Dishwasher-Safe if you want them to be resilient to drips or spills that might occur when regularly watering the seeds.
Seed Packets: I used the Scrolled-Flap-Envelope file which I resized to approximately 3” by 3” by creating a 3” by 3” square to measure to, selecting the whole Scrolled-Flap-Envelope file and dragging the side and top handles until the center of the envelope roughly fit just larger than the 3” by 3” square. I detached the flap using the Open Path tool and dragged it shorter with the top handle, then reattached it with the Join Two Points tool. To span the gap, I created two outlines of the detached flap, one at 0.4 and from that, one at 0.08, which I cut from Recollections Yellow Pin Dots paper and purple textured cardstock papers, respectively. I glued them onto the envelope flap with glue stick. Alternatively, I made an extension to the flap that says “seeds” so the envelope can just be cut as one piece (extending the flap so that the side is 3.557 inches, then cutting off the rounded part plus one inch, flipping it and reattaching it, then subtract welding it with the larger piece (make the main piece a solid color and the small piece solid white before using the Subtract Weld tool. I disassembled and rearranged the letters from the Wise Words Cutting Collection: Ribbon Banner file to write “seeds” on the Seed Packet and used the Print and Cut capabilities to create the packets quickly. You could spend a little more time and get a beautiful result using the Pen Tool and a gold gel pen. I embellished the flap of one version of the Seed Packet with a bow made from embroidery/craft floss and attached with glue stick, the other with a butterfly borrowed from the Pop Up Fairy Card file and an embroidery floss that wraps around a button (adhered with a glue dot).
Magical Faerie Wand: After your guests plant the seeds from their Magic seeds Packets, they’ll each need a Magical Faerie Wand to bless the seeds and activate the invisible Faerie dust that helps the seeds to grow (*grin*). I used the stars from the Sunburst Star Card file to create the Magical Faerie Wand topper, cutting two of each star shape from gold and yellow cardstock papers I had in my stash and from a gold flowers sheet of cardstock from the “Boho Tropical” Paper Pad from Craft Smith. I assembled each set of stars with glue stick and sandwiched between them some gold tinsel and a wooden skewer (with the sharp end inside the star) using hot glue. You could use gold thread, gold embroidery/craft floss or anything else similar you like!
I hope you’ll enjoy making these pieces and have wonderful success with a Magical Faerie Garden Party of your own! Happy Spring!

Become a Member!
By becoming a subscriber to Pazzles Craft Room you will have access to this project as well as hundreds of other projects, thousands of cutting files, and so much more!Get Pazzles Craft Room!
Join Now for only $19.95!

Awww, so cute! Really pretty.