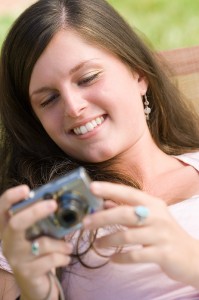
My daughter started her Sophomore year last week, and like all parents on the first day of school, pictures were a top priority for me! I have to admit I’m not much of a photographer, but I do my best.
Oftentimes in scrapbooking we aren’t thinking about the photograph as much as we are thinking about showcasing our photos. This got me thinking, what are some inexpensive ways to ramp up your photography skills, put your camera to good use, and start capturing some super shots for your next scrapbooking project? A few sources to check that can help get you started are contacting your local camera store or community colleges for classes or utilizing the web by searching for “free online photography classes.”
Another great resource is your friends! I couldn’t think of a better way to get tips than from someone who loves taking photographs, is good at it, and who also wants to help encourage your creative process. Since we are all friends here in the Craft Room, what are some photography techniques that have worked well for you? Share them with us in the comments below!
~Tatum


Since I know one of the friends Tatum mentions is me, I figure I’ll get this ‘Just Chatting’ session rolling with my favorite tip. It’s not really MY tip — it’s actually my dad’s! He retired from the military and became a camera repairman. He will always know more about cameras than I do. But he taught me well! Here’s his favorite tip to teach new photographers because it’s so easy for anyone to do!
Learn about the aperture settings for your camera: what they are, and the whens, whys, and hows of using it. Aperture is the setting on your camera that tells it how much distance — depth in front of and in back of your subject — to make in focus in the picture. A small aperture setting means that very little will be in focus — a good setting for close-up portraits, pictures of flowers or food, or pictures with a really distracting background that you want to blur out. A large aperture setting means everything will be in focus! This is great for landscape shots.
There’s a catch, though! Changing your aperture settings will affect your shutter speed. Small aperture settings actually let a lot of light in to the camera, so this means you can have a fast shutter speed. This is good news for indoor photography! Large aperture settings, where everything is in focus, let very little light in to the camera, so you will have a slower shutter speed to compensate. Outdoors on bright days for landscape shots, this is fine. But at darker times, like sunrise, you might want a tripod so you don’t get hand shake from slower shutter speeds.
How to do it:
On SLR cameras — look for the mode marked “Av.” This is “Aperture Priority Mode” and means that you can set the aperture yourself to be small or large, and the computer in the camera will adjust the shutter speed automatically to match. I love it, and it’s my favorite mode to shoot in!
On Point-and-Shoot cameras — using the “Flower” will give you the smallest aperture. “Portrait” mode should be small as well. “Sports” or “Action” mode should also have a small aperture to give the fast shutter speed you need for action, but how your camera really handles that will vary by make and model — I’d check the manual. For a large aperture, use the landscape mode. Some point and shoot cameras will have a full manual or Av priority mode. If that’s the case, awesome!, because now you have full control of what’s in focus.
Amanda H.
Thank you for that very educational Tip! I learned alot from it. Thank you.
One of my favorite things to do with light, is try to get light streaming from a window to light your subject from the side. This give a natural bright side/shadow side to your subject. Play with it and you will see what I mean.
the rules of three when taken a photo my camera has lines come up for me in the view finder and that helps me. also you use it on your scrapbooking page. When you are taken a photo try the “s” that make your eye follower the “s” curve it draws you into the photo. Lightroom and photo shop help after taking a photo too.
When there is a photo that I know that I have a limited time to catch, IE..blowing out birthday candles….sometimes I will turn on the setting that allow the camera to continue taking photos for “x” amount of frames even after I release the shutter. That way, I am sure to catch at least one good shot. This is also good to use with group photos because ultimately, someone will have there eyes closed or mouth talking, etc.
I think the best things you can do to improve your photography skills are:
1. Know your camera, it’s functions and how to control them.
2. Know why your aperture and shutter speed are important.
3. Read about composition and the rule of thirds.
4. Read about depth of field and how to use it.
5. Look at good portrait, landscape and photo-journalist
pictures for composition and exposure. Look at paintings
for composition and color. Photography is painting with
light.
6. Keep in mind how the picture will be framed in your
project i.e. space for paper piece overlay,
complimentary colors, font overlays etc.
7. Find a friend or family member with a good grasp of
the fundamentals take you out on a photo safari.
8. Pre-Plan a picture then go shoot that picture.
Well that is my 2 cents worth, hope it’s helpful.
Remember: Having fun is what’s important, the rest is just study and practice.
Steven.