I hope you had a great Fourth of July! I know I did. I ate way too much food, stayed up way too late and had way too much to clean up on Monday. Now that I have recovered it is time to look at the pictures I took. I have 9 grandchildren who live nearby and the annual fireworks-in-the-backyard event gives me lots of great pictures to scrapbook.
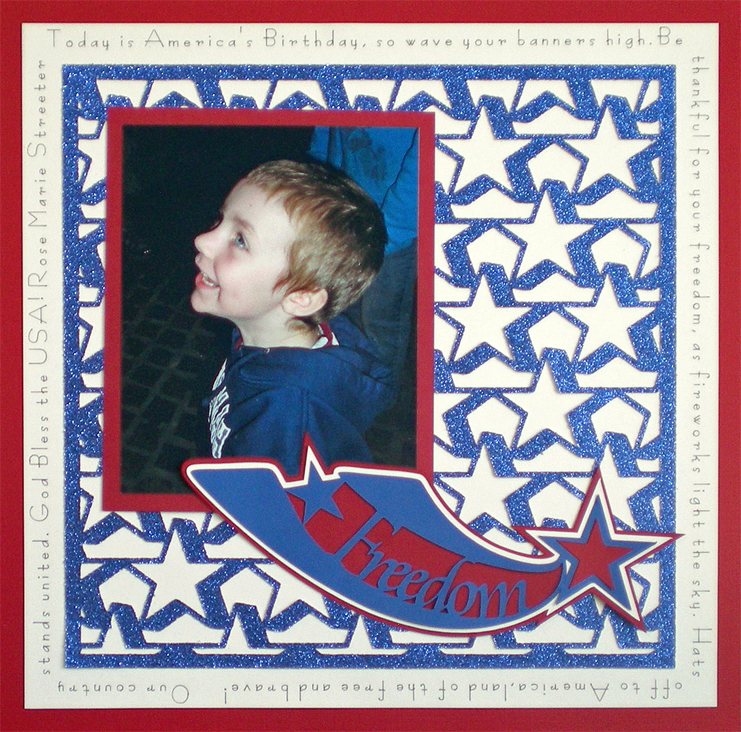
I had one picture of my grandson, Jeshua, from last year that begged to be the ONLY picture on the page. I like the idea of featuring a single picture on the page but don’t always want to fill the page by using a lot of journaling. That is when I like to use paper lace overlays. They fill the page, add dimension and are a lot of fun to design. Pazzles sells a wonderful CD of paper lace designs but you can also make them yourself.
Two weeks ago Amanda showed you how to make paper lace that had random images placed at different angles to each other. This week I have made a video that shows you how to make paper lace that has structured rows. I find them very quick to make. Simply choose a shape or word, multiply it across and up, making sure the edges overlap and use WYSiWYG to convert it to paper lace. (Hint: WYSiWYG really means what you see is what you get. So you can create the illusion of overlap by thickening the lines before you use WYSiWYG.) If you want, you can add a border (or frame) around the edge of the lace like the stars paper lace I made for my scrapbook page.
Today I am loading you up with tutorials and instructions so make sure to snag them all. The Basic Structured Paper Lace is a good beginning project for paper lace. The Freedom Page tutorial is an Advanced project and comes in 2 parts. The first one shows how to make the paper lace with offset rows and a border around it. The second part shows you how to make the rest of the Freedom page shown here. There is also a pdf file of the instructions for the Freedom page as well as the actual cutting file for the page.
Happy Designing!
Chris


I love this page layout. It’s a tutorial I will be checking out.
Great tutorials Christine Thank You!!
I always love lace…this is really cute!
This is great! Your grandson is adorable ! Thank you for the tutorials. Dana
I don’t have the time to do scrapbooking and only wish I had seeing your stunning layout. I like the use of the pen tool around the page and the paper lace. Thanks for the inspiration.
This is grat. Can’t wait till I have time to try this out.