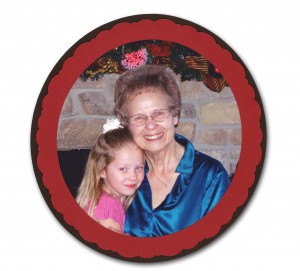
 I hope you all had a wonderful Holiday Season! My house was filled with family including children and grandchildren. There were 22 of us all together! That gave me many opportunities to take pictures to remember the fun and the love we shared. I am sure many of you did the same. Now, I want to use some of my favorites to create scrapbook pages and gifts. Since I am not a professional photographer I will need to crop my photos to remove unwanted hands, heads etc. I especially love to crop into ovals and circles; it gives such an elegant feel to the photo. The trick is how to match my photo mat or frame to the cropped photo. I am sure you will not be surprised to find out that there is a great cropping tool in the Inspiration Studio Software.
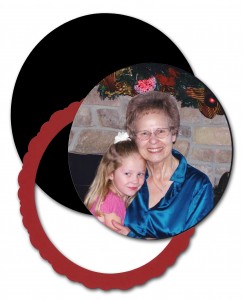
You may be tempted to fall back on your old oval cutter or template and blade but once you have cropped the photo how will you match the oval frame to the photo’s oval? Then how do you add a beautiful cut edge to the border. Surely not with hand held scissors! It is enough to make you resort to rectangles and squares for all your cropping. The Cropping Tool solves that little problem very nicely.
I love this tool but there are a few tricks you should know to perfectly postion it for cropping. It is easy once you understand how to use the rulers to guide you. Then you can make custom mats and frames that will be perfectly matched to the cropped photo. It may be fairly easy without the Crop tool if you are making a rectangle but circles and ovals are hard to match up without bringing the photo into the software. Watch my video to learn how to crop the photo, create matching mats and frames and then print and cut.
PS You can even print and then cut the photo out using your Inspiration cutter. Check out Print and Cut if you want to know how!
Here’s to the return of the elegant cropped oval!!
Chris


THE video stops in about the middle, which is very inconvenient. I don’t know how to make a frame for my picture.
I just checked all 3 videos to make sure it was not a rendering problem. Since I can view all of them I’m guessing it is an internet problem. It may just be that your internet provider is bogged down. Try watching the Low-Res version and see if that helps. I imagine there is a lot of traffic on the internet since all of the kids are out of school. 🙂
I also was able to watch the video all the way through. I had a friend last night complaining that his internet was twice as slow as usual due to everyone being off for the holidays so I think Christine is on to something 🙂 HTH!
I was wondering when you fixed the scalloped edge you didn’t join the two points. Will that cause a problem when cutting out the object. I have had some alphabets do this and I had to go in a join the points.
Brenda
Good “Point”. 🙂 Actually, the points joined automatically, as they sometimes do when you move them close to each other. I failed to make note of that. Definitely make sure the points are joined by using the Join Two Points tool.
This is so great. My neice just got married in September and I have alot of pictures and now I will scan them into my inspiration software and setup my layout. I didn’t think of this. Thank you and HAPPY NEW YEAR TO ALL