![85617058[1]](https://www.pazzles.net/wordpress/wp-content/uploads/856170581-300x199.jpg)
At some point in our journey to “Cutting Enlightenment” we all want to create a card or box. This usually occurs when we get beyond the simple single fold card and want to do something a bit more complicated. We are familiar with the scoring tools used by card makers: the ball tipped embossing tool, the bone folder and the scoring blade for the slicer/cutters. But what can be done with the Inspiration? Surely there is some nifty way to score fold lines with our amazing machine.
In fact, I have come up with at least 9 different ways to score a fold line. It all depends on what look you want, what tool you have and how much time you want to spend on it. Let me try to explain all of your options, then it is up to you to decide which to use.
Using only the Cutting Blade: (See Pictures below text.)
- The easiest, simplest way is to create a dashed or perf line where you want the folds and cut everything out all at once. This is fast and efficient but it does sometimes result in the folds breaking if there is a lot of opening and closing on the fold.
- You can also cut using 2 steps. First, give the perf lines a different color. Then cut the perf lines first at a lower pressure and shorter blade length. When done, DON’t remove the mat just increase the pressure and blade length and cut the rest of your project. (Remember, to select the color box in the Cut Control Panel.)
- If you don’t like the look of perfed folds you can score a light cut line using the 2 step process. Leave the fold lines solid and give them a different color. Set your blade length to 1 and using a VERY light pressure score the lines. Then increase the blade length and pressure to finish cutting the rest of the design. The disadvantage to this is that it can weaken the paper to the point that it cracks on folding. Also, it does let a white core show so you will need to ink it.
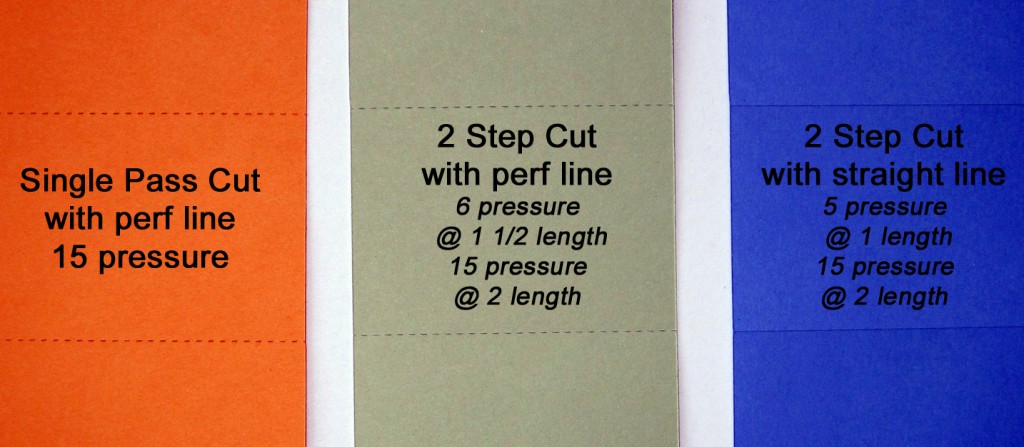 Reminder for ALL 2 step methods: When you are done with the 1st step- leave the mat in the machine and don’t close the cut control panel!
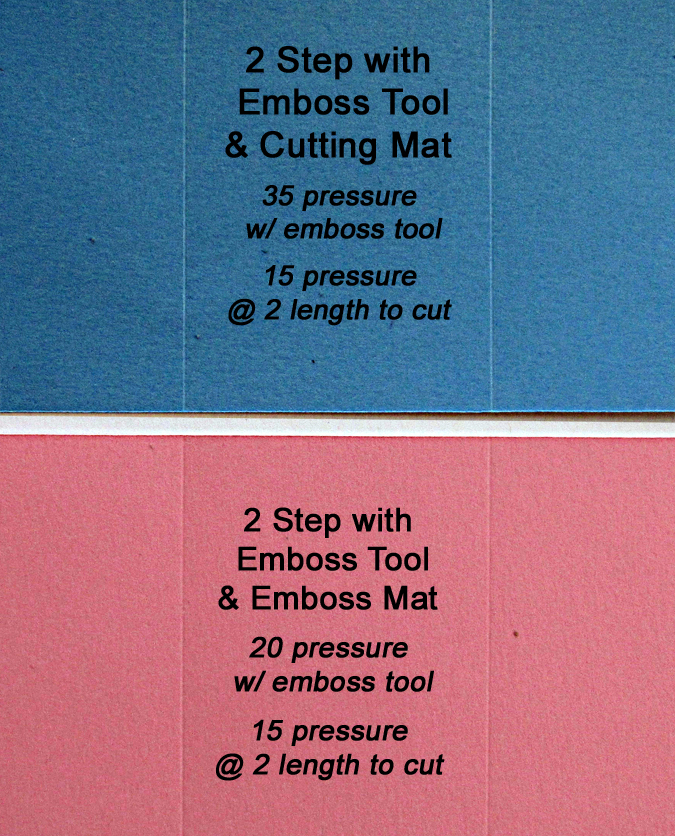
Using the Embossing Tool:
- On a regular cutting mat- Following the 2 step process, be sure to put the embossing tool into the cutter first. Select only the fold lines and emboss at a fairly high pressure using the small ball end. Change to the cutting blade and cut the project.
- Use the embossing mat- Place paper on embossing mat and using the embossing tool’s small end, score the lines. Switch to the cutting blade and cut project directly on the embossing mat.
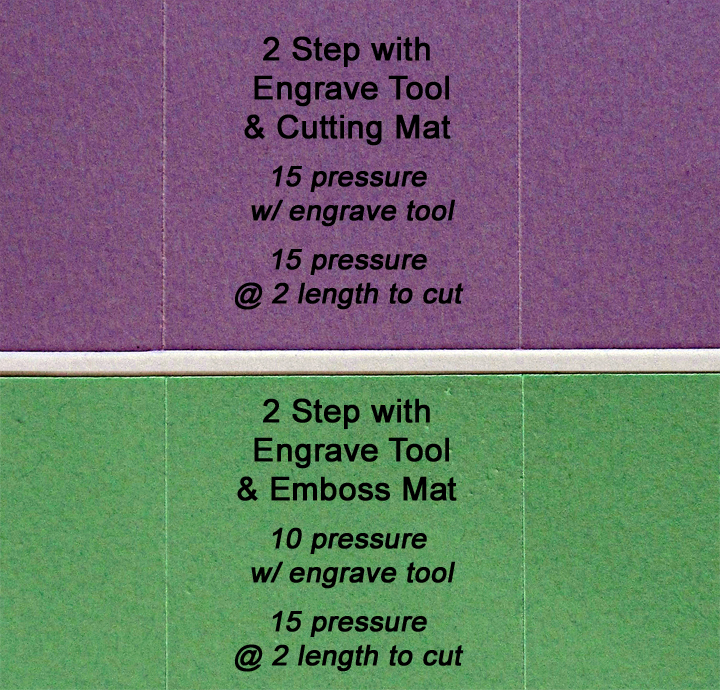
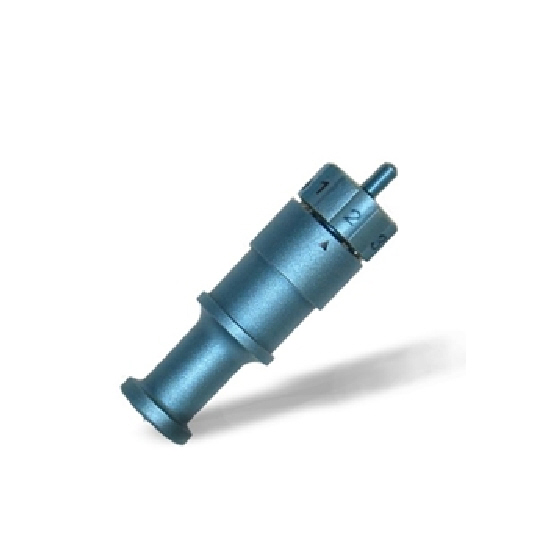
Using the Engraving Tool:
- On a regular cutting mat- Following the 2 step process, be sure to put the engraving tool into the cutter first. Select only the fold lines and score at a medium (15) pressure. Change to the cutting blade and cut the project. Be careful! Too much pressure will tear the paper.
- Use the embossing mat- Score in 2 steps. Place paper on embossing mat and score the lines with the engraving tool and a medium low (10) pressure. Switch to the cutting blade and cut rest of project directly on the embossing mat. Watch for tearing or scraping of the paper surface.
Using the Pen Tool:
- This requires a DRY ball tip pen. On a regular cutting mat- Follow the 2 step process by first assigning a different color to the lines you want scored. Place the dry pen into the pen tool and adjust height of pen according to directions for using the pen tool. Use a high pressure (35- 45) to score the fold lines. Double score if needed. Replace with cutting blade and cut rest of project.
- Be sure your pen is a DRY ball tip pen, you don’t want any ink on your project. On an Embossing mat- place paper on mat and dry pen into the pen tool. Position pen height following instructions for pen tool. Assign a different color to your score lines and use the dry pen to score the lines with a medium (15) pressure. Switch to the cutting blade and cut the rest of the project directly on the embossing mat.
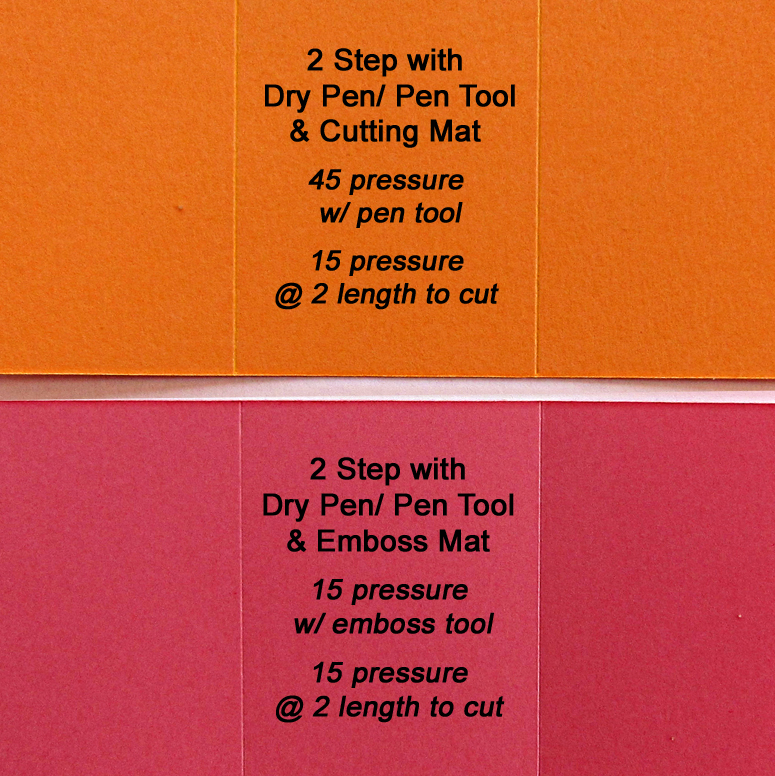
If you are a veteran card maker you may prefer a method that most closely replicates a ball tip score line with the “bead” or nice little bump along the score line. The scoring methods that will give that effect are with the embossing tool on the embossing mat, the engraving tool and the dry pen on the embossing mat.
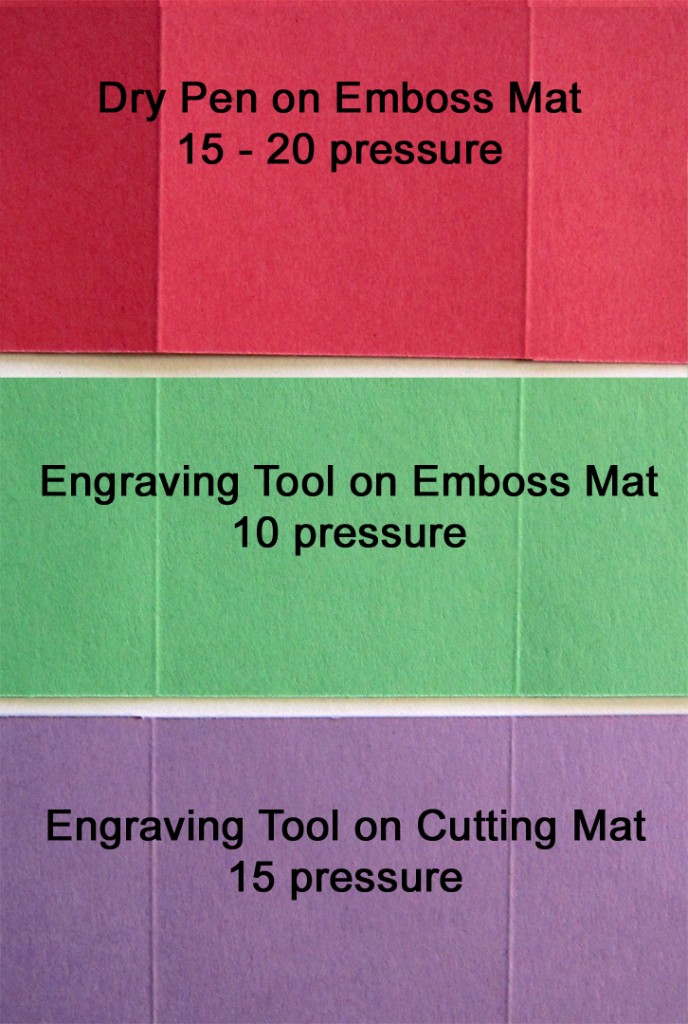
I recommend you test out the different methods and find out what pressures work best for the paper you are using. (I used World Win Colormates for my tests.) My pressures and blade lengths are only suggestions and you should use them as a place to start your testing.
Personally, when I compared all of the different methods side by side I could see benefits for each one. I think it really boils down to what I said in the beginning. It depends on how much time you want to spend and what tools you have. If I were to choose today, I think my choice would be the Dry Pen method but who knows? Tomorrow, I may change my mind!


I love this. Is it possible to put it in a printable format so that I can print it and put it next to my machine? Thanks!
Here you go Vicki, I was working on it even as you asked! 🙂
Print format yeh, I will try these Thanks for all your hard work.
This is GREAT.
What do you mean by a “dry” pall point pen tip? Do literally mean a pen that has dried out? thanks!
Debbie, yes just a ball point pen that doesn’t write anymore. 🙂