
Join the Pazzles Design Team this week as they share DIY organization projects. Use your Inspiration Vue to organize your home life and your crafty life. We’ve got clever ideas, tips and tricks and inspiration to share. For even more DIY Organization ideas visit our Organization Week Pinterest Board.
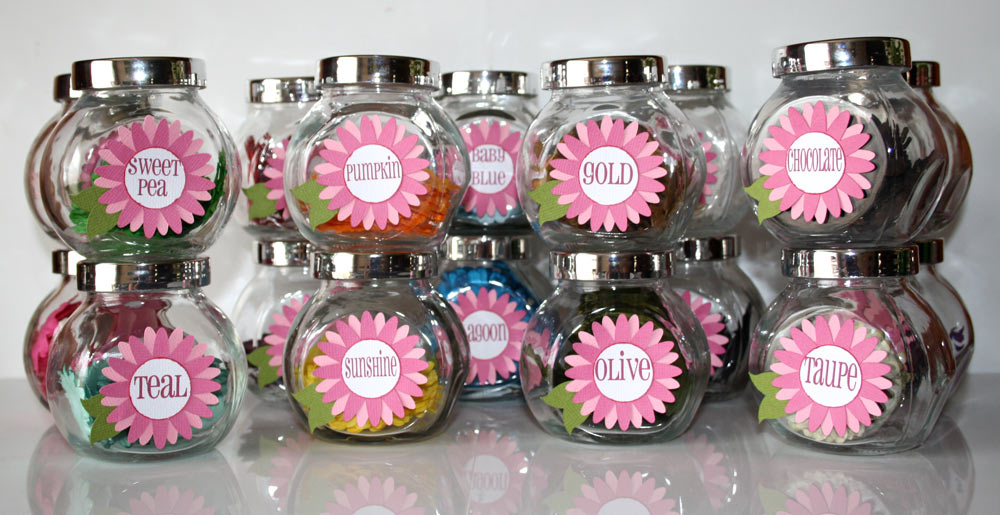
Hi, it’s Belle here today sharing a project to help organize yourself or your craft stash! For those who know me, I love to organize (a lot). Funny thing is, I’m not always as organized as I’d like to be, but I love organizing just the same. This little project is something I’ve been meaning to get to for a while – labeling my little jars that have my paper flowers in them with a ‘better than average’ label! That’s where this simple Craft Room Library Flower file came in handy.
With only four sets of paper to cut, it was a quick project to complete. I chose two simple shades of pink for my flowers, the same green for both of the leaves and then the white centre of the flower meant my text was easy to read. I multiplied the flowers so I could cut out 20 of each colour at once. I then multiplied the leaf set as well.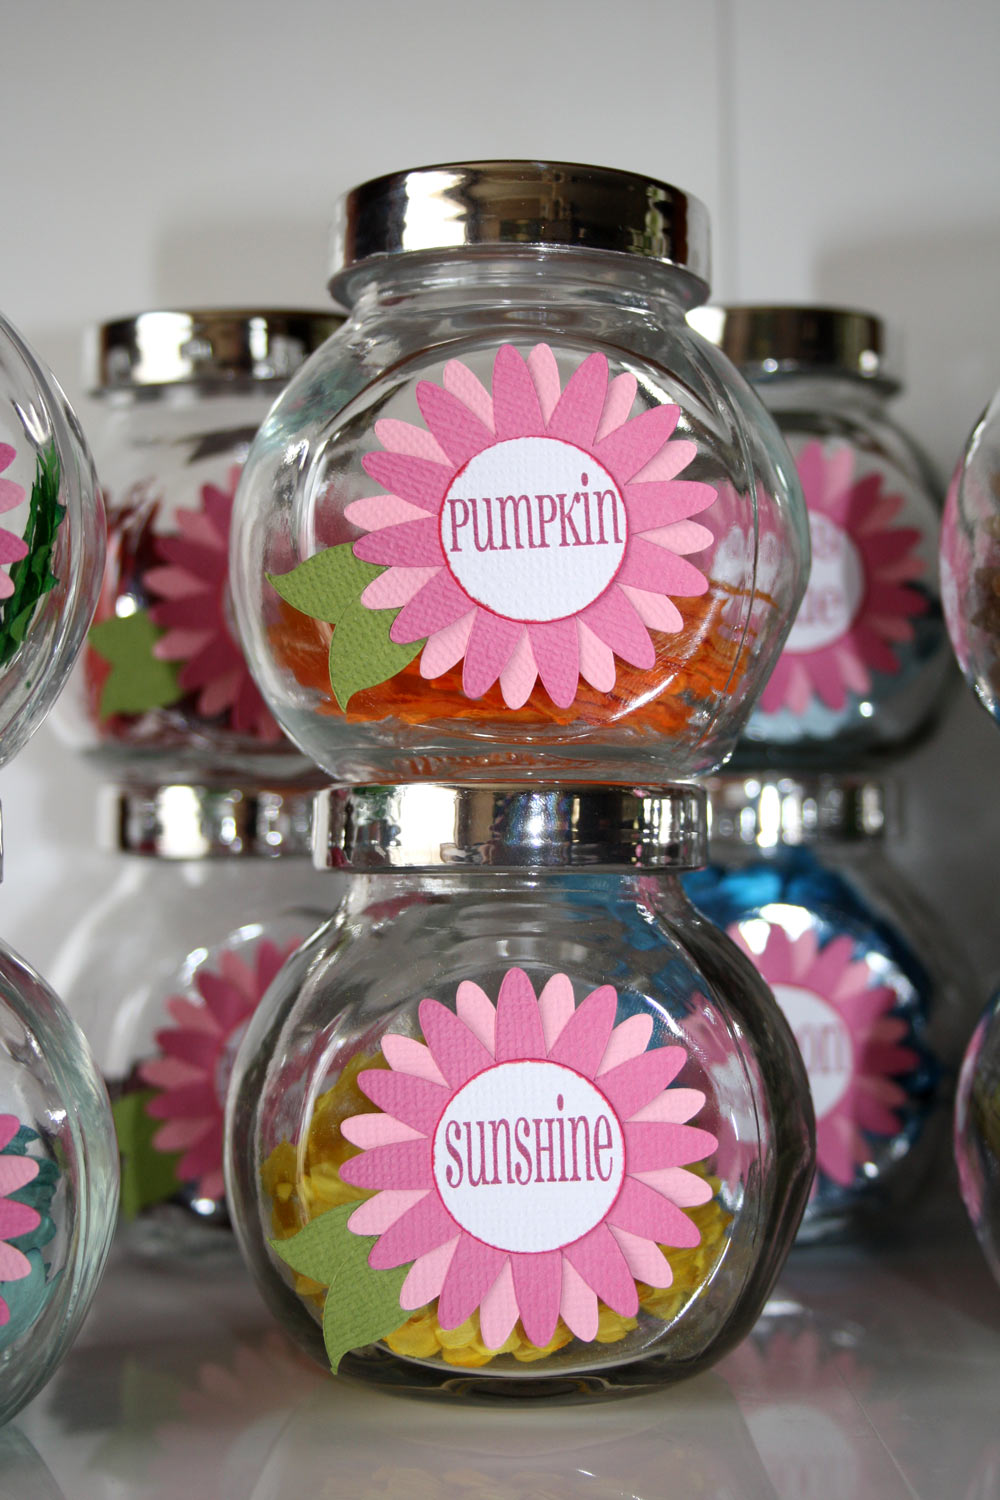
For the centre disc of the flower, I multiplied these and added the text using Pharmacy font with all the lovely names of the flower colours from the manufacturer. I then printed these without the circle line (changed it to white so it wouldn’t print). I then used the Print & Cut technique to cut around my text in a disc shape – don’t forget to use the registration mark on your page when printing. It can be moved to wherever you’d like it on the page so it doesn’t interfere with your design. After gluing each piece together I then used a glue dot to adhere each label to the front of the jar, and I was done! I also used a copic marker to ‘ink’ the edge of the discs with the names. You could also use this file as a complete piece and simply print the whole design and cut around the perimeter of the design before adhering to your jar or chosen vessel.
These jars I’ve used come in a pack of four at IKEA for $2.49 which is great value, and can be used for so many things. This technique can also be used to create party favour jars, or store whatever you like with whatever labels you choose!
I hope I have inspired you to create some labels around your home or craft space to get into the organizing spirit this New Year and give them that Pazzles flair!
~Belle
Supplies:
Kaisercraft Cardstock (Candy, Bubblegum & Moss colours)
Craft glue
How very cute and so simple, I love projects that are simple to do but pack a big punch. Great Job Belle!
I have a stack of these jars, they look so pretty. Thank you for the inspiration.
These jars are the perfect size for a craft room. You decorated them so nicely. A flower label tells me exactly what is inside the jar–flowers! Nice work Belle.
To darned cute! I love that you used a flower and flowers are what is stored in the jars. Too smart!