
Join the Pazzles Design Team this week as they share DIY organization projects. Use your Inspiration Vue to organize your home life and your crafty life. We’ve got clever ideas, tips and tricks and inspiration to share. For even more DIY Organization ideas visit our Organization Week Pinterest Board.
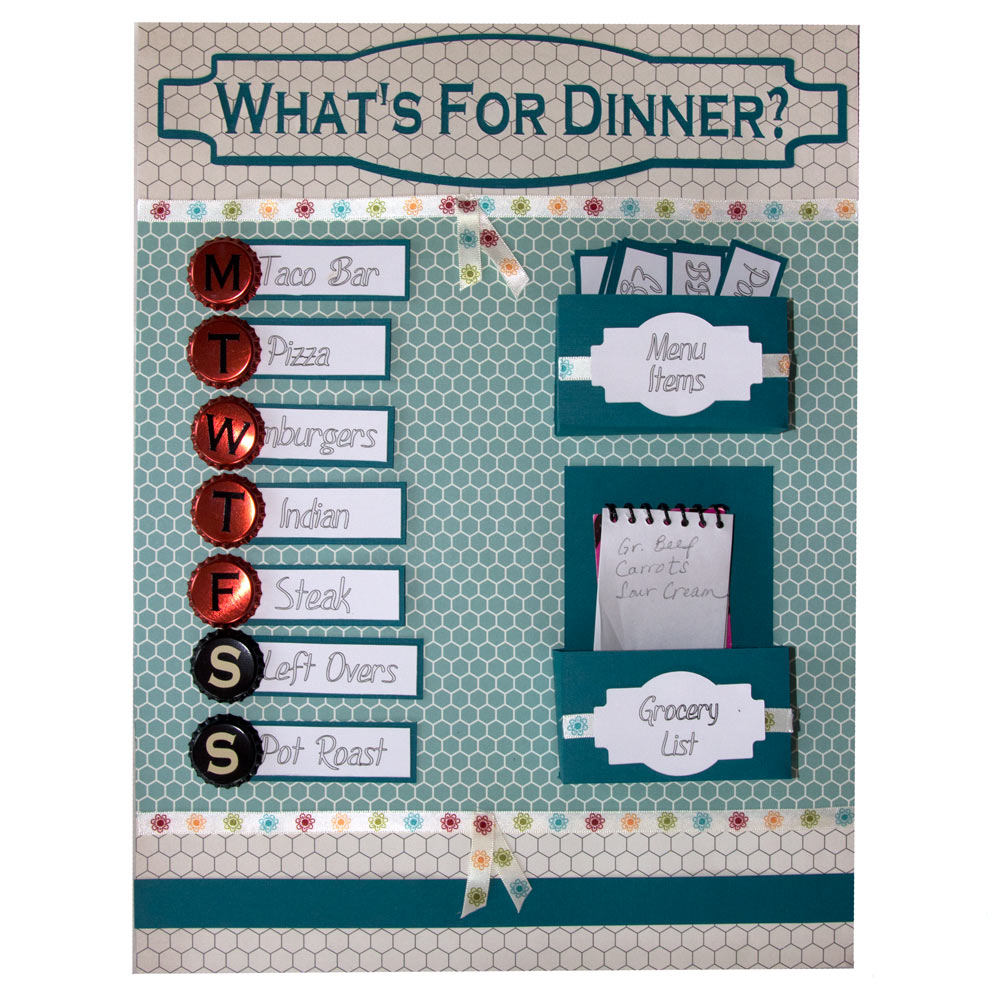
It is a brand new year and time to get organized! Don’t huff and groan. I am going to start you off easy. I created a striking, modular Menu Board. Sit yourself down here at the hearth and I’ll teach you how to make one for your kitchen.
It was wonderful to design my entire project in the Pazzles InVue Software. The software is a great tool for getting your ideas down “on paper” yet still be able to easily manipulate it and make notes. To play around with shapes, their sizes, and various fonts is a blessing for this non-artist.
My metal sign measures 12 X 16 inches. In my InVue software, I created a new file measuring 12 X 24 inches. I chose and made shapes that represented the image in my head. Originally I was going to simply cut circles out of card stock for the days of the week. As my project evolved, I decided to use decorative bottle caps. Each letter representing the days of the week are cut from Pazzles Vinyl. I matched the font of the letters with the board’s title font “What’s For Dinner?” You will note that the tile frame matches those on the boxes to the right. Magnets are adhered to the bottle caps to hold the menu choices in place.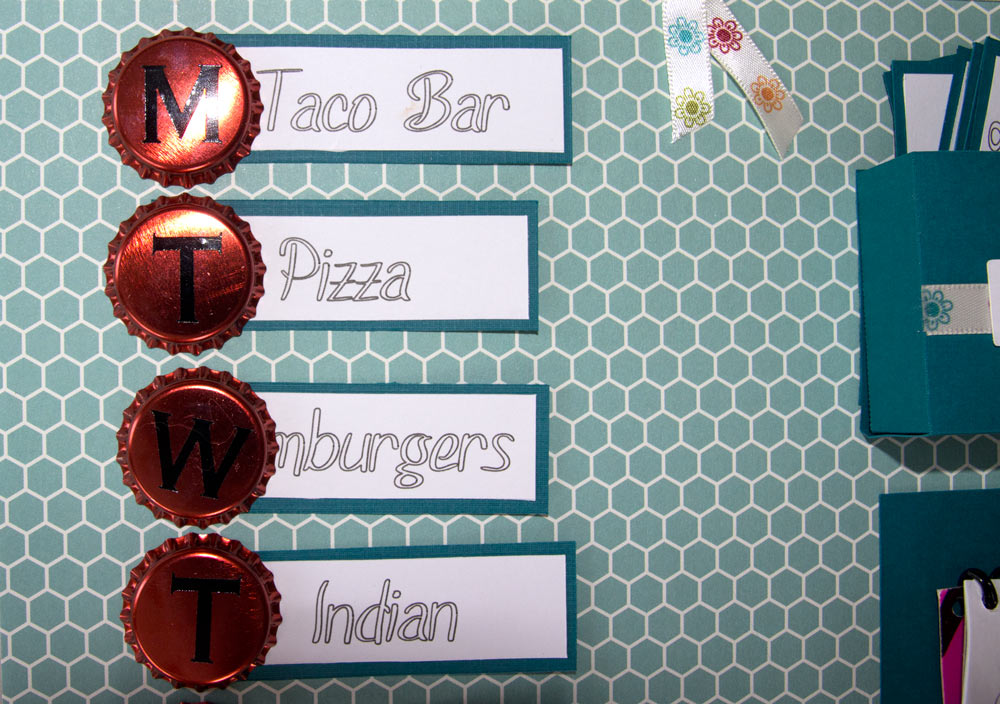
For the menu choice cards, I created rectangles and used the Bracket Tag file. With InVue I was able to mark these shapes as a cut only option. Then I selected the font for the menu choices and put them in place within each rectangle and bracket tag. These I marked draw. When I am ready to cut the entirety of the item, I first used the Pazzles Pen Tool to draw each of the words for the menu choices and the titles “Menu Items” and “Grocery List.” (At this point in time, InVue software does not support single stroke fonts. I think it still looks sharp.) Next I cut only the boxes and bracket tag surrounding these words. It is a handy system!
The boxes that hold the menu choices and a notepad for the grocery items, are made from an altered version of Pazzles Pocket Box Card. (I left off the outside, front flap.) Because this Menu Board is decorative, I can display it in my kitchen. Instead of the kids asking “What’s For Dinner?” they can look at the board.
~Krista
Supplies:
Menu Choices, “Menu Items,” and “Grocery List” font (SF Foxboro Script)
“What’s For Dinner?” title and Days of the Week font (Copperplate Gothic Bold)
Scrapbook Adhesives Crafty Power Tape
Recollections Paper and Cardstock
Bottle Caps
This is a wonderful project. You did a beautiful job with this.
Love, Love, Love! I considered making one of these too 🙂 I’m an avid menu planner and this is terrific. Great job Krista!
Great idea! I love that you have a pocket with menu pre printed menu names. Makes it so much easier to plan!
What a cool idea to start off the new year. Well done.
What did you use for you metal background?
Thank you all. This was a really fun one!
Auntie Marg, I used a re-purposed decorative sign. You can find them at craft stores (or a thrift store).