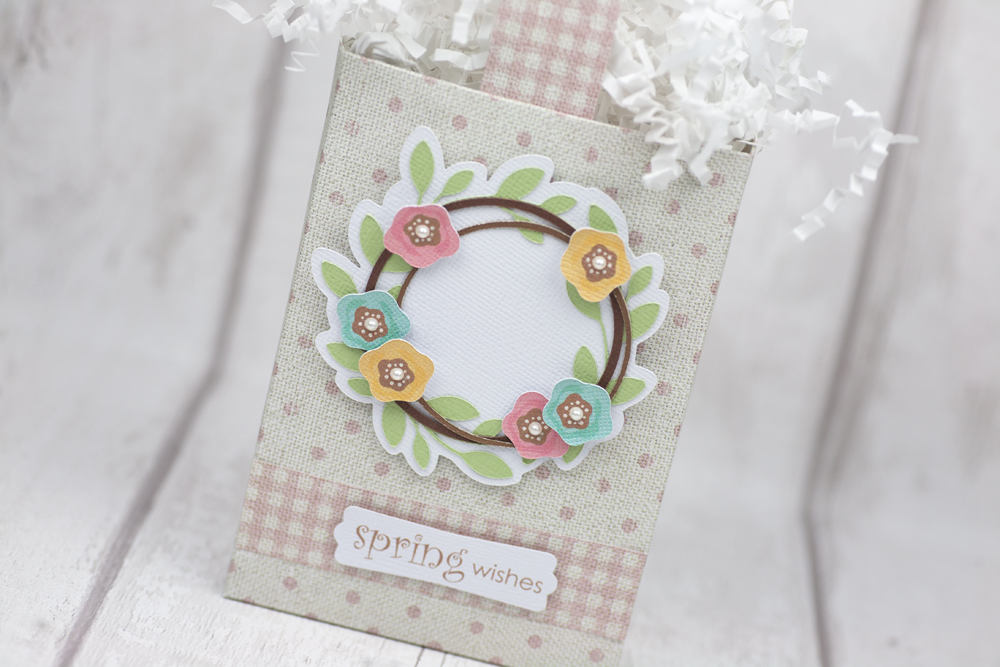
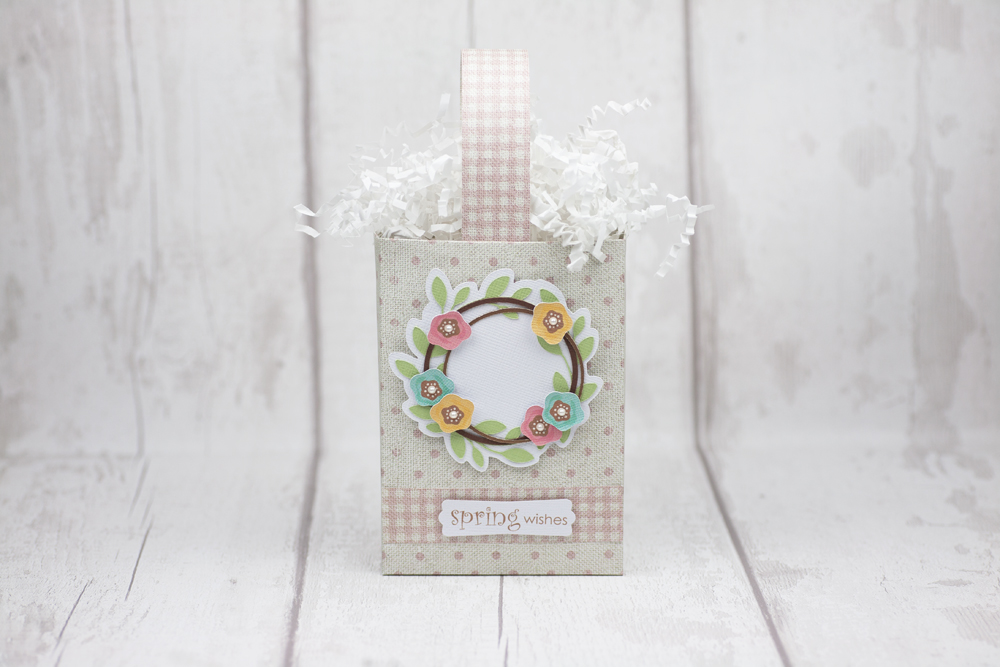
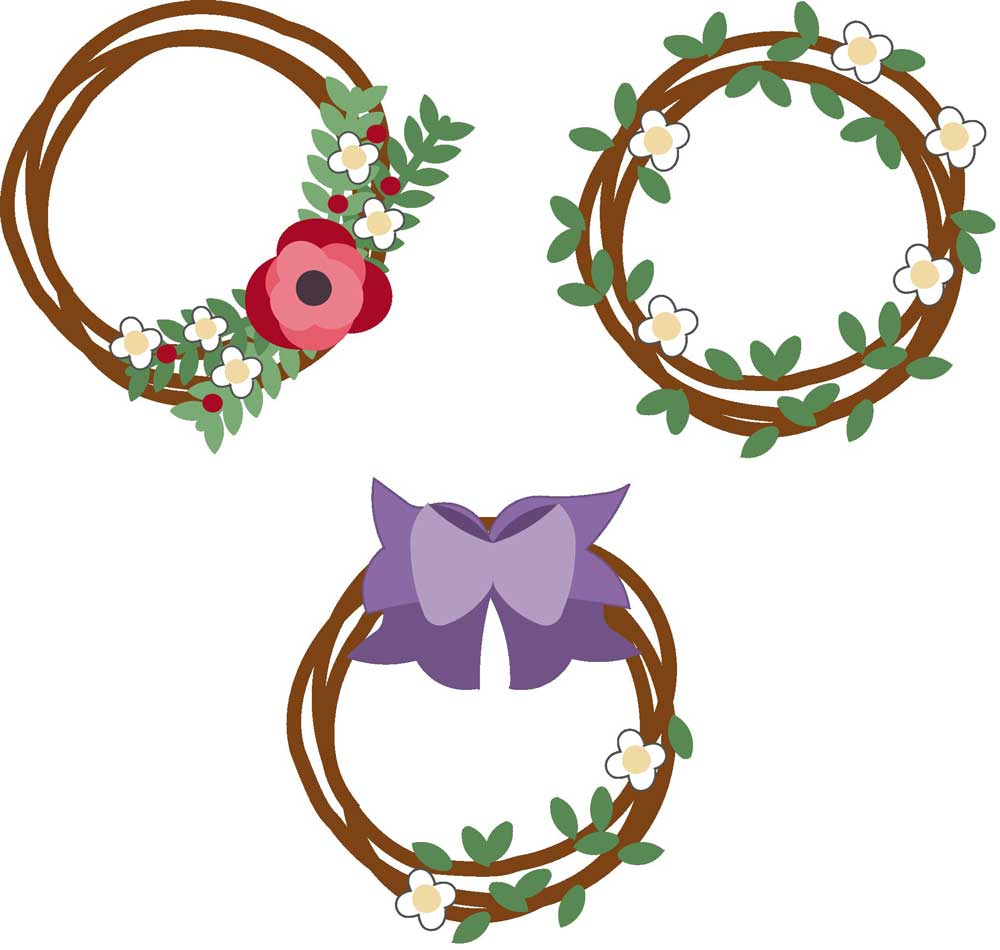
I love browsing through the Pazzles Craft Room Library and finding a cut file for my base project, then see how I can pretty it up! The files I have used for my Spring Wishes Gift Box are the Cereal Box and Spring Wreath (Miss Kate Cuttables).
I resized and altered the cereal box slightly for my specific project. I added an extra piece to fit inside the base of the box to make it slightly sturdier depending on what goodies I decide to add inside the box. I cut the box using my thicker quality scrapbook paper. I folded the flaps inside at the top of the box also which made it sturdier.
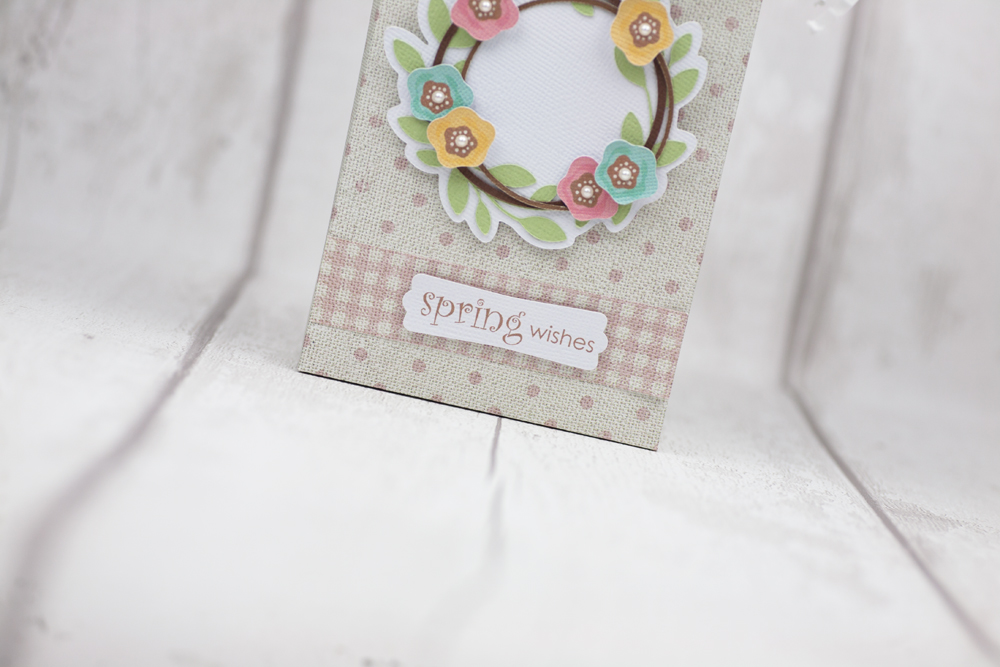
I resized the Spring Wreath to fit the front of my box and cut some of the elements for my Spring Wreath using coloured cardstock. I filled in the back of the wreath as it was distracting seeing the scrapbook paper in the centre of the wreath but it is a personal preference.
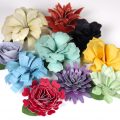
I particularly liked the little flowers on the wreath and wanted to keep all the coloured layers. The tiny flowers would have been too tiny to cut in layers of coloured cardstock, so I PRINT & CUT the flower elements. The image above on the left shows the elements on my visual mat. The image on the right shows no colour bleed or cut lines around each of the flowers when I PRINT. When I had PRINT & CUT the flowers I used a Flower Craft Tool to gently curve the petals and give them some definition. I added some tiny pearl dimensions to the centre of each flower.
I cut myself a handle and border trim for the front of the box out of coordinating gingham scrapbook paper with my paper trimmer. Finally, I printed my sentiment using one of my fonts on my computer and matched the colour of the text with the same colour as the inside of the flowers.
I was a bit lazy and grabbed a Stampin Up paper punch that sits on my desk and punched out the printed sentiment ‘Spring Wishes’. Of course you could personalise the sentiment to your own taste.
On the front of the box I layered the wreath, some flowers and the sentiment onto craft foam pads.
I hope you enjoy making this gift box which can be used time and time again by altering the elements on the front. Also, the wreath could be used to make a gorgeous card or use it in your scrapbook layouts.
I have laid out all the elements of the file ready for you to PRINT & CUT. The knack is to select your elements and use the Cut Menu box to deselect the areas that you do not want to print but (hopefully) I have done the hard work for you!
My printer page is set for A4 paper, but if you are using Letter size paper you will need to change the paper settings to Letter size so that it matches your printer paper. Before you PRINT the elements ensure you go to print preview to check everything is as you want before you print! Do not move any elements off the visual mat in your software before you go ahead and cut the elements.
Supplies Used


By Joanna Wright

Become a Member!
By becoming a subscriber to Pazzles Craft Room you will have access to this project as well as hundreds of other projects, thousands of cutting files, and so much more!Get Pazzles Craft Room!
Join Now for only $19.95!

How pretty Joanna! I love the colors and especially the flowers! Thank you!