Wrapping a gift in beautiful paper and bows is half the fun of gift giving. Every year I pick just the right wrapping paper to fit my theme. Well, at least that is the theory. I like to have a different wrapping paper for each of the grandkids but now that there are 11 of them it is impossible. Now I have a different paper for each family, that way it is less confusing when it comes to passing the gifts out on Christmas Day.
My husband and I have a wrapping marathon one evening close to Christmas. We put on Christmas music and have yummy snacks handy. He handles the big, square stuff and I do all the odd shaped gifts and anything small. I always have grand ideas about the bows and ribbons but usually settle for the same old stick on bows. They are fast and inexpensive but I often don’t have the right color or size. There are beautiful bows in the stores but the prices are too high. I really don’t want to add $5.00 to the cost of every present just for fancy packaging.
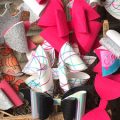
This year I decided to try making my own bows. I researched a lot of internet sites and dismantled a few purchased bows. There are a lot of ways to make a paper bow but the one I am sharing with you today is my favorite. It goes together quickly and can be made in any size you want. You can also stack two bows together for a fancy bow, like the one on the top. All four versions of the bow are included in the cutting file. The bow tails can be used interchangeably so you can get the look you want.
I think I will make a bunch of these up in different sizes to match my paper. Then on wrapping night, even my husband can add the finishing touches to the presents without me worrying that he is going to put a blue ribbon on a green package!
Happy Wrapping!
Chris
A Craft Room Membership is required to access additional content. Please Join Now or Login!


Wow. What a neat idea. Looks so easy. Thanks. Wanda
Wanda, they are really easy. Plus they are adorable on baby gifts as well! 🙂 I think I will use up a bunch of my scraps of cardstock by pre- cutting these bows. I won’t assemble them until I need them but they will be ready when I want them.
What a great idea. Thank You!
Christine where can i find the frame you have the bows in?
Gloria, the frame is not a cutting file. I just added it to the photo using a frame from my Photoshop software. I thought it needed an extra “something”. Guess I will have to design a cutting file that is similar to it! 🙂
Gorgeous Christine – just what I needed for that extra little touch of yumminess to my presents this year. Thank you.
Very nice. I can see these textured too!
Thanks Christine for the file which is just perfect! I have just given Christmas pressies to my colleagues at work and they all admired the bow on the present. http://ilove2cutpaper.blogspot.com/2011/12/paper-bow-inspired-by-pazzles.html
How beautiful! I am sure your colleagues were thrilled. 🙂
I made several layers (making each layer a little smaller) to give my bows more dimension. It turned out really cute. Thanks for the idea.
Christine, I use my old 3 ring binders (that I almost sent to the thrift store) and protective sheets to organize my ‘pre-cut’ projects. That way I can keep all the pieces together and organize by color and theme as well. They stack nicely and help me believe I’m organized 🙂 I would like to pre-cut a number of these and add them to my collection. Thx for the file!!
Using these on my gifts this year…so fun.
Cheryl, what a great idea. I used to do that with my old die cuts but I think I will need to resurrect it for my extra cut pieces.
Hello there, Just received the Pazzles Inspiation
as Christmas gift! (how lucky am I!) downloaded the Bon Bon Cups + Bows ready for New Year, am I going to have fun or what! Think these are such a good idea!
Thank you Chris these are simply elegant