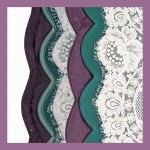
 Who doesn’t love scallops? They are so much fun and I don’t think they have ever NOT been fashionable! Big scallops, small scallops, mini scallops and scallops on scallops can be found everywhere in scrapbooking and card making projects, home decor and fashion. The trick is how to make those scalloped looks yourself without pulling your hair out in the process!
Recently, we here at Pazzles have been making all kinds of scalloped designs for an upcoming CD. Along the way I have learned a few tricks and honed some of my scallop making skills. I actually have discarded the method that used circles, at least for most of my projects. I have come up with some methods that are much quicker, at least for me.
Use small segments to make arcs, join them together in a line and use that scallop line to make your border or scallop mat. With this method you can make all kinds of variations to the scalloped theme. Circles and ovals are tougher since you cannot work in a straight line. I have come up with a method to make quick basic scalloped ovals and circles. Start with an oval or circle that you have converted to scallops with the Scissors tool in the Inspiration software. Create a guideline for the depth of the scallops and use the Move Point tool to change the scallop depth.
Of course, I have created a video to show how easy it is to make all kinds of scallops. I was having so much fun prepping for the video that I created over 10 different scalloped mats in a short period of time. I encourage you to watch the video and share the projects you have made!
A Craft Room Membership is required to access additional content. Please Join Now or Login! Scallops are popular accents in scrapbooking and card making. This video will teach you to easily make scalloped borders, photo mats and page backgrounds. Learn how to make scalloped squares, ovals and circles. You will also learn how to make variations on the basic scallop to add more interest to your project.


Love this!! i just bought a bunch of edge punches to create borders 🙁 But, I am thinking of all the new possibilites of edges I can create from here!! Thanks for the great tutorial.
Brilliant tutorial! Thank you so much. Linda
I haven’t watched the video yet….but I too love scallops. I use them all of the time. I love anything Victorian and lacy. In fact, most of the laces that I make are inspired from antique lace that I see at antique shops. I sometimes take a photo of them to copy. I am looking forward to seeing this video to see what Christine has come up with.
Wonderful lesson – thank you so much!!!
Cheryl
Thank you for the tutorial. It helps to see the process in action and work along with it as I create my scallops.
Thank you for the video, I love scallops too, especially creating them on different shapes.
I just hope a repair for the cutter comes out soon so that my scallops look perfect and not on a slant
At the moment I can’t cut anything with a scallop as it just doesn’t look right.
Great tutorial thanks, at last this makes sense. Can uoy give me more info on the other border with the peaks.
Cheers Beth
The border with the peaks was made by first drawing 2 lines. One was rounded up and the other was rounded down. It should look somewhat like a sideways S. You have to make sure that the bottom of the downward arc is not lower than the end of the upward arc. So I usually draw a guideline below the arcs to make sure they are even. Make sure the 2 arcs are joined together, then mirror the curved shape. Join the ends and multiply. I think I will make a short video showing how I did it. Watch for it in the video library.