 I know that many of you love the nested shapes; those diecuts that get progressively bigger and bigger. When layered in different colors and paper patterns the effect is quite striking. The question is, how do you recreate the same look using the Inspiration Studio Software? There are 2 different ways to make copies of a shape: the Outline tool and the Condense tool. Each one works in a slightly different way and sometimes that makes a lot of difference. Let me show you how to choose between the two functions.
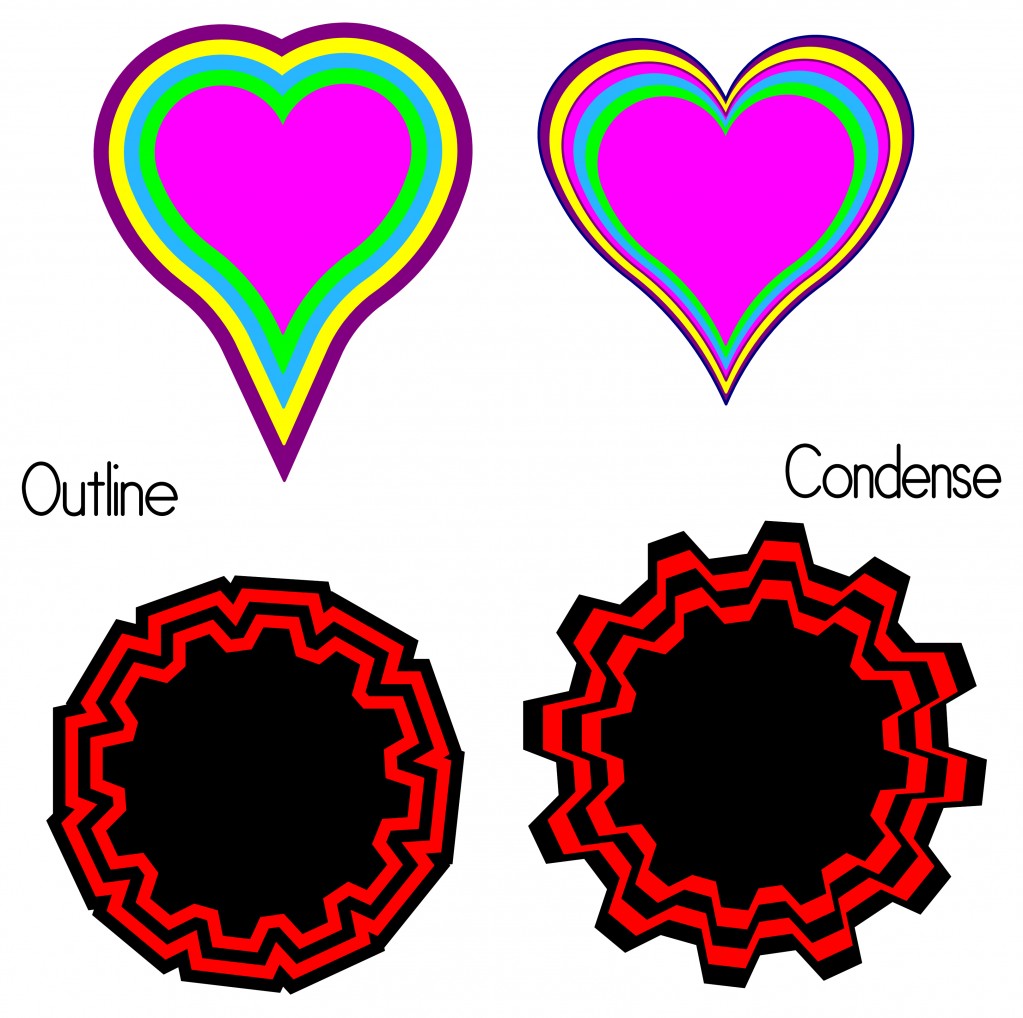
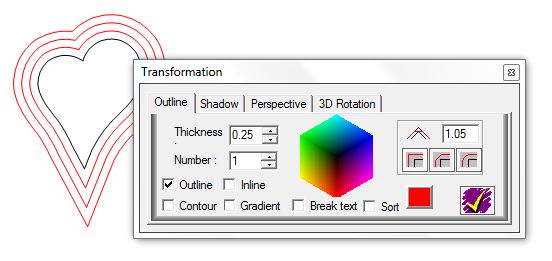 The Outline tool follows the contours of the shape a specified distance away. Often the resulting outline looks identical to the original. However, depending on the shape and how far away the outline is, there can be some loss of detail. In the Outline window you can specify how far apart you want the outline and you can even chose to create multiple outlines at one time. This is the tool that you are probably most familiar with.
 The Condense tool creates an exact copy of the original in a specified size. This means that there will be no loss of detail no matter how large you make the copy. To open the Transformation window just press the C key on your computer. The Transformation window will appear and the word Condense should be highlighted in gray. Next to Height and Width you will see a window that shows the current dimensions of the shape. Next to those you will see up and down arrows and another window that you can specify how much you want to enlarge or decrease the dimensions. Type in an amount (such as 0.5), click on the up arrow for both height and width, click on the Duplicate button and hit Apply. You will have a duplicate of the shape that is 1/2″ larger in both directions. You can continue to make larger duplicate by following the same process as many times as you wish. Finally use the Centering tool to center all your copies and you have your nested shapes.
Here are some examples of the same shapes created using both the Outline tool and the Condense function. Which tool you choose will be determined by the look you want.



Thanks for showing the differences there….a picture is worth a thousand words.
As for the virus…been there and done that 2 weeks ago. There is a nasty one going around through the emails of other people…and they are totally unaware that they gave it. It sits there like a ticking time bomb. If only these people who create them could use that talent elsewhere to benefit mankind!
Thank you – it is good to see exactly what happens in different circumstances – makes complete sense now.
Thanks, I learn something new everyday on this site.
This is great. I like the written instructions and the pictures showing the differences. Good Job.
Thank you. I’m amazed by all that I learn about my machine. Cricut, eat your heart out!!!
Pingback: Pazzles Craft Room » Blog Archive » Embossing with a Glue Pen
I have just tried this technique. The only problem that I had was the centering on the condensed picture. I used the same shape. I had to go through ALL of the position tabs and when I finally got back to the centering one, it finally made it all centre. Is this a glitch in the system/program?
Marina, I am not aware of any glitch in the program. Make sure that you have selected all the pieces you want centered. It might be that one was not selected in the beginning.
Also, be sure you have run the updates for the Inspiration Studio software and your cutter. If you have never done this you should do it right away.