
Stick Pins and Hat Pins are items that remind me of my grandmother’s jewelry box. They were something I rarely saw her wear but were fascinating to me as a child. I do remember seeing them on occasion when she wore one of those little hats with the veil over her forehead. My mom had one with a top shaped like a teapot that she wore stuck in her coat lapel. Now I see them added to cards and scrapbook pages as an accent to the design. Most often I see them with beads but I also see other tops to the pins that add interest to the page or card theme.
 I took a tour of my local craft store’s quilting section and found several pins that I thought could be used to make my own stick pins. The quilting pins with flat circles or flower shapes work exceptionally well. You can attach anything to the disc using a glue dot. T-pins will work too and come in lengths of 1 ½ and 1 ¾ inches. If you want a longer stick pin, look for needles used for doll making.
In just a short amount of time I made 5 different stick pins. Everything needs to be made on a small scale so keep that in mind when creating your pin top. Cut your basic shape from cardstock and then use embossing inks, glitter glue, crackle glaze, ribbons, beads and rhinestones to glitz them up.
The orange flower pin uses a flat quilting pin. I cut 2 sizes of the flower, coated the edges in copper glitter glue and let it dry. I then curled the flower petals and glued the layers together. The center of the flower is an orange dew drop from Robin’s Nest. I attached the flower using a glue dot.
I wanted a more antique, masculine look for the star pin so I used black glitter paper as my background. The top cut-out layer was cut from black cardstock, coated with embossing ink and embossed with an antique gold embossing powder.
Of course, I couldn’t resist trying to make a tiny rosette. I will admit it was a challenge but the look is so much fun. If you don’t know how to make a rosette be sure to look at last week’s Tricky Tuesday. I cut the rosette out of paper (not cardstock, it is too stiff for something this small) and used a rhinestone for the center. It is attached to a flat disc pin with a glue dot.
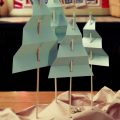
I also wanted to try one of the long doll making needles but the challenge was how to attach the butterfly to the needle. Follow the steps below to learn how I did it.
 1. Cut two strips of cardstock about an inch long and narrow enough to slip through the eye of the needle.
 2. Thread both strips of cardstock through the needle’s eye. They should be centered so that there is an equal amount of the strip on both sides of the eye.
 3. Place glue on one half of each strip.
 4. Glue each strip to itself by folding over the needle’s eye. Fan the
  strips out so there is one strip on each side of the eye. This creates a base for gluing down the butterfly.
I used 3 rhinestones for the center of the butterfly. They are Pazzles rhinestones which can be heat set. I used a tiny dot of regular glue to hold them in place and then used my heat embossing gun to melt the adhesive on the back of the rhinestone.
 For the heart pin, I used red cardstock and a flat flower quilting pin. I
 used crackle glaze to cover the heart and while the glaze was wet, I pressed a rhinestone into the center. Be sure to let the crackle glaze dry before attaching to the pin with a glue dot. For the pin, I used a t-pin with a strip of cardstock attached to it similar to the doll making needle.
I challenge you to try this project. It can be done in a short amount of time but the finished pin can add just the right touch to your project.
Chris

These are so sweet. What a great idea…not just for our pages or cards…but for inexpensive gifts for nursing home residents. I think that I may make a batch of these to share for the 4th of July. I need to get hopping!
These are so Beautiful what a wonderful project for the summer and get ready to plan for the Holidays.
These are simply AWESOME! Thanks for sharing these wonderful stick pin ideas……they are sure to spark lots of creativity.
Thanks so much for the files and the tut…talk about saving money, and now i cane make whatever color rosettes i want for my pages.
sorry thought i was on the rosette page but the stick pins are a great idea too 🙂
Pingback: 5 Stick Pin
Do you have a svg files?