I love designing cutting files and as part of my job here at Pazzles it’s important that I don’t misplace or lose the images I’ve created for the image library in the Craft Room. After all—I’m designing them for you! I like the convenience of knowing that everything I’m creating for Pazzles is in one location. It helps keep me organized and it’s a sure fire way to ensure that I don’t misplace or lose the images I’ve worked so hard to create. Nothing is worse than working on a cutting file only to find later that you don’t remember the location you saved it to, or the name of the cutting file to do a search. I have found that it makes life a lot easier if I know they’re all in one location on my computer and here’s how I do it.
Where do I save my images once I download them from the library?
Samantha Craft Room Member
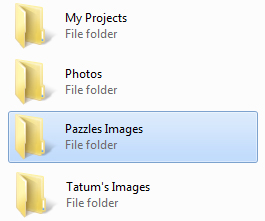
I have created a folder in My Documents on my computer and labeled the folder “Pazzles Images”. That way I know that this is dedicated solely for the images that I download from the image library in the Craft Room. If I am creating my own images I have another folder that I have labeled “Tatum’s Images”. This is convenient for me because it helps me organize images that I’ve created and those found in our Craft Room. It’s important to make sure all of your images are going to one location so that they are easily retrieved when you get ready to start working on a project. Remember that the software doesn’t save your images inside of the program. You will need to make sure that your images are stored on your computer, external hard drive, or a jump drive (for those of you who like designing on the go). Christine has always kept all of her jump drives and dongle keys on a lanyard. This is a convenient way to keep the important stuff in one location so that you aren’t frantically trying to search for the images you’ve created and saved.


When I started downloading all the images…I created a folder that was label…Pazzle…and then put folders in that folder just like Pazzles site has…that way once I download it…I put the images in the same folders as the Pazzle Site has…a little more work…but I found it’s easier for me that way…hope this makes sence and helps Samantha out…
Since the Retreat, I have begun saving (or creating) a JPG for every WPC I have, making sure they’ve got the same name (with a JPG & WPC extension). I’ve made individual category folders inside a main My Documents/Pazzles folder. I’m using the same categories as the Craft Room Library — makes sense to me. It’s a massive job to move all the files I’ve created or saved over the years, but I didn’t even know what I had! Now I can quickly view a JPG thumbnail & get started. Any possibility we’ll ever get a WPC Viewer upgrade? I’d sure be willing to pay for it!
Just wanting to know how you download a jpeg and then match it up with the wpc images. I have tried this and have not been very good at it. Still not getting them to match. I am not very good at computers and know that it is my fault. Thanks for any help in advance. I am hoping that some day I will be able to go to a pazzle retreat!
I also do as Brenda & Roxanne, but not from the start, so I still have files that I need to get the jpeg’s for. The easiest way Kristen to save a file as a jpeg, is to right click on the picture, and then click “save picture as” type in the exact name as the wpc file. If it is in the “craft room” it is very easy to just right click on the picture, the names usually are the same. If you are downloading a freebie from another site, and there is not a picture, after you download the file, open it up in the pazzles software. Assemble the image if necessary, if it is a paper piecing. Select the whole image as if you are grouping it together. Then in the “File Menue” click on “Export”, when the export a file pop up screen appears, on the top of the pop up screen, make sure you are saving it in the file folder you want the picture, then in the bottom of the pop up screen, type the name of the file. Be sure not to choose the wpc file or if you do make sure you remove the wpc extention from the name and do not put any extention. and then choose in the “Save as Type” section Jpeg from the drop down. Hope this helps, but viewing the jpeg next to the actual file is so helpful when you are deciding what you want to cut.