 The Inspiration Studio software makes the process of viewing saved cutting files a lot easier with the ability to download those images directly to the image gallery. I love the fact that I can view my images through the gallery and then simply click on the image to import it to my page. Since it’s so easy to view CDs you’ve saved to the gallery, a lot of you want to know what other ways the gallery can benefit you—mostly with the thought of being able to save your own designs. I’ve put together some helpful suggestions here to help answer Alisha’s questions as well as a lot of others here in the Craftroom.
I know that we can download our CD’s into the gallery, but I have images that I’ve made that I would like to save there too. Is there a way to save custom images to the gallery?
Alisha C. Bozeman, MT
Today I was retrieving some files I created over three years ago. I would have loved the ability to view what the cutting file looked like through the image gallery, but these files were created long before we had the Inspiration. We are so lucky to be Inspiration users. I can’t begin to tell you all of the ways that this machine has made my life easier. I decided that today would be the day that I take all of my older cutting files and move them over to my Image Gallery in the Inspiration Studio software. I’m all about convenience, and by saving my files to the image gallery in the Inspiration Studio software my life will be that much easier! Here are the steps that I walked through in order to save my images to the gallery. I do want to make a note here that regardless of if those images have been saved to your image gallery; you’ll still want to back them up on a jump drive in case your computer crashes! (There are slight differences between the standard software and the Pro version so be sure you read the correct set of instructions.)
INSTALLING FILES INTO THE IMAGE GALLERY IN INSPIRATION STUDIO- standard version:
1. Open your file in the Inspiration Studio software.
2. Press Ctrl+A to select your entire image (Ctrl+A is the shortcut for “Select All”)
3. Open your image gallery
4. You can create a new category by selecting “Create”
5. In your image gallery a new category icon will appear, most likely it will have the name “SPic1.pic”.
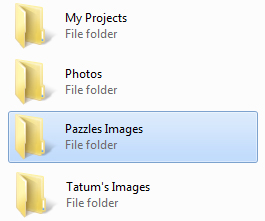
6. You can change the name of your new category by clicking on it, pausing, and then clicking again.
You should then be able to type in the name you want such as “My Projects”
7. Click on your new category so that it is selected, but do not open it.
8. Select ¡°Add¡± from the right side of your screen.
9. Your image will be added to the selected category.
10. Double click on the category to make sure it is there. If it is not or if there are parts missing,
you did not select the entire image.
Continue adding more new images to your catalog by following steps 7 – 10.
If you would like to learn more about managing your Inspiration Studio Image Gallery be sure to watch
the video called Saving Images in the Fundamentals section.
***********************************************************************
INSTALLING FILES INTO THE IMAGE GALLERY IN INSPIRATION STUDIO- PRO version:
1. Open your file in the Inspiration Studio PRO Software
2. Press Ctrl+A to select your entire image (Ctrl+A is the shortcut for ¡°Select All¡±)
3. Open your image gallery
3. You can choose an existing category or you can create your own for each collection.
4. To create a new category select the ¡°Create¡± button.
5. A window will appear where you can give your new category a name. When you are done typing the
name of your new category, click OK.
6. In your image gallery a new category icon will appear with the name you have chosen.
7. Click on your new category so that it is selected, but do not open it.
8. Select ¡°Add¡± from the right side of your screen.
9. Your image will be added to the selected category.
10. Double click on the category to make sure it is there. If it is not or if there are parts missing,
you did not select the entire image.
Continue adding more new images to your catalog by following steps 7 – 10.
If you would like to learn more about managing your Inspiration Studio Image Gallery be sure to watch
the video called Saving Images in the Fundamentals section.

Thanks – – I was wondering how to do that.
thank you! that was not easy to figure out on my own.
9. A small window will appear asking you what value position you want, 1 = the first image in your catalog, 2 = the second etc., choose the number you want and select “ok”
What does the “value position” mean? Does this mean I have to assign a number to each image in my gallery? and why? This really does not make any sense to me….don’t they just go into alphabetical order by name?
Is there a way to create a sub catalog inside of a catalog for example inside of Animals can a Cat catalog be created?