Peek-a-Boo Card
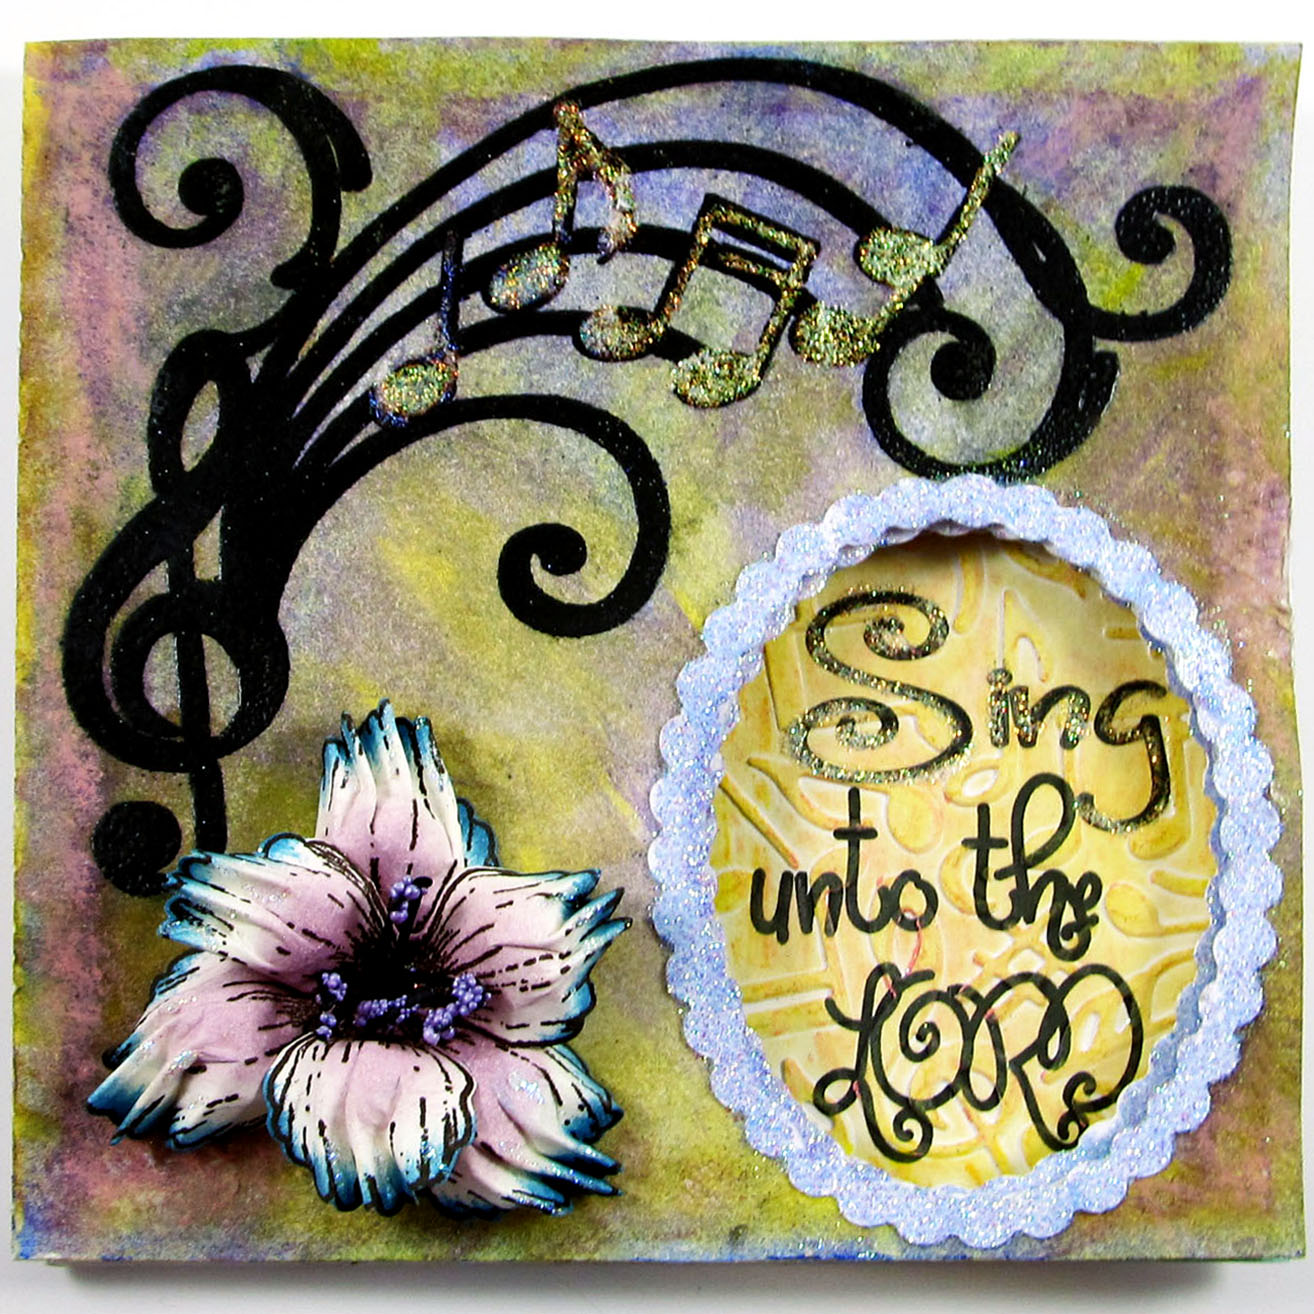
A project made with a custom rubber stamp (cut on the Pazzles machine of course!)
A project made with a custom rubber stamp (cut on the Pazzles machine of course!)
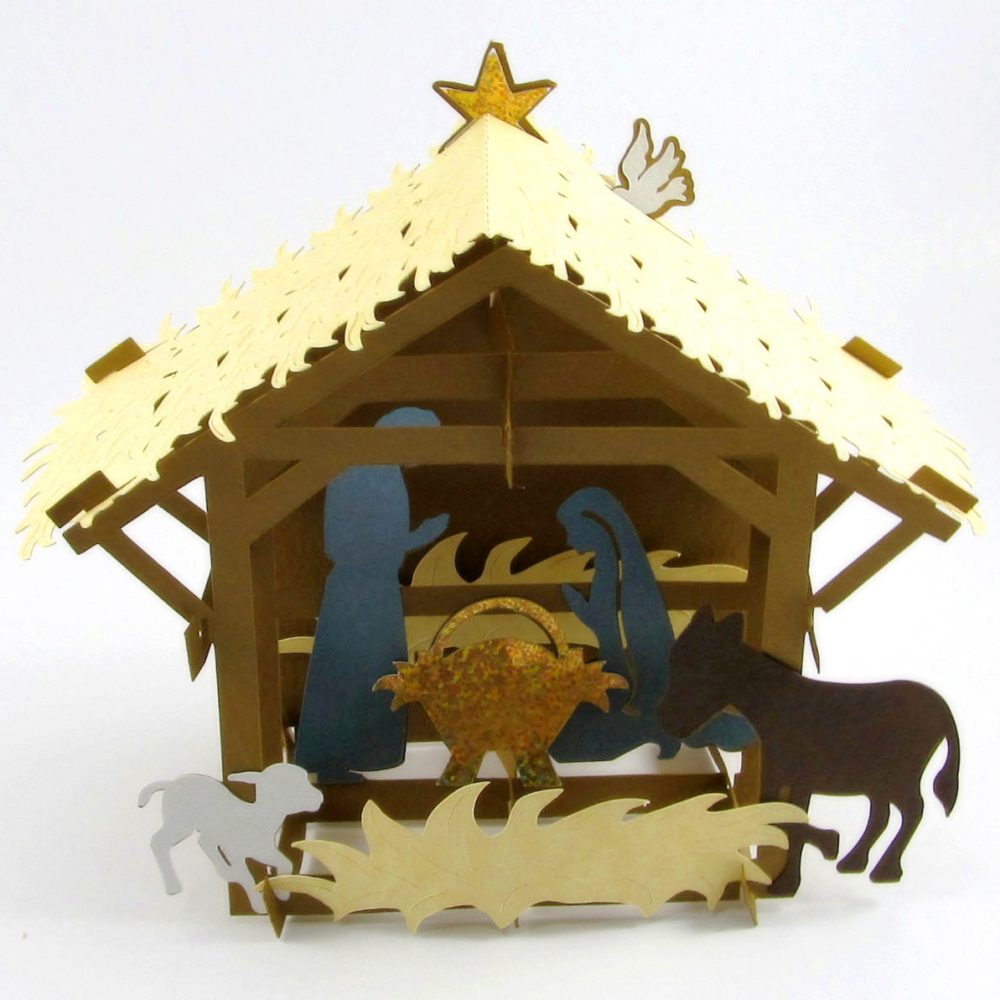
Last year I looked through all of my massive cutting file collection trying to find a 3D Nativity project. I couldn’t find any suitable ones, so I purchased a few, but I wasn’t happy with the way they turned out. So this year I decided to create my own 3D file using a nice layered Nativity Scene that I found in the Pazzles Craft Room.
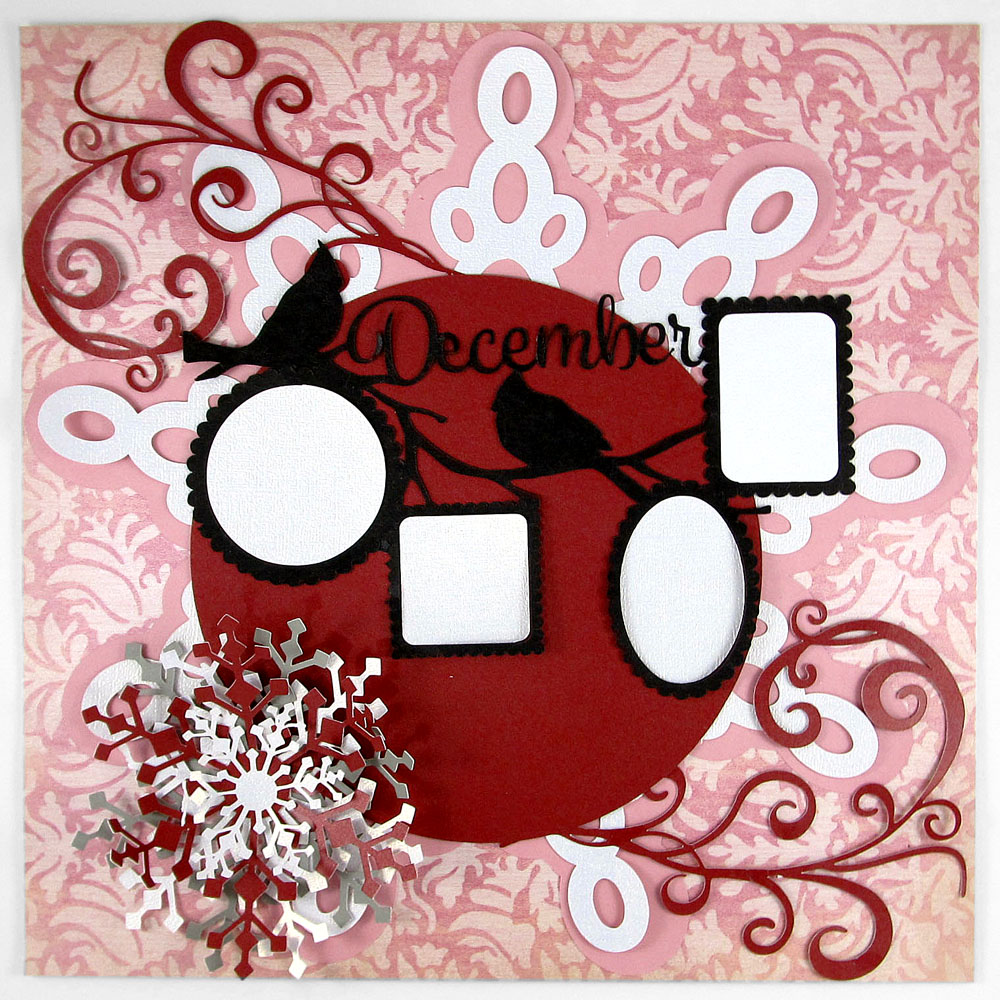
A beautiful December page with a large, lacy snowflake, frilly 3D layered snowflakes, and lovely breezy swirl.

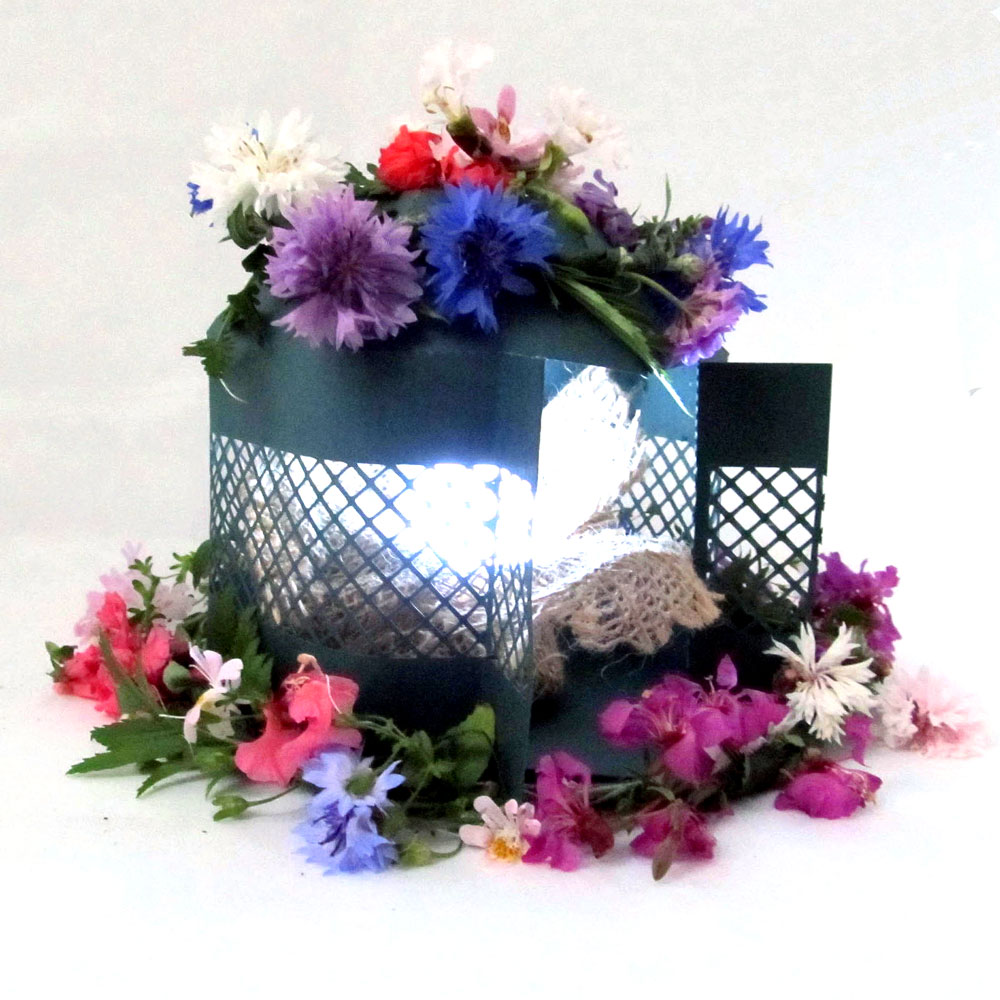
A clay and burlap cornucopia wall hanging to decorate for the season!
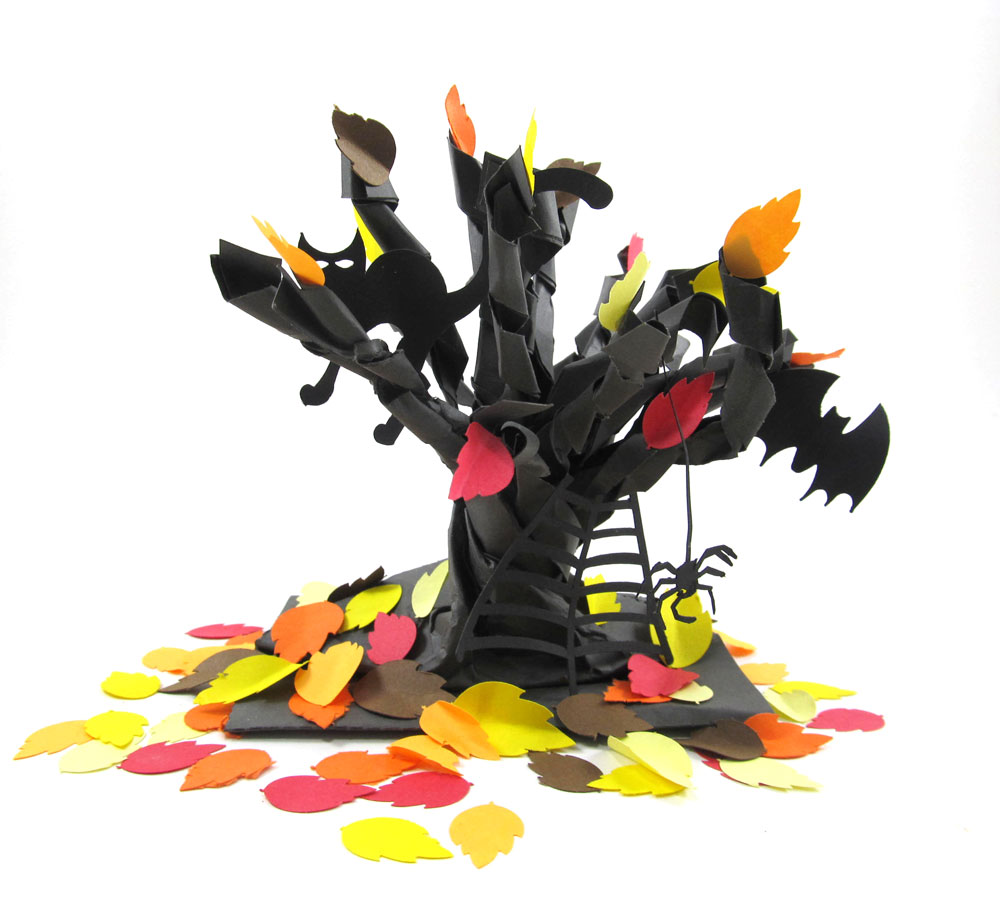
This versatile 3D tree design makes a nice centerpiece for the entire Fall season. Decorate with colorful leaves, or it bare branches with leaves scattered at its base or as pictured for Halloween!
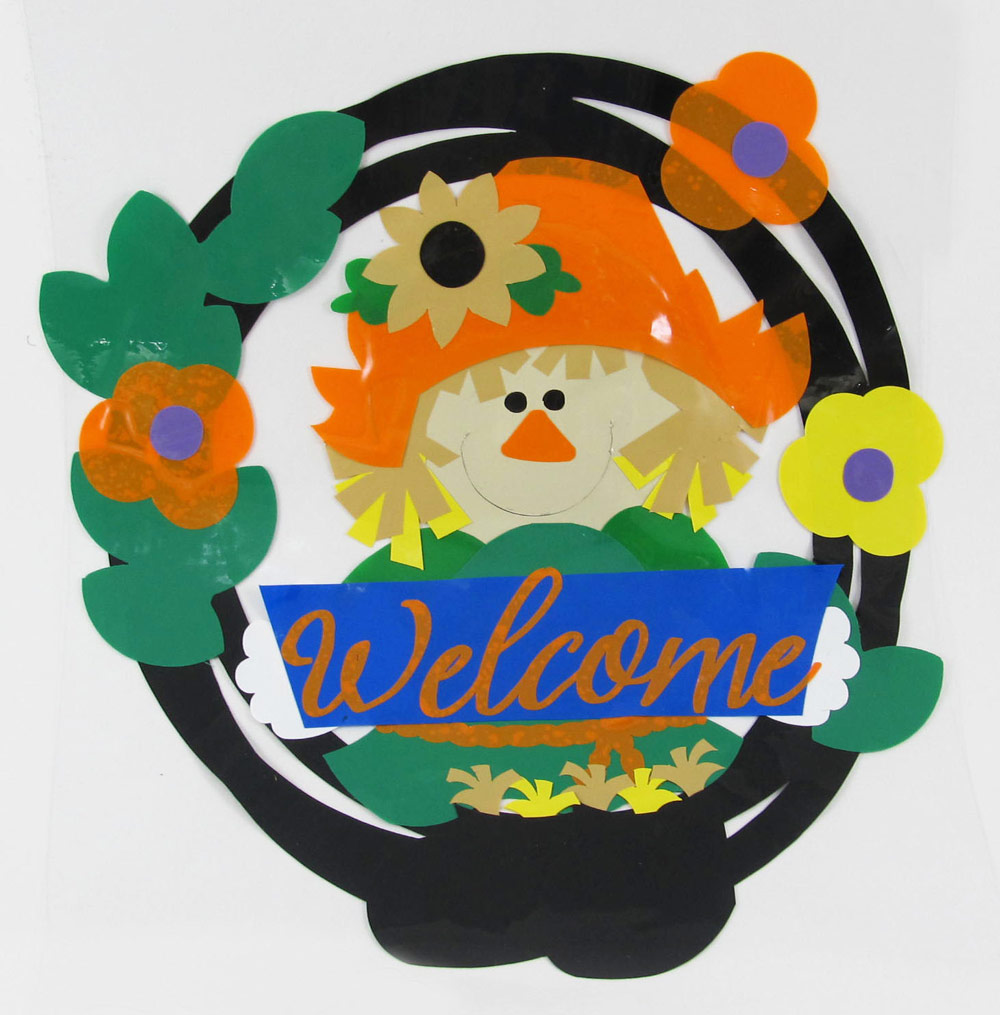
When I was a girl I played with paper dolls. When our daughter was young, instead of using paper dolls, she played with die-cut vinyl pieces called Colorforms. Today we can cut our own shapes from vinyl cling material and create designs for placing on our windows, smooth surfaces, or for using in building creative designs on a vinyl covered board, much as our children did. Today, I had the opportunity to play with Pazzles Vinyl Cling material to make a cute fall decoration for my sliding glass door. I found a nice Scarecrow design and a Grapevine Wreath in the Pazzles Craft Room to adapt for this project. Since the vinyl I was using was 9” wide, I resized the wreath to about 9” wide. Then I selected parts of the Scarecrow with pumpkin design that I needed. I wanted the scarecrow to be sitting on the edge of the wreath instead of standing, so I transformed the britches portion of the design into a banner. I resized the scarecrow pieces to fit nicely inside of the wreath. I typed the text using the InVue software, with the Brightside Typeface, and thickened it by shadowing at .02”.
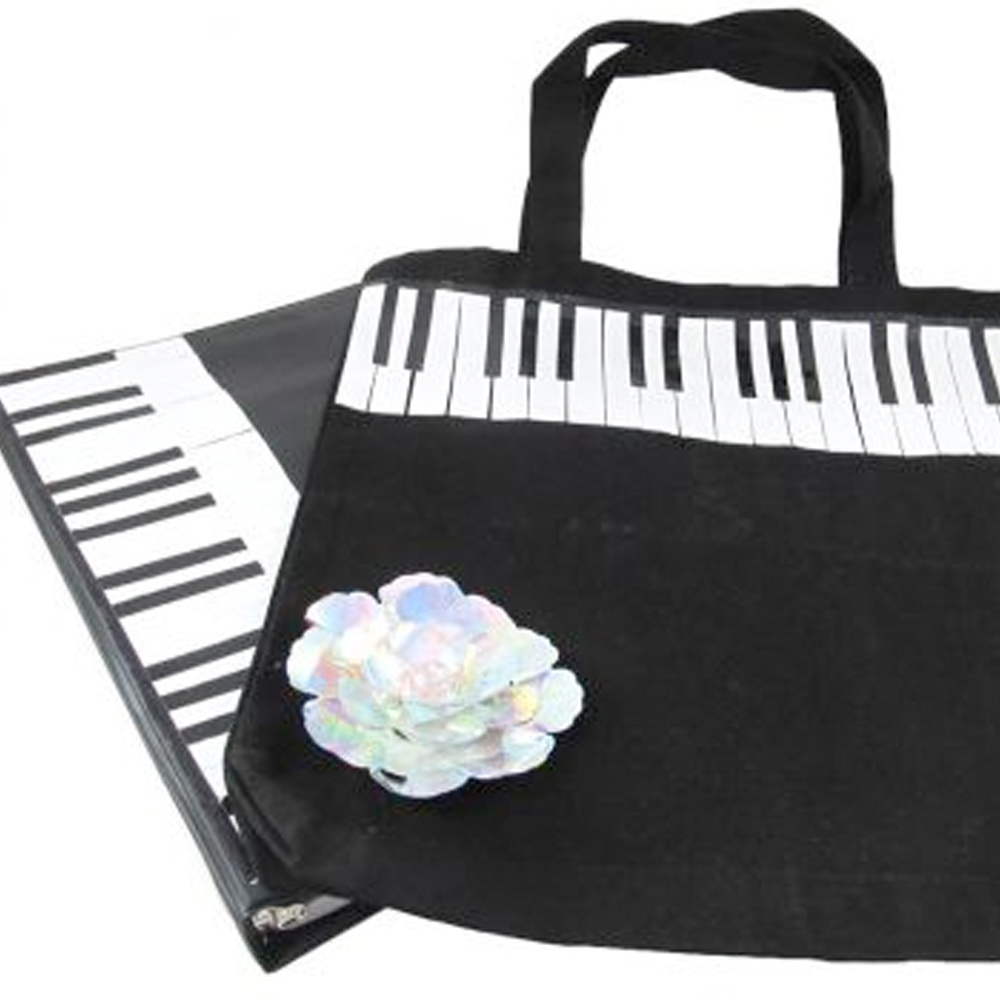
As school is starting, it is a great time to help our students get organized with book bags and notebooks. Creating custom decorations for them using our Pazzles cutters and Duct tape adds a special touch which is simple. I purchased a bag to decorate from Joann.com in the 13” wide size, perfect for holding music books. Walmart had binders on sale, so I picked up a black one. The Pazzles Craft Room has so many wonderful cutting designs that could be used to decorate these item with any theme. I decided to decorate mine with a simple keyboard design. I had white Duct tape on hand which made experimentation easy. The attached file worked well for cutting the keys from strips of Duct tape that is 1.9” wide.
Our family likes to go tent camping, so I started this project with the idea of a dome tent. I looked through the Pazzles Craft Room for a 3D project with a dome shape that I might use for the tent. I found the Hot Air Balloon Box design with a nice dome shape, so decided to use the top portion of that file for my tent. After I cut it out, my husband commented that it looked more like a Yurt. When I looked up Yurt, I learned that it is a portable, round tent, covered with skins or felt, and used as a dwelling. The structure includes latticework for walls. That gave me the idea to add a section of lattice around the walls of my design to make a Yurt. You will find the resulting Yurt file in the Pazzles Craft Room.
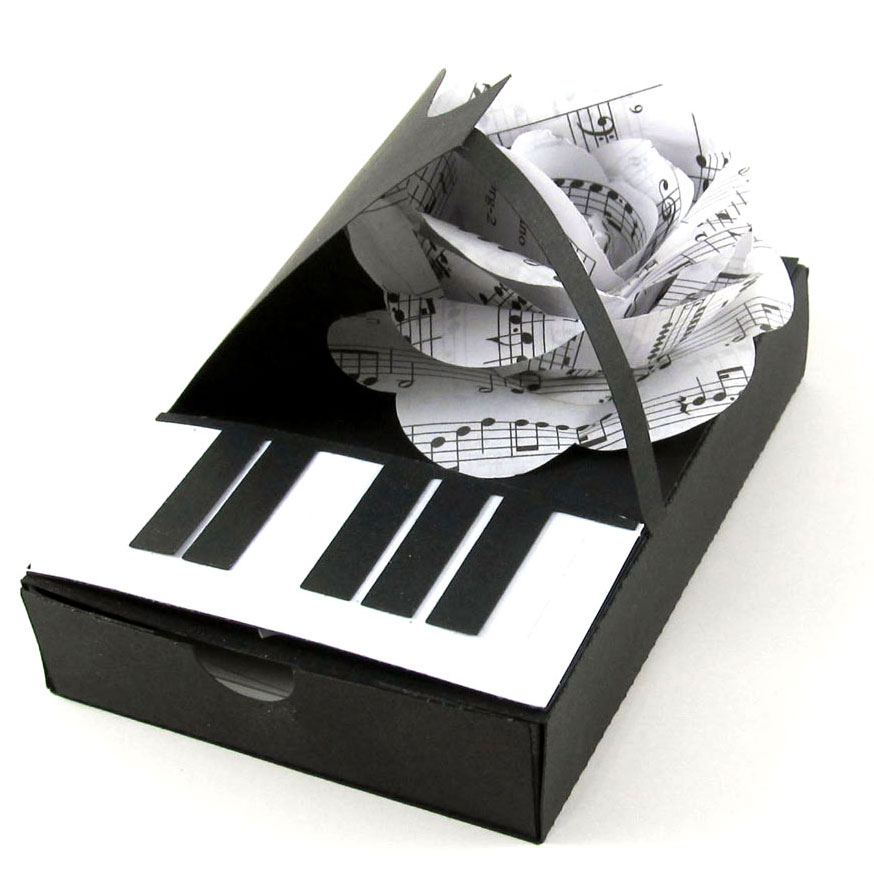
Recently I was crafting with six of our young grandchildren, ages two through 10, and wanted an easy project for them to make quickly. I had made some musical roses from the Twirled Flower Rose file in the Pazzles Craft Room recently and needed to make more. After I made one, the children each wanted to make their own. I quickly printed some sheet music on both sides of regular printer paper, resized the Twirled flower file in the InVue software to 8” wide to fill the 8.5”x11” paper, and the children were dazzled as they watched the Vue cutter make swirls around the printed paper on the mat. I showed them how to start wrapping the outside end of the cut strip around a pencil, and keep wrapping until all of the paper was wrapped. We put some clear drying glue on the last inside bit of paper, set it on the table and let it unwrap until we liked the size.
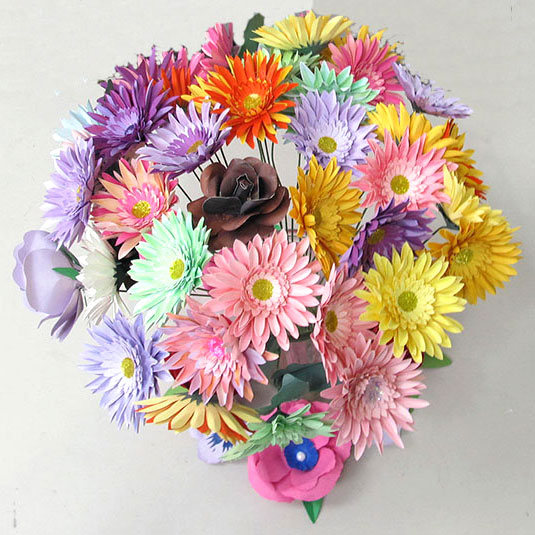
I found a petal from the rose bush outside of my studio, and decided to fashion one with a similar shape out of a triangle using the Pazzles InVue software. You can find the cutting file for the resulting 3DRose in the Pazzles Craft Room Library. These files came in handy for creating paper bouquets for my son's wedding. Here's how I assembled the roses. The first layer formed the flower bud when the sides of one petal were hot glued to an opposite petal. The remaining 3 petals were hot glued about 1/3 of the way up from the base of each petal, and adhered to the forming bud. The back center of the next layer was hot glued to the first, with the petals positioned alternately to those of the first. A thin line of hot glue was applied to the base of each petal, which was folded up to adhere to the forming bud. The corners of each petal were curled away from the center of the bud using the small end of a small paint brush. This process was repeated with all of the layers except the last one. The last layer was simply glued in the center back, with no glue required at the base of the petals.
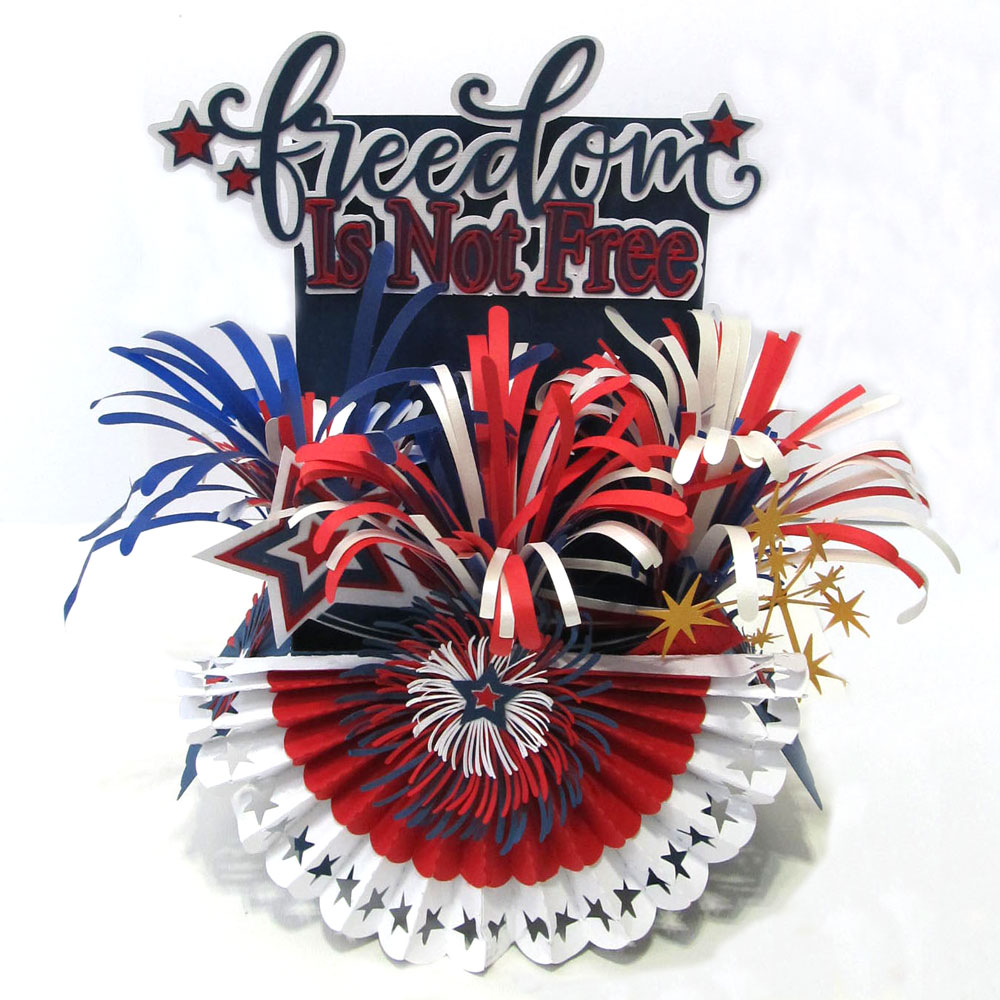
A centerpiece for your table for freedom that makes a strong statement in support of those who have given so much to gain and protect the freedoms we have.
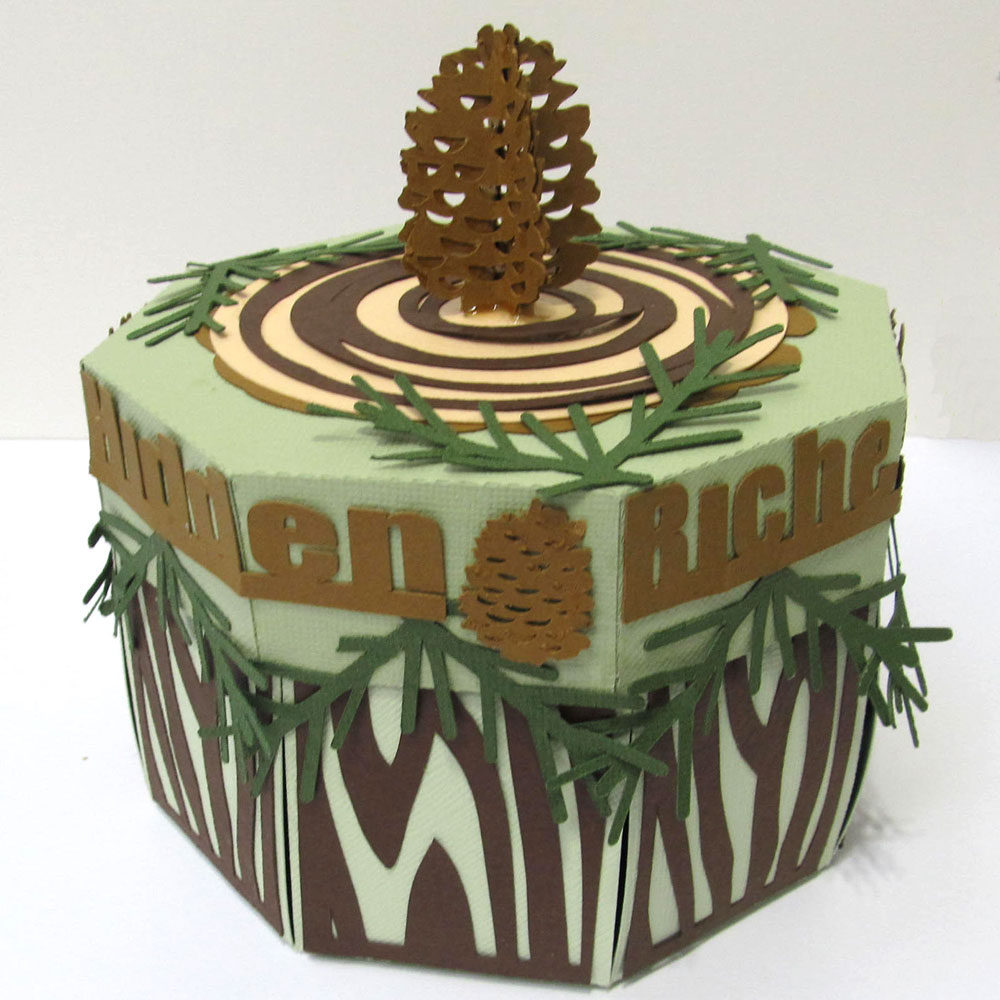
This octagonal exploding box is sure to WOW the outdoorsman recipient. It can serve as a treat box, gift card holder, or a gift item.
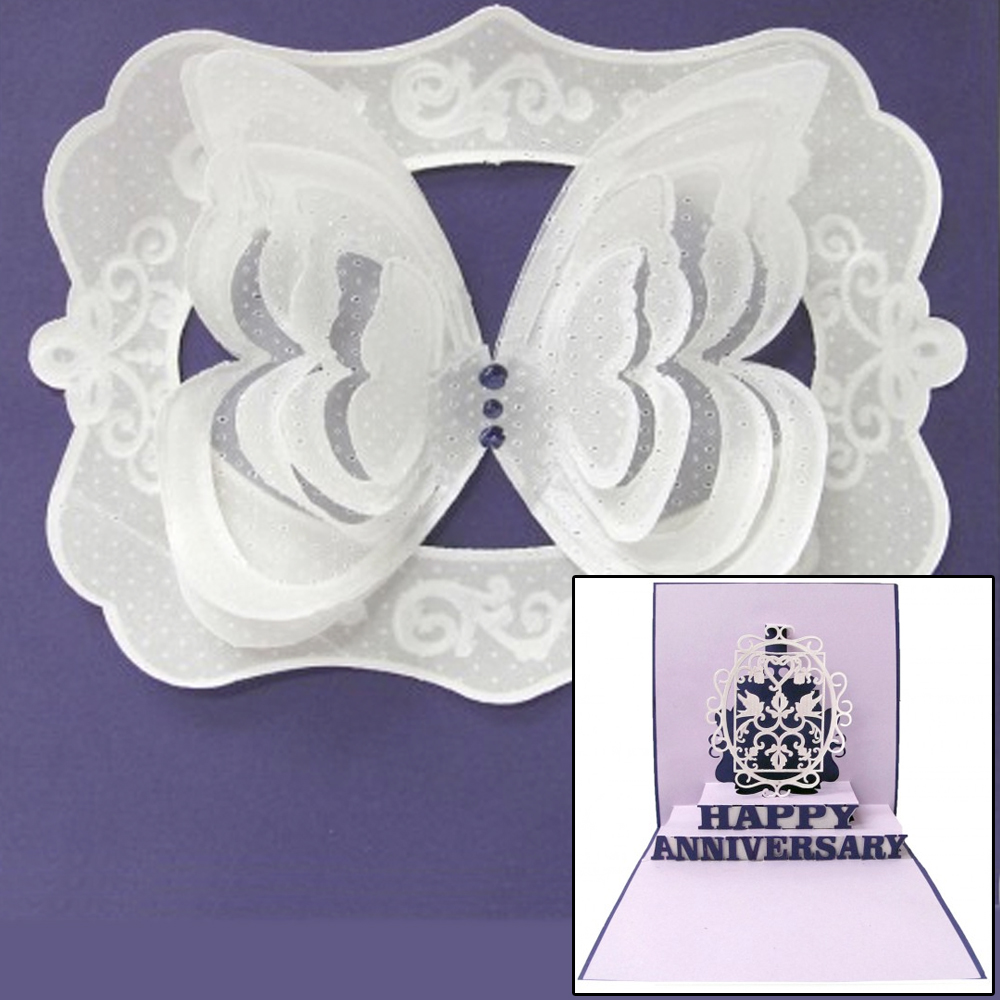
I needed a nice anniversary card, and found some suitable designs for creating it in the Pazzles Craft Room Image Library. I wanted to use my Piercing Tool for this project, and thought that this 3D Butterfly would be perfect inside of a frame for the card front. The piercing and embossing on vellum gave the pieces the elegant touch that I was looking for. I used a Purple Viva Pearl Pen to create the tiny pearls on the center of the butterfly to add that final touch to the completed card.