Holidays


Gingerbread Village Paper House

Gingerbread Village: Main Street House

Just down Main Street is the cutest little house with every Necco wafer perfectly positioned on the pitched roof. The village kids like to sneak up and take a lick of the giant suckers stationed at the doorway, but do it quickly, because it's likely Mrs. Ginger is watching from the window. She'll write down your name and report you to Santa.


Gingerbread Village: Church

In the center of town just down from the pond is the Gingerbread Village church. After Sunday services the congregation gathers for hot cocoa and gingerbread cookies from Graham's Bakery. The stained glass windows were a gift from Santa Claus himself after a huge frosting storm in 1989 knocked out the old windows.


Gingerbread Village: Country Cottage House

Welcome to our annual 12 days of Christmas event! We have been busy creating so we can share with you. Come on in to our first Gingerbread Village piece, the Country Cottage house, and make yourself at home. This tiny house holds all kinds of sweet treats and you are welcome to stay as long as you'd like. If you get hungry just break a piece off the door and have a snack.


Christmas Tree Pieced Card Two ...

Do you have your Christmas cards done yet? I am still working on mine. Every year I try to design an easy card that I can duplicate pretty effortlessly so I can get them done on time. But then there are a few special people who mean the world to me and I want to send them a special card. Maybe something a little more creative. A card they will know I spent time on just for them! But during this time of year, who has time to design a whole different card? Not me! So instead I took my original design and vamped it up! On the simpler card I used the Tree, Squirrel and Ribbon Banner files from the Craft Room. The snowflake is in the Pro 2014 software image gallery and I used the drawing tool to create the star, then I assembled them in a pretty basic design.


Christmas Lamp Card Two Ways

Hello Pazzles friends, Melin here today sharing a fun way to make a fast simple card and or take it to the next level. For the main card base, I used the Side Step Fold file from the Craft Room. I cut them both in kraft cardstock. I then used my DCWV Performance stack and found some lovely cream note paper. So I cut a cream mat for the main area of the card and then cut the rest of the mats in the patterned paper. I then turned to the Craft Room Library and found the fun Christmas Lamp file. I cut them out in black cardstock. For the "fancier" version, I took it a step further and embossed it with black embossing powder. If you look at it, you can see how it makes the lamp look a little more "realistic". I then cut the flames out and inked them to give them a bit of a "glow". I then cut out the garland and cut extras to line the bottom two steps on each card.


Christmas Cards Set

Happy Holidays Christmas Cards Two ...

From CAS (clean and simple) to just a little more fancy, whichever you prefer, this card has you covered. Clean and Simple Christmas Card First I made a simple card by drawing a rectangle and giving it a ducktail (ribbon) end. I duplicated and then resized them, giving me a step effect. I cut out the banners in simple red and green paper. I then cut a piece of white to fit the front of my card and used my Pazzles Pen Tool to add Happy Holidays with the Alex Brush font. I added it all to a premade card base to create a very simple, and easily duplicated holiday card, which comes in handy if you have to make a lot of them.


Christmas Elf Ideas

Elf Approved Cutting Collection: WPC, ...

Hide your marshmallows and lock down the pantry, the Elves are coming! So many people are participating in the fun Christmas Elf tradition, that we wanted to have a little elf fun this year too.


Candy Cane Christmas Cards Two ...

Hi fellow Pazzlers, Joanna here with you to share two Christmas cards using my Pazzles Inspiration. One is a Print and Cut card that can be made in bulk and the other is using the same design but paper pieced. The second card is more time consuming to make, therefore you would possibly only wish to make these for your closest friends! I sized the cards exactly the same and used the rhinestone feature on both the base cards. Instead of using rhinestones which would be quite expensive I filled the rhinestone design with a red fill and red line colour, then Print and Cut my base card. Print & Cut Candy Cane Christmas Card I created my rectangle for the inside white card and made an outline for the red card. Check out the Video Tutorial on Creating an Outline, which will help you with this process. I imported the Candy Cane cutting file into my software, which I found in the Pazzles Library.


Thnaksgiving Kid's Table

Thanksgiving Kid’s Table Activity Mat

I love Thanksgiving, not just for all the delicious food, but for the feeling in the air too. As a kid I loved how the adults sat at one table and all of us cousins got to sit at another table decorated especially for us. To carry on my favorite childhood memory I decided to create a project designed with your own little turkeys in mind this Thanksgiving. Use this fun activity placemat, cup and napkin ring set to keep little hands busy while they wait for dinner to be served. Let them decorate their own cups and listen to them giggle as they “gobble” up cherished memories this Thanksgiving.


Thanksgiving Turkey Box

Turkey Box Remake

This fun turkey makes a great decoration for the mantel, or an end table, or use it as a Thanksgiving table decoration. If you want to use it for place cards, be sure and look to see what Design Team member, Melinda Beltran did with a few modifications. When I made the original turkey box a few years ago, I had no idea that it would remain one of my all time favorite projects that I had created. I have done a few modifications to the file to make it quicker and easier to assemble, without taking away from the fun personality of this character.


Thanksgiving Place Cards

Thanksgiving Place Cards

Busy, busy, busy. We are coming into the time of the year when we are so busy. We don’t have time to do elaborate projects, but still want the look of elaborate projects. Thanksgiving is one of those times. We want everything perfect on our dinner tables right down to the last detail including our place cards. Today I have a quick easy idea for place cards. I found these silver 3" x 2" frames at a yard sale for about buck but I have seen similar ones at the Dollar Tree and Michaels for next to nothing


Thanksgiving Table Decorations

Thanksgiving Table Decorations

I am decorating my Thanksgiving table with Pazzles vinyl. This was my very first attempt to cut vinyl. I do not know what I had been afraid of. It is so easy. I started with the Give Thanks phrase from the Craft Room Library to decorate a vase for a centerpiece. I was working with small pieces, so I did not use the transfer tape. I did however, print out the image, tape it to the inside of the glass vase and use that as a guide to lay down the layers of vinyl.


Advent Countdown Cards

Advent Countdown Calendar

Not a creature was stirring, not even a mouse…… 
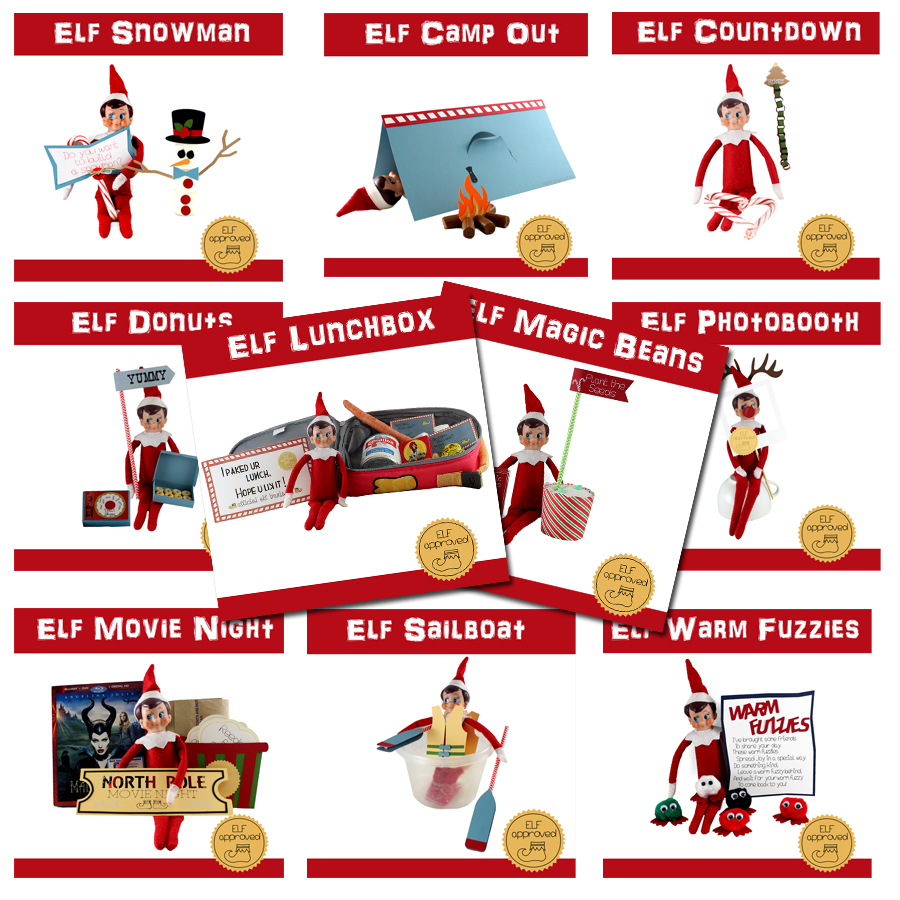
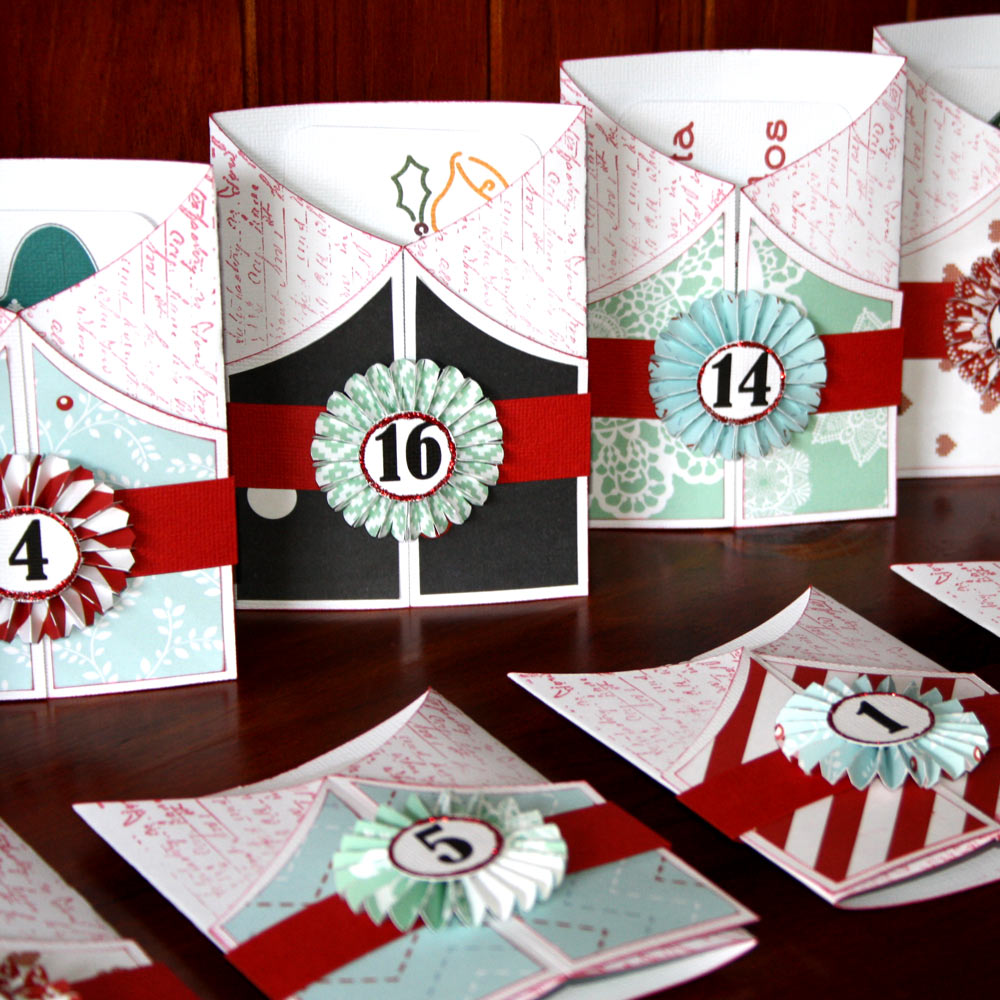
Can you believe Christmas is just around the corner? I’m constantly reminded by the children and also the Christmas merchandise that seems to hit the stores at the start of October! I’m sharing my ‘countdown calendar’ with all of you today and hope I leave you with some inspiration for your own interpretation of one. I changed my mind so many times of how I was going to create this calendar, but I have to say I’m very pleased with the result, and I can still go a bit further with embellishments if I want to. We haven’t done a countdown calendar quite like this before, and so the thought of creating something with family activities built in sounded like fun. The main files I’ve used are the Gate Fold Card from the Fun Folds 1 Cutting Collection, Assembling Rosettes files, and Pocket Card. I used the print and cut method for the small discs with each number and also for the activity cards.


Printable Cherry Pie Slice

Printable Cherry Pie Slice

A delicious print and cut project that is 'easy as pie' to make! The back of the box opens so you can tuck small treats or treasures inside.


Fall Leaf Favor Boxes

Here in the UK, the leaves on the trees are changing color and it is a strong reminder that Autumn is here. I thought I would create some Thanksgiving Favor Boxes for my friends from a selection of cutting files found in the Pazzles Library. I used the Rounded Box Top file and decided to place some printed leaves on the front of the boxes. I used the Fall Leaves by Miss Kate Cuttables which includes 3 leaves in the set. I imported the Rounded Box Top onto my visual mat and placed one of the leaves in the center of the front panel. I then used my InVue software to print the leaf onto my cardstock. Once printed I placed my cardstock onto my Print and Cut mat and cut the box out. I repeated this two more times switching over the leaves.


Thanksgiving Centerpiece

Happiness Table Top Banner

I love personalizing my projects and I generally try creating my projects with someone special in mind. I love giving my creativity away and having that person know it was made especially for them. Thanksgiving is right around the corner. For those hosting your own turkey day, this is a great way to greet guests with personalized messages. Perhaps the use family name, or glue several sections together and make an entire saying for your Thanksgiving centerpiece.


Wicked Witch Layout Sketch

Cut And Paste Sketches: Wicked ...

It's been a while since I shared a Cut And Paste Sketch with you, but today I have a totally wicked layout to share. I'm hoping this layout can be used to document your Halloween parties and the yummy spooky treats you bake for Halloween. There are so many great Halloween paper lines this year, so the hardest part of making this layout will be choosing which papers to use.


Halloween Wall Hanging

Halloween Wall Canvas

As most of you know I went on the Pazzles Cruise. I was so inspired by the canvas project that Klo taught us that I wanted to share it with all of you. So first of all I got a 12 x 12 canvas. In the class we used the Pazzles Stencil Material but I didn’t have any of that on hand, so I took a trip to the hardware store. I found one of those 11 x 11 no trespassing signs and figured "it's plastic, so why not give it a try". While I was there I also picked up some joint compound and some glow in the dark spray paint, but that’s for a later project.


Halloween Bat Banner

Boo! Halloween isn’t so big here in Australia, so creating a Halloween project came with both excitement and nerves! My banner project uses the Cut and Fold Flower Medallion from the Cut and Fold Medallions Collection in the Craft Room. They look great whenever used, and I hadn’t thought about using them for a banner before, but they’re perfect. The file I chose had flower cut-outs, so I changed them out for witch hats to match the Halloween theme. When using the Cut and Fold Medallions I prefer to use double sided paper so that when you fold back your cut outs, you have a contrasting paper showing. I used two sheets from Kaisercraft’s 13th Hour Collection - Evening and Dusk. 'Evening' has the orange background with the black spots (top layer). The 'Dusk' sheet I used for underneath instead of plain black cardstock with the black pattern showing.


Halloween Subway Art Canvas

This fun Halloween Canvas is a great addition to anyone's decorations. With the fun words and nearly see through spider web, it will make your friends take a second look. I have to admit, this is probably one of my favorite Halloween decorations I have ever made. I can see myself using it for years to come, because it just goes with any style of decor. After painting the canvas, I used Mod Podge on the canvas. I then used the gray vinyl from the Pazzles Neutral pack for the words. This keeps it subtle, but you can still see it through the frosted vinyl from the Pazzles Primary Pack, that is generally used to give the look of etched glass. It gives a wonderful effect for the spider and its web.


Halloween Lamp with Vinyl Silhouette

Halloween is right around the corner, and who doesn’t like to decorate for the holidays? This is a super easy project and it’s so much fun! When the lamp is off you can’t see the design. But when someone turns it on, POP, there it is! It is so fun to see their faces when they turn the lamp on! My son said, “It’s kinda like the Christmas tree. I just can’t stop looking at it.” I combined several Halloween files from the Craft Room Library to create this scene. Once I got my design the way I wanted it, I welded the elements together. (Make sure you reverse your design before cutting, especially if you are adding words.) I cut my design out using Pazzles Wall Vinyl in Cotton (White).


Halloween-Bat-Tube-Favors

Halloween Bat Tube Favors

Joanna here today, with a Halloween themed blog post. It’s that time of the year when we can go Batty at Halloween. It is such fun to make all those treat favors for the kids…….you can just let your imagination run! I have used an existing file in the Craft Room Library, using the Pillow Box Bat. I decided to tweak the file so that I could make a snug wrap around my plastic food safe tubes. I have included the file for you, so all the hard work has been done. If you use larger or smaller tubes you may need to resize the wrap.


Page 30 of 45« First...1020...2829303132...40...Last »