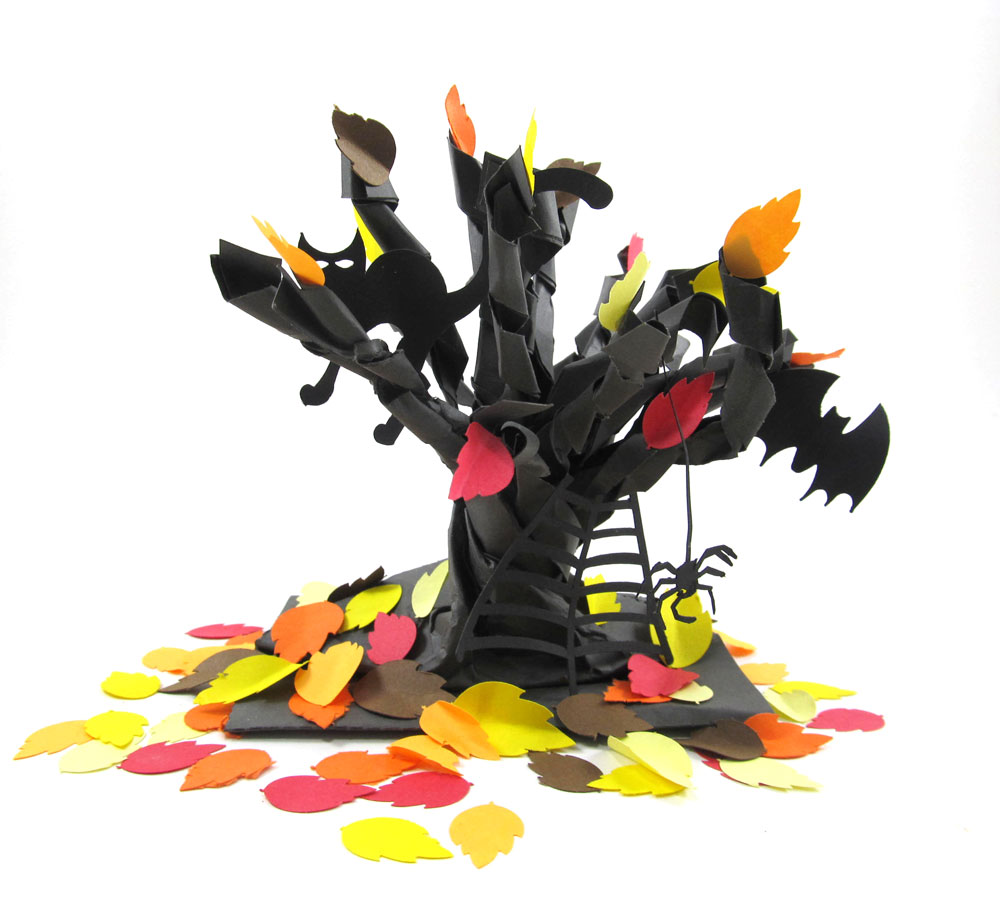
Paper Bag Fall Tree
This versatile 3D tree design makes a nice centerpiece for the entire Fall season. Decorate with colorful leaves, or it bare branches with leaves scattered at its base or as pictured for Halloween!
This versatile 3D tree design makes a nice centerpiece for the entire Fall season. Decorate with colorful leaves, or it bare branches with leaves scattered at its base or as pictured for Halloween!
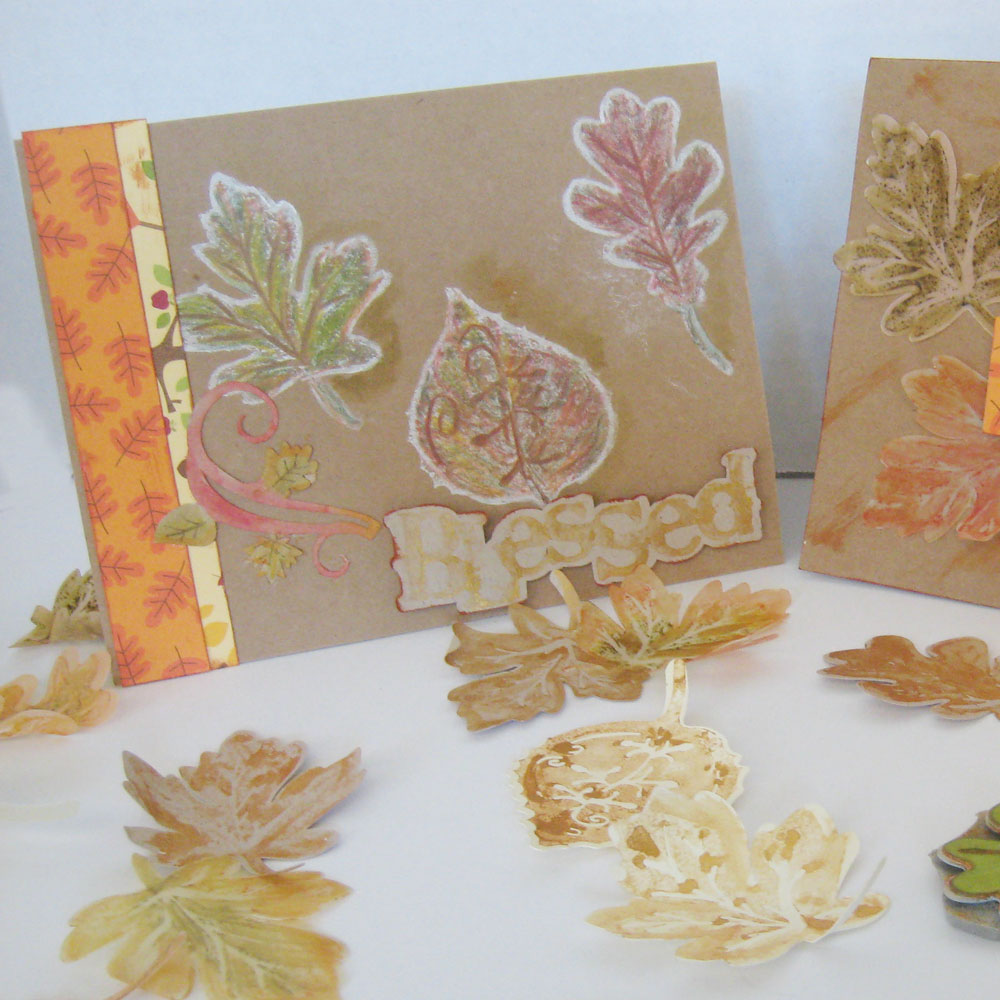
Autumn is my favorite season of the year, with cooler temperatures and gorgeous fall colors. The leaves with their multiple colors, shapes and textures always garner my attention. This month I wanted to try my hand at making stamps with my Pazzles Inspiration Vue, inspired by the wonderful fall leaves. Pazzles stamp kit contains everything you need to create stamps—two different thicknesses of special rubber, cling mounting foam, a sanding block and acrylic block to mount your stamps. The Pazzles Craft Room has a video that clearly explains the entire process from finding an appropriate design to putting the stamp together. The Pazzles Craft Room Library has a collection of Falling Autumn leaves, and unable to decide which one to use, I chose three--Falling Autumn Oak, Falling Autumn Sugar Maple and Falling Autumn Swirl Aspen. Fall Word Titles contained the word “Blessed” which is perfect for a word stamp. It may be used for many projects and cards throughout the year, so I eliminated the leaf tail for the stamp.
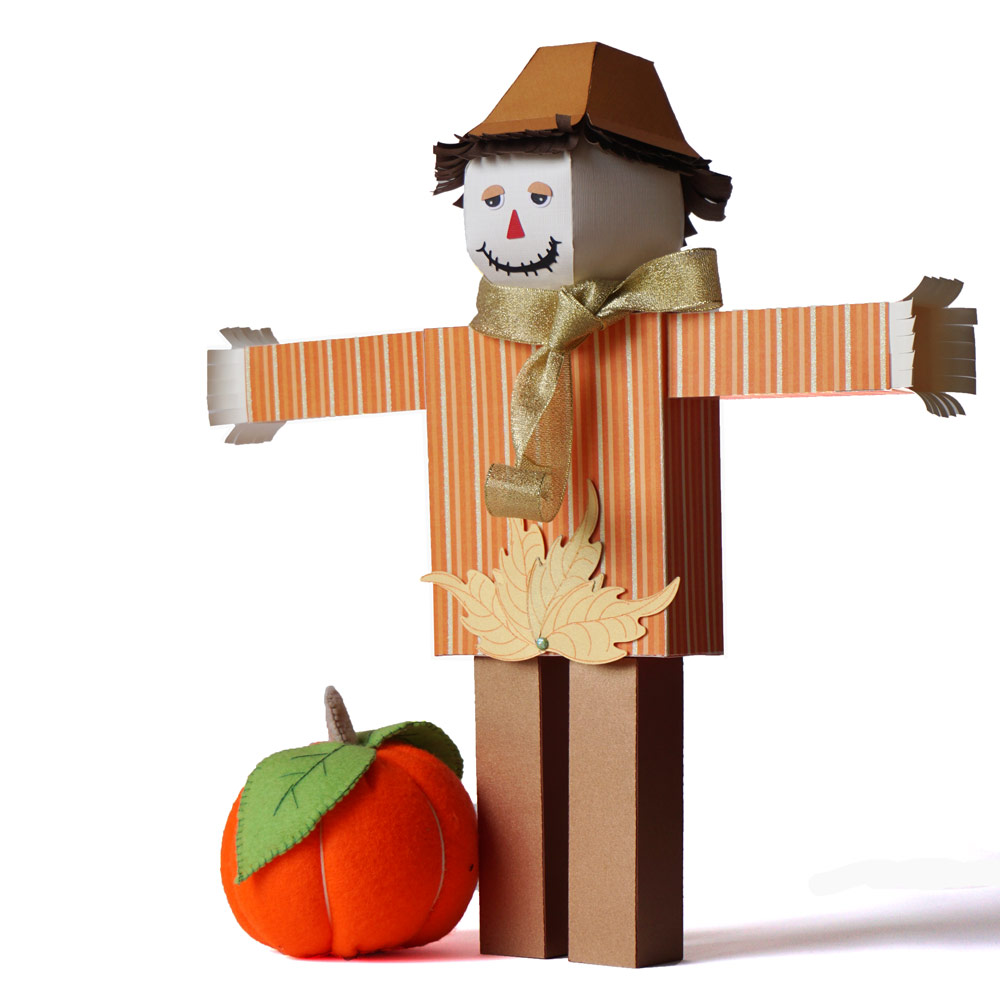
Use this dimensional scarecrow to protect your home "crop"!
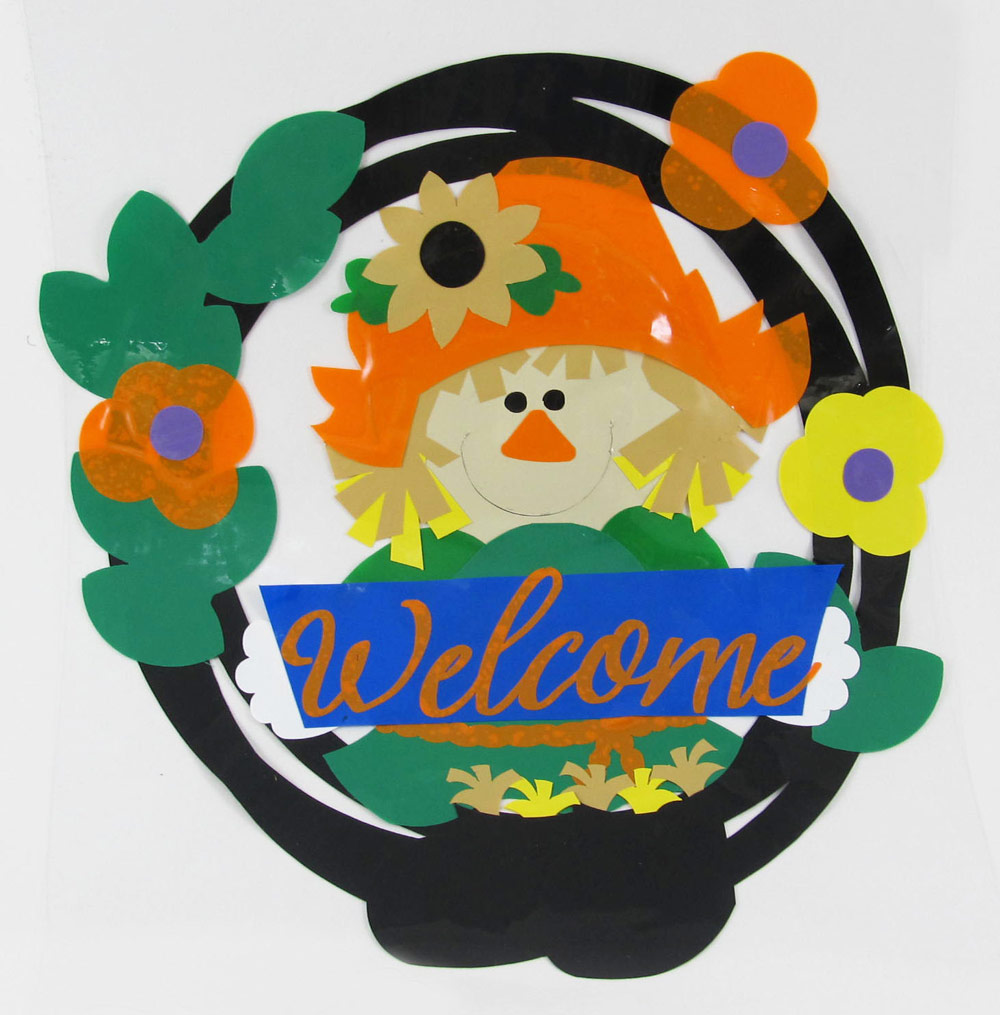
When I was a girl I played with paper dolls. When our daughter was young, instead of using paper dolls, she played with die-cut vinyl pieces called Colorforms. Today we can cut our own shapes from vinyl cling material and create designs for placing on our windows, smooth surfaces, or for using in building creative designs on a vinyl covered board, much as our children did. Today, I had the opportunity to play with Pazzles Vinyl Cling material to make a cute fall decoration for my sliding glass door. I found a nice Scarecrow design and a Grapevine Wreath in the Pazzles Craft Room to adapt for this project. Since the vinyl I was using was 9” wide, I resized the wreath to about 9” wide. Then I selected parts of the Scarecrow with pumpkin design that I needed. I wanted the scarecrow to be sitting on the edge of the wreath instead of standing, so I transformed the britches portion of the design into a banner. I resized the scarecrow pieces to fit nicely inside of the wreath. I typed the text using the InVue software, with the Brightside Typeface, and thickened it by shadowing at .02”.


This project was created from the Early Fall Harvest themed files from the Pazzles Craft Room. I have noticed that ombre is very in and thought it would be fun to make a sign celebrating all the wonderful apple varieties we are blessed with, especially here in the Evergreen State. I had an ombre acid-free cardstock paper pad titled “Paint Chip” from Craft Smith with some of the colors already coordinated for me. I added the rest of the colors from card stock in my stash. Components: Backing - two 10 by 7.5 pieces of cardboard (like from a small shipping or moving box, or a cereal box will do)
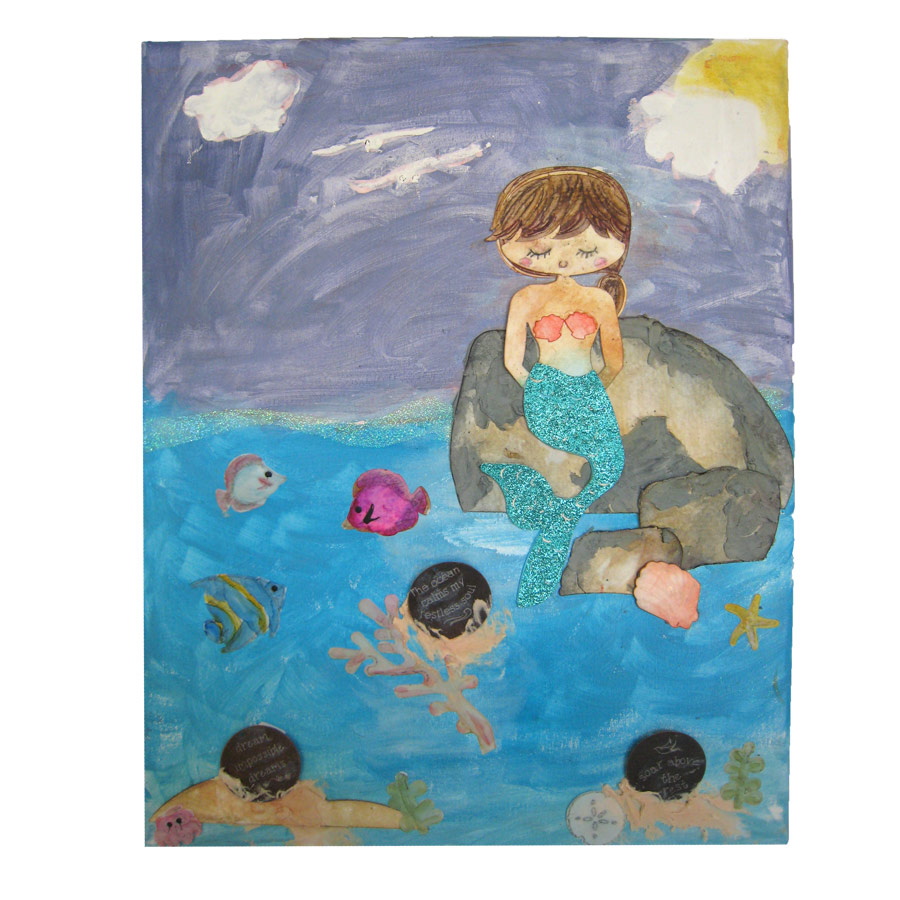
I recently enjoyed being a student in the Tim Holtz Creative Chemistry 103. I had taken courses 101 and 102 previously, each time immensely enjoying the process and play involved, and learning about how to mix various products and colors so as to not “create mud,” but to create something wonderful. I find the process of creating to be most therapeutic, and my Pazzles Creative Cutter certainly brings me to the next level, combining a variety of techniques, tools and Pazzles Craft Room designs to create art to decorate my home. My Ocean Treasures piece was inspired by the latest mermaid design in the Pazzles Craft Room, created by Miss Kate. This cute mermaid caught my eye, however I wanted her sitting on a rock, so I needed to perform a little “surgery” in my InVue software. Using the scissors tools, I could swap the body of a seated mermaid with the head and arms of the one I preferred. I also found a wonderful assortment of rocks and ocean themed designs in the Pazzles Craft Room. Engraving round metal jewelry blanks with appropriate quotes seemed like a good solution for my vision of golden treasures, thanks to the Engraving On Sequins video in the Craft Room, I was able to do this with ease. To make the letters stand out, white picket fence distress crayon was smeared over the letters, the excess rubbed off with a finger. The smudged appearance gave the illusion of being made old by sand and water. The rocks, sand, mermaid and scalloped shell were cut from watercolor paper, using the Pen Tool with drawing pencil for the mermaid’s face. Various distress inks and texture paste colored with distress ink created the look of the rocks and sand. Watercolor pencils were used to color the hair and face of the mermaid, with ink blended in the background for the skin colors.
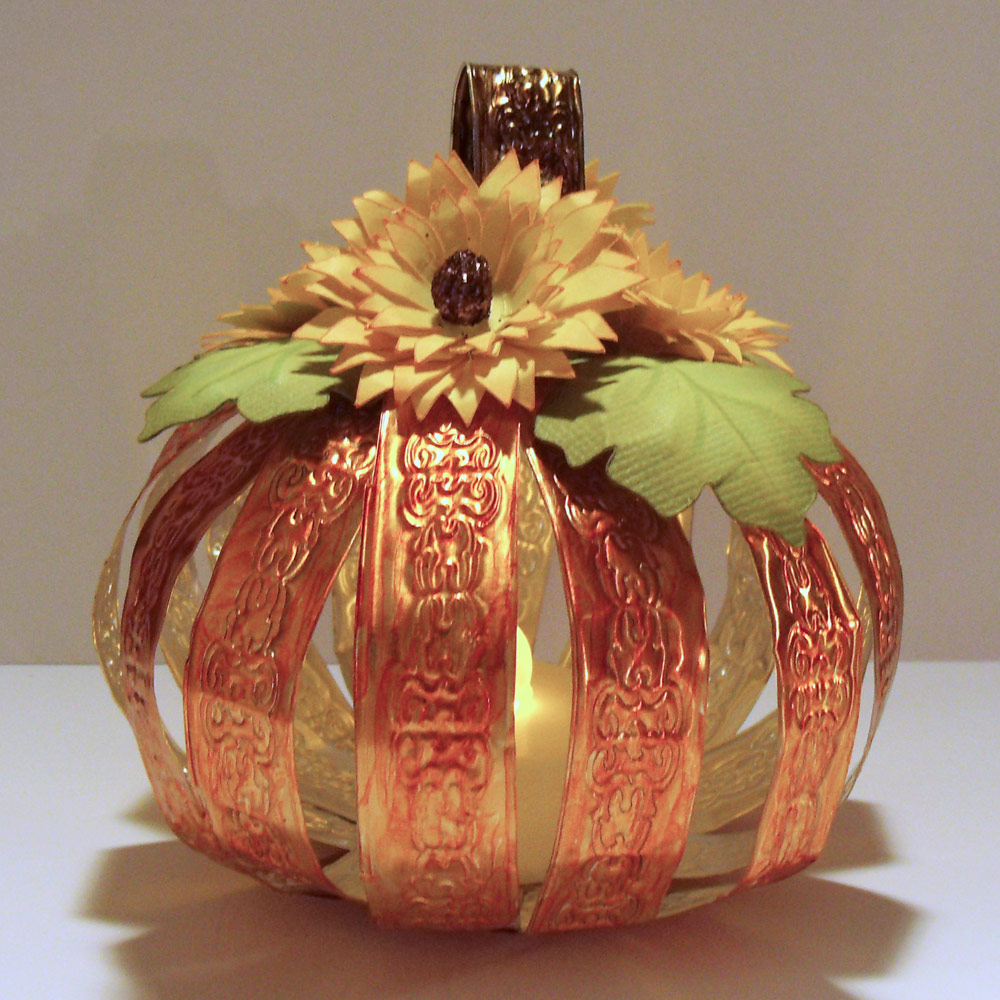
Hello crafty friends, Melinda here with you today, and I have a super fun project to share with you. As I looked around my craft room, I spied some of that fun metal craft I had used on a previous project. I decided that I wanted to do something with it, but what? I headed over to Pinterest to see what would spark my creative juices. I was going through some pins….Like most crafty hearts….I can really get lost down the rabbit…err Pinterest hole! But then it hit…inspiration. I saw these wonderful little “pumpkins” made out of mason jar lids….HERE. I didn’t have the Mason jar lids, but I had my craft metal and my Pazzles!!! So I went to work designing the pattern for the embossing. I didn’t just want to cut the metal into strips. Once I finished designing the strips, I used the Pazzles Embossing Tool and embossed the pattern and then cut them out. I cut out a total of 8 strips. You can find the file for this project here: Pazzles Craft Room 3D Pumpkin File.
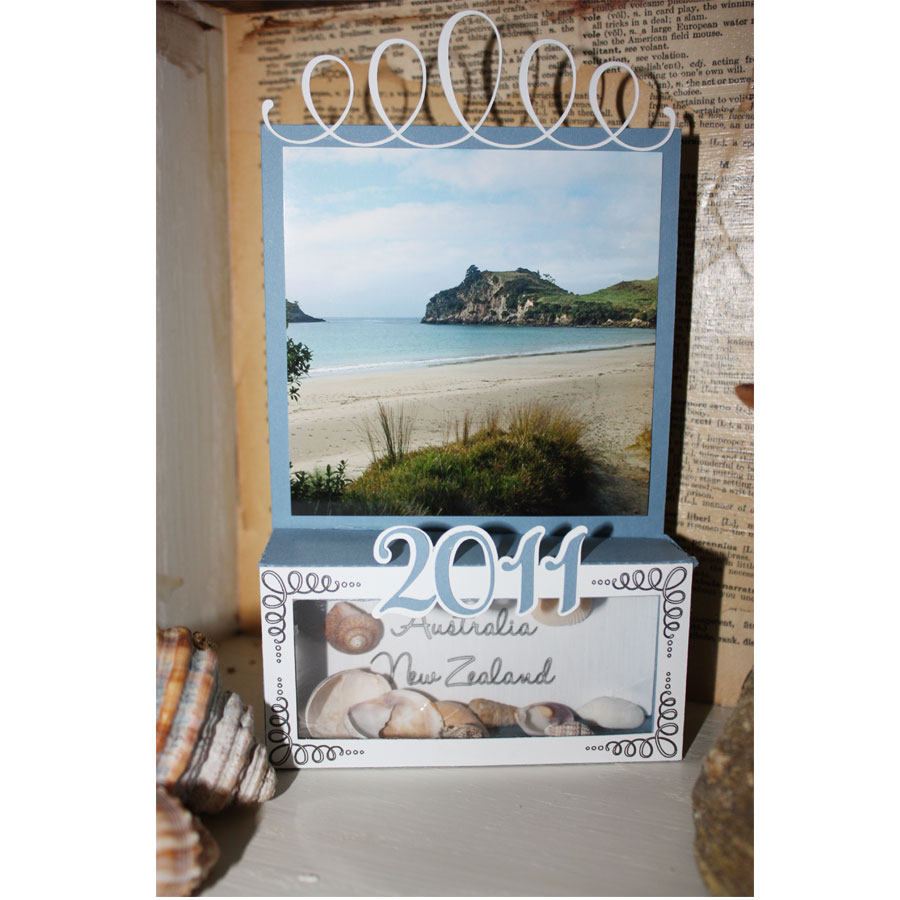
Have you ever had something like sand, seashells or any other very small piece of memorabilia that you didn't know how to share? This week's project was created with just this in mind. While on vacation, Jeff and I picked up some very tiny seashells that were perfectly shaped, but too small for basic display, so I began thinking of ideas of how to display them. I thought of shaker cards, but that was just not going to work. That is when I realized I could do a simple frame with a shaker box on it. This would allow me to put the year, location, add a photo, and have the memorabilia all in one place.
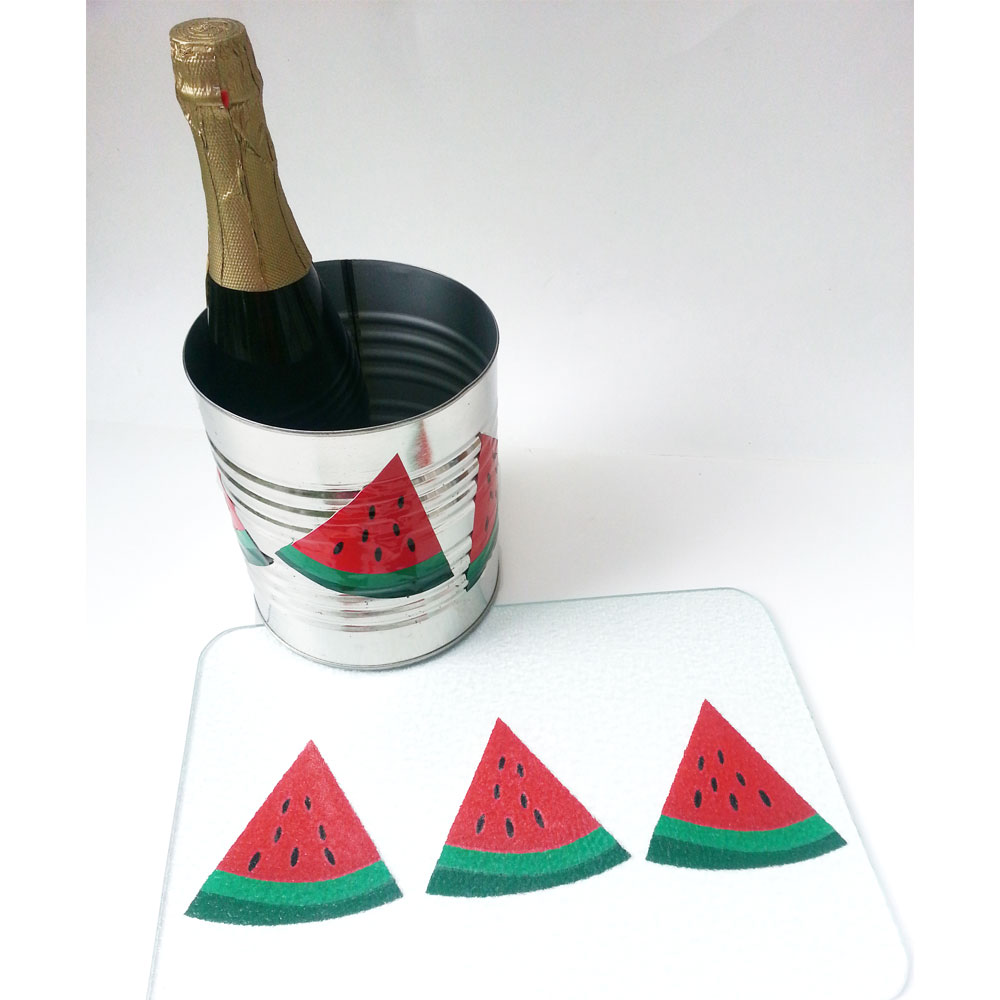
For this quick summer project I grabbed an empty #10 can (that never made it to being a stomper for my kids AND that was opened with a safety opener to avoid sharp edges!). I also grabbed a glass cutting board that I got at a thrift store and have had for quite awhile and use regularly. I washed them up, dried them, and spray painted the can only (inside and out) with clear Krylon to seal it so it won’t rust and any rust already present won’t get onto other things. I used the new Backyard Summer Collection: Watermelon wedge to create layered vinyl embellishments for a shabby chic ice bucket (or plant pot, or plastic utensil/napkin holder, or vase, or throw some colored tissue inside and fill it with mini muffins for a housewarming or hostess gift. . .) and matching, washable cutting board. I resized the entire watermelon wedge to about 4 inches square, separated the parts and created a 0.02 inline of just the red wedge. I then created a 0.04 inline of the new smaller red wedge and the light green rind piece and cut 3 sets of these from white vinyl to layer directly behind the red wedge and light green pieces on the can; the white pieces were only used on the can. I cut six sets of the whole watermelon wedge (using the smaller red wedge, not the original) from the corresponding colors of vinyl and adhered them to the can in this order: white wedges, red wedges, dark green (outer) rind, white (of lighter green/inner rind piece), light green inner rind and the black seeds.
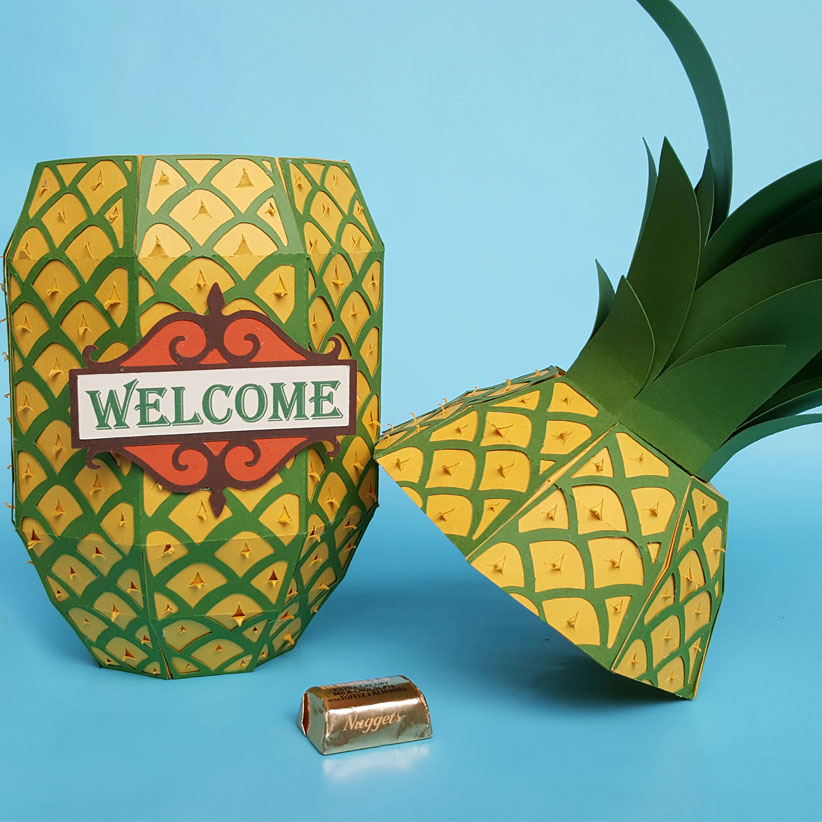
The pineapple is the national symbol of hospitality. It started way back in Columbus’s Day. He discovered the fruit and brought it back to the states, but farmers couldn’t figure out a way to make it grow outside its normal environment. The fruit quickly became an expensive commodity as it was not easy to ship without spoiling. Only honored and distinguished guests were gifted the extremely expensive whole pineapples and mostly by royalty. Even though today the pineapple is readily available, it still remains a symbol of welcome.
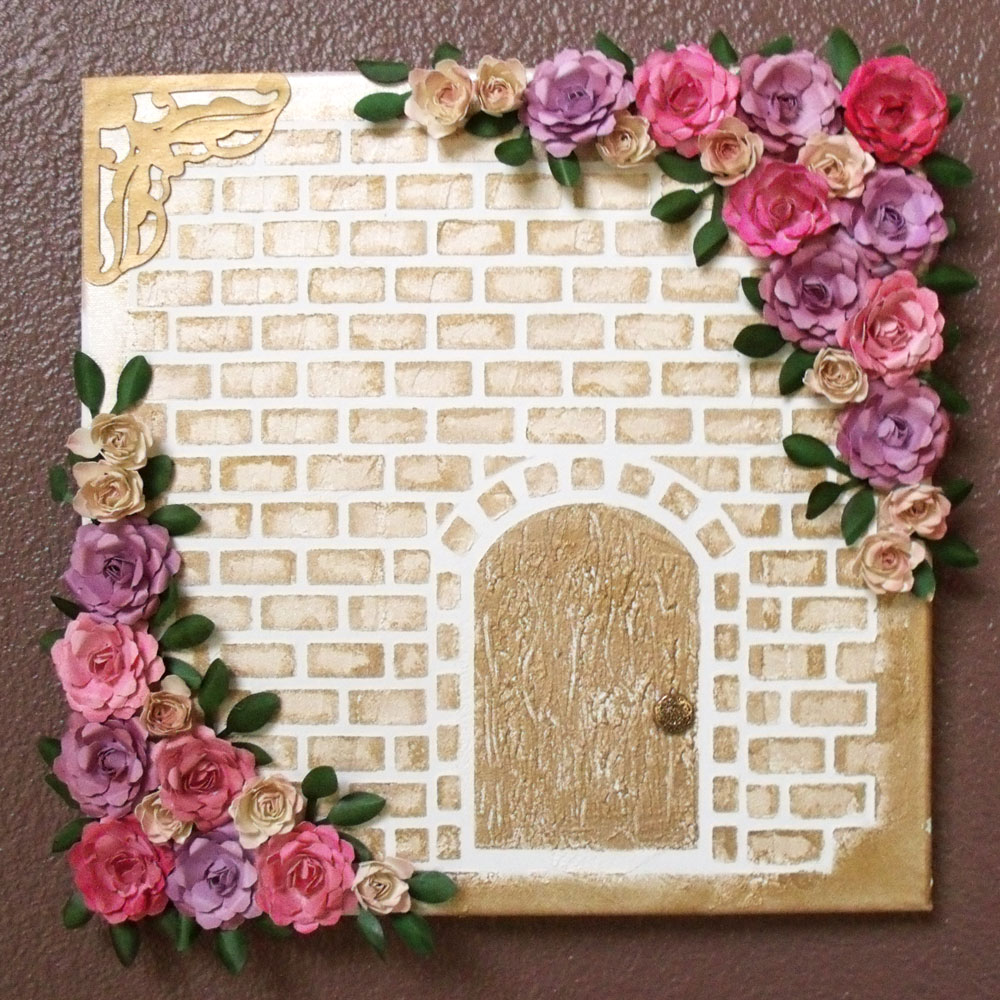
Melinda here with you today. I am super excited to share my project with you today. This month I was tasked with creating a project that used the Pazzles Stencil Material. So here is what I came up with! I created this wall hanging. I started by using the Pazzles Stencil Material . I was real excited when I got my hands on some. It is a much lighter weight than the typical stencil sheets you get at the craft and hobby stores. That means you can get a lot more creative with the type of cuts. I used the Brick Wall file. I created it in my Pazzles Software. Once I was happy with the look, I cut it out of the material. It cut like BUTTER!!! I used a semi-used mat and it had no trouble sticking down while it cut all the “bricks” out. Once I was done cutting the material, I turned to the internet and made some homemade gesso. I found a tutorial online. I used the baking soda, paint and glue version. Once I mixed that up, I simply laid my stencil down on my canvas and spread the gesso all over. I really didn’t need any adhesive to hold the stencil down as I just carefully went over it with the gesso.
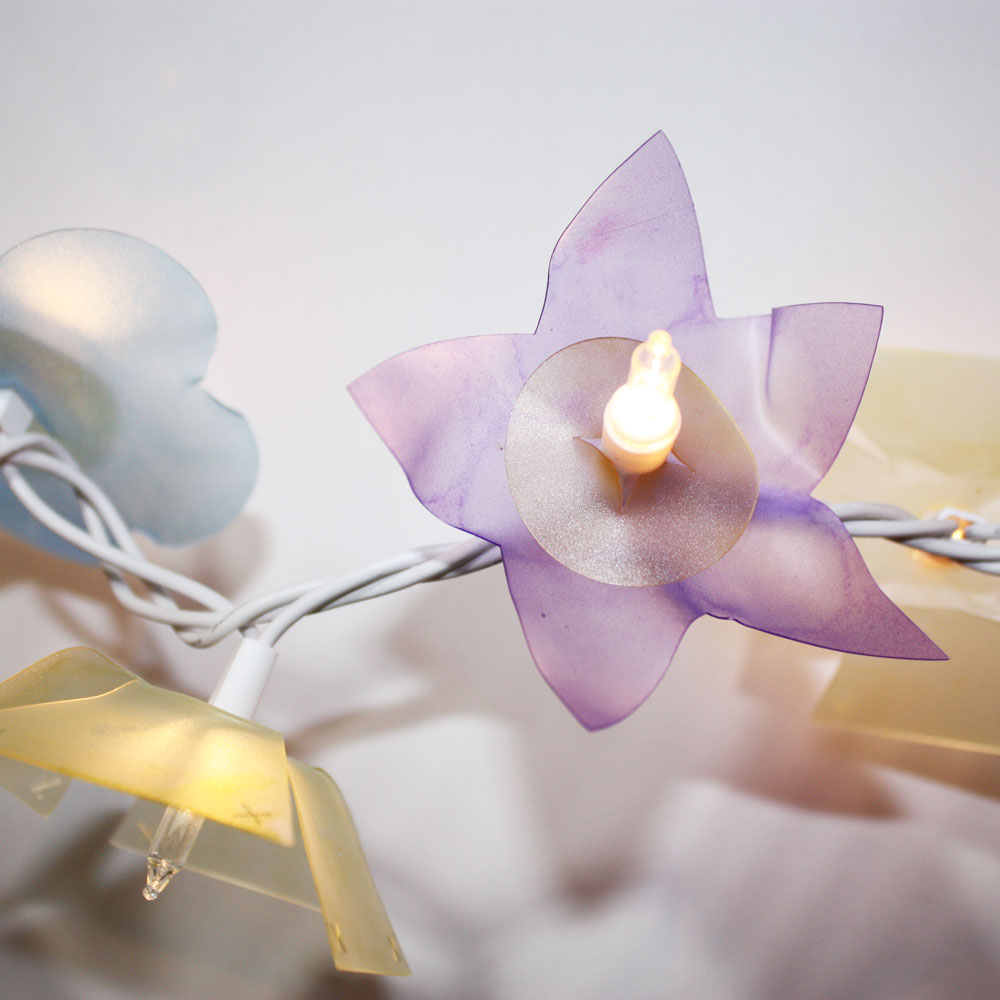
I have been seeing people put very cute string lights on porches, outdoor spaces, game rooms and even kids rooms. It is something that is so fun and appealing that it made me realize it would be so fun to be able to create a cover for those lights. I created some shapes that include flowers, starbursts and covers. You can mix and match or use just one style for your entire string of lights. The fun thing with these is, they are very easy to change out, so you can change with the seasons or holidays if you want.
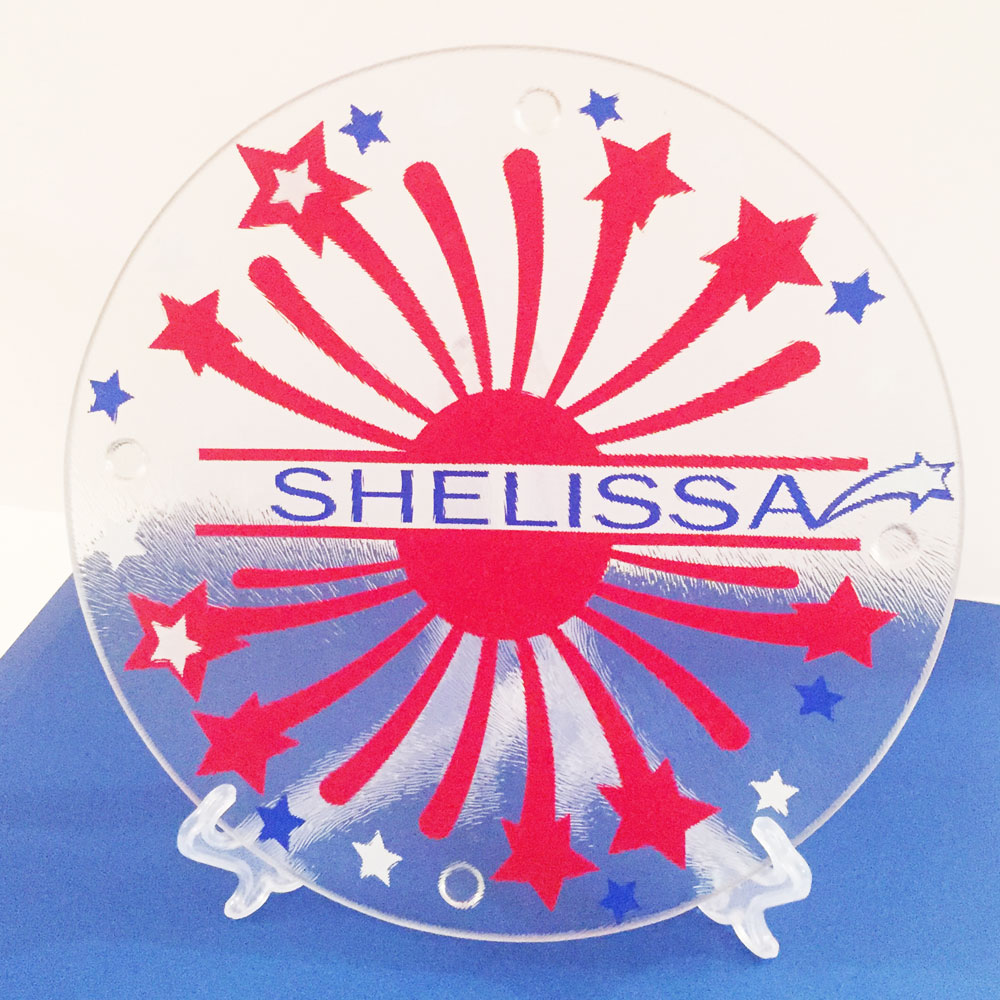
Are you looking for a kitchen décor item to help with the celebration of the Fourth of July? Pull out your vinyl and take note of how to assemble this easy project. For this project I will supply you with instructions on putting vinyl on a clear trivet that you can pick up at the Dollar Tree. This trivet is nice for putting those hot pans on in the kitchen. From the Pazzles Craft Room Library I used the July 4th Set file. I used the firework explosion cut file from this set. I used the cut path with line scissors to cut a line through the image. Once the project was cut in half, I highlighted one section and using the up arrow key about 15 times created an opening for my name.
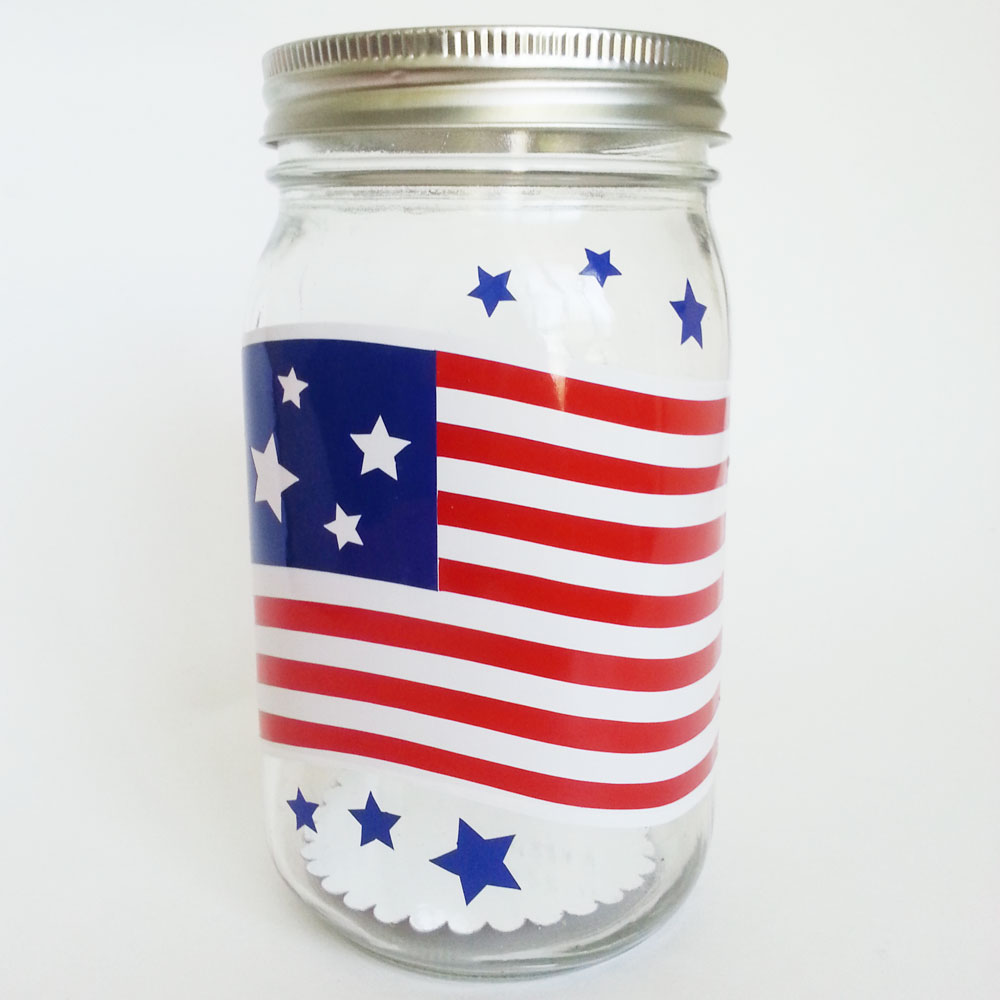
For this layered vinyl project I used the three layers of flag from the MK July 4th Set. I would recommend getting the Wall Vinyl Transfer Tape from the Pazzles Store to make placing your vinyl onto the Mason jar easier (due to the many stripes which are a little delicate), but the Pazzles Jewels Vinyl was forgiving and came unstuck when I needed to carefully reposition or remove bubbles (which I would recommend adjusting immediately because this amazing product is permanent and even dishwasher safe!) I adhered the red layer first, then the white, then the blue, using the cut out stars from the blue flag field as embellishments above and below the flag on the jar.
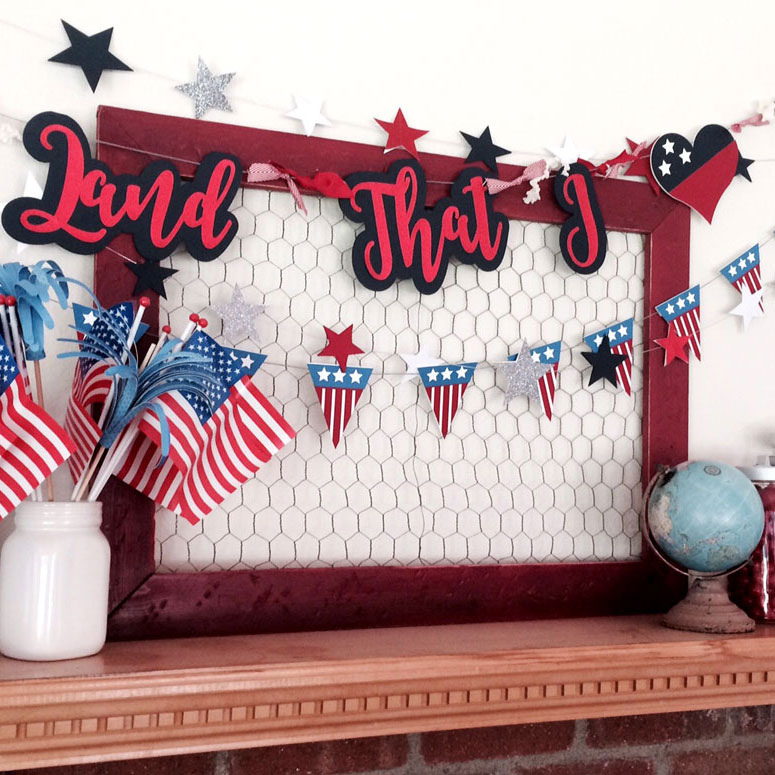
"Land that I Love" and flag pennant banner.
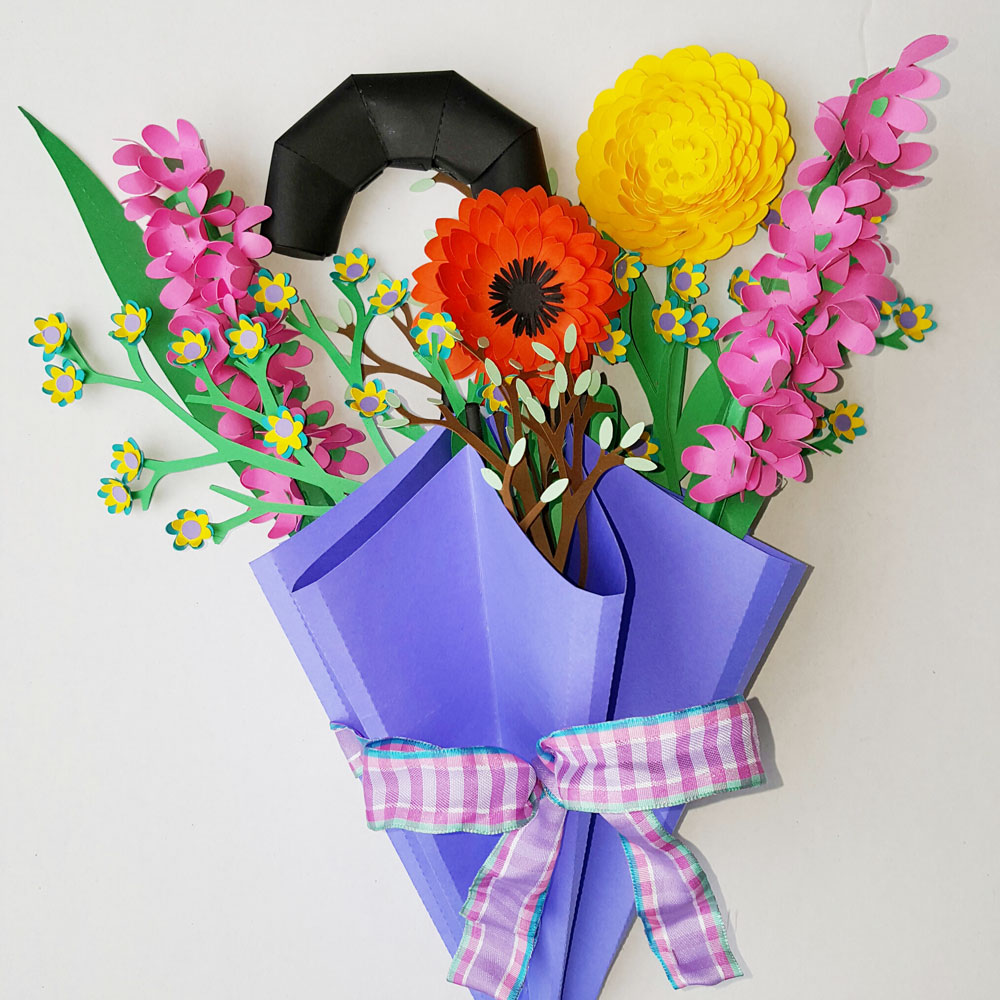
An umbrella wreath full of vibrant beautiful flowers. Makes a fun baby/wedding shower decoration or decrease the umbrella’s size and add candy inside it for a fun party favor!

Have you ever needed something for a spot in your home and haven’t been able to find the perfect thing to fit in that space? Consider creating a special art piece, using your Pazzles machine, a purchased piece of art and Pazzles vinyl. The inspiration for my art work came from the location and the area around where I was placing it, specifically next to my patio doors, overlooking my back yard. Key components in my back yard are the “occupants". I have the usual things in my area of the country-a palm tree, a swimming pool, hibiscus plants, bird of paradise plants, citrus trees and feral cats. I’ll explain about the cats, specifically, “God’s Cat Garden” a bit later. A base to place the vinyl was required. I was unable to find the correctly sized unfinished piece at my local craft store. A pre-made framed sign, made of paneling with words etched in the surface was the correct size. The piece was on sale so I purchased it, planning to sand off the words and refinish it. After sanding off the original words, I used two shades of paint on the paneling base to create a distressed look and distress stain to antique the frame.
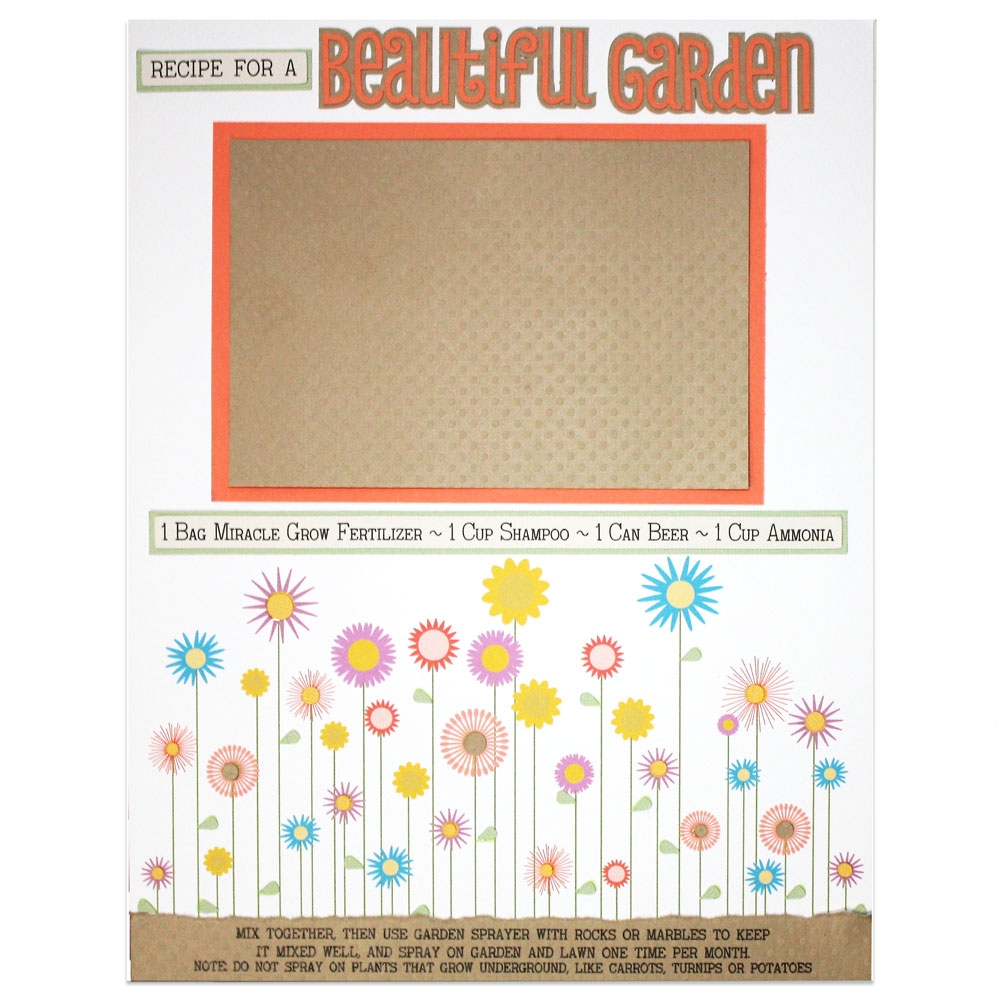
Every Spring and Early Summer as the cold weather turns and the grass starts to get green, the flowers start blooming and the leaves cover the trees in verdant colors, I get excited and ready to start adding a touch to our own yard for us to enjoy for the next few months. The past two years we have not done a lot in our new home, so this year we are ready to really get started. As I was thinking of the things I needed to do to make sure our yard is vibrant with color and flowers, I recalled the special recipe that my oldest sister used and shared with us in the past. We have used this recipe in our past homes and have always left each place with a plush lawn and beautiful landscaping with flowers and bushes that show their colors to the fullest. So I know it is time to pull out the 'recipe.' As I was doing that, I realized I could not find it. It then occurred to me, it should be with my recipe swap book that I did years ago with a group of online friends, that I still use. That meant creating a page.
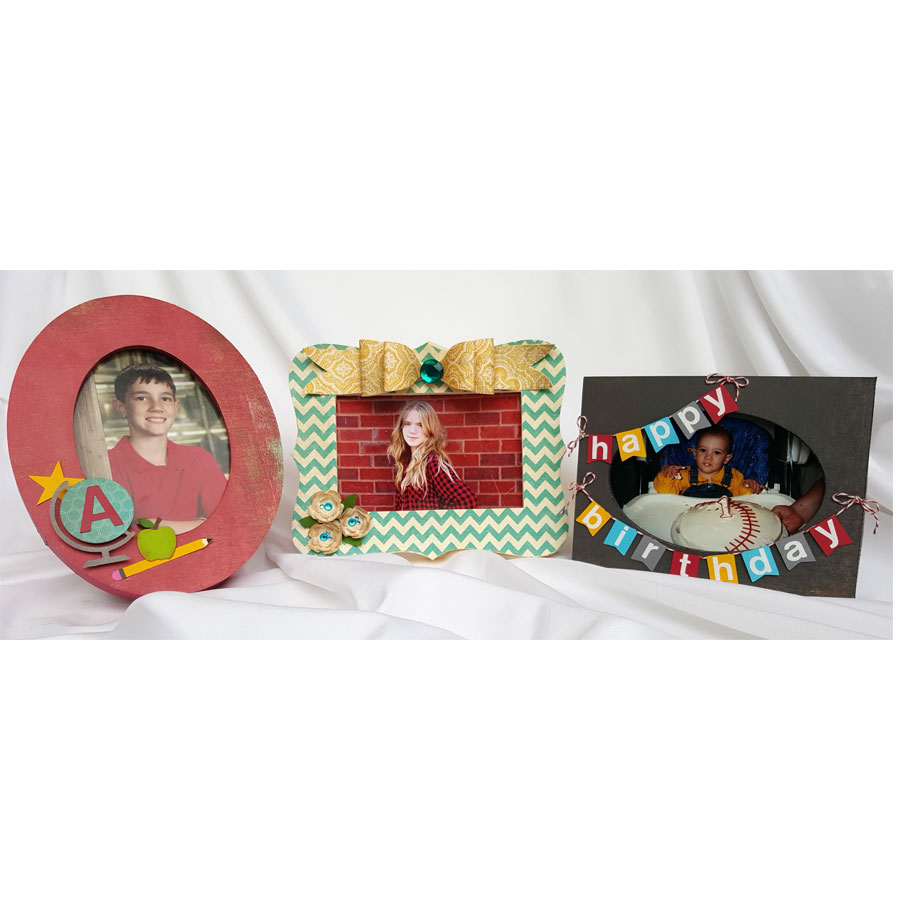
These fun frames have a dual purpose. They are not only frames, but boxes too. I was very excited about this project because, like many other projects in the Craft Room, their versatility is almost endless. You can leave them as plain as you like, or really dress them up. Check out the frames section under the decorative header in the Craft Room. You can use some of those files to decorate your frames. I think the Circus Tent file or the Choo Choo file would be really cute. Adding something as simple as a name and a basketball, baseball, or the like would make great team gifts, and remember you still have the box part to add treats to! How about adding a graduation cap to one for a grad gift! Another idea is to shrink them and use them for table markers/favors. They can be the same theme or completely different.
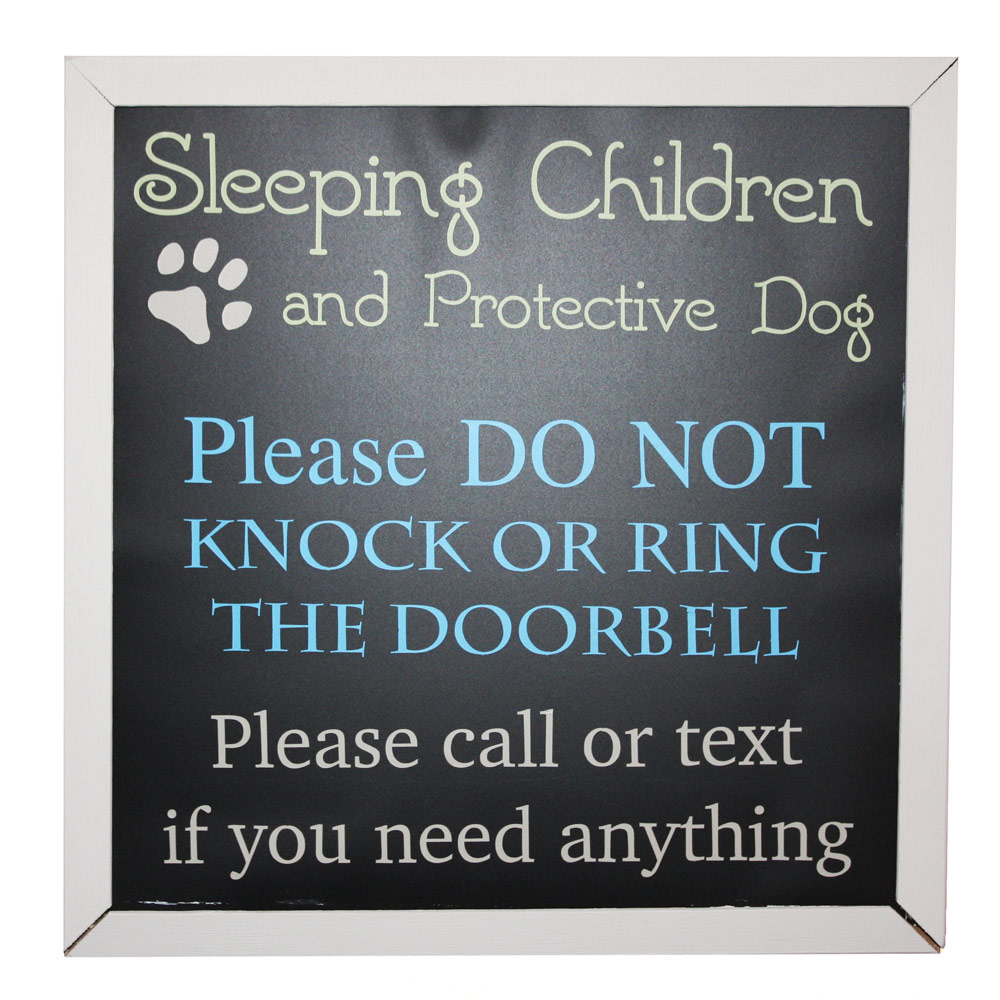
When my daughter asked me if I could make a sign for her front door for her new pre-school/daycare, I immediately said yes. I love to work with vinyl. It cuts so nicely and is so easy to work with. I found the saying that she wanted to use, then picked out the fonts I had on my computer and created this piece. I bought a 12 x 12 chalkboard piece from Joann Fabrics. I added paint to the edges and then put the vinyl on it. Of course, I couldn't stop there, because not everyone that naps is a child, so there are a number of different options for everyone in your life, including you.
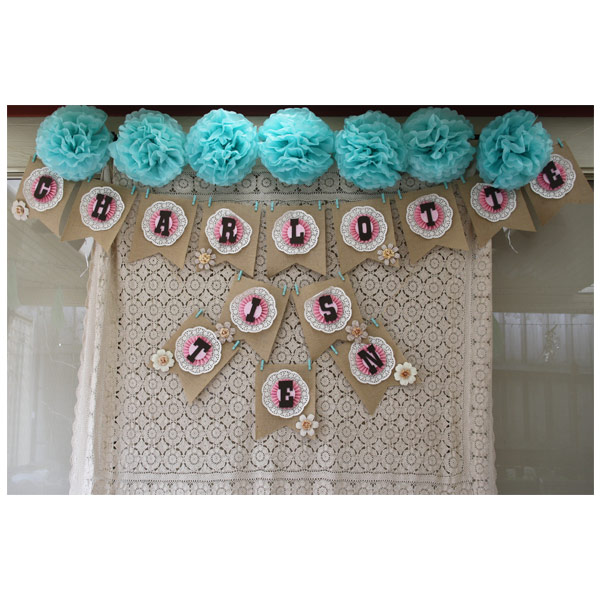
Belle here today sharing with you a vintage banner I made for my daughter’s 10th Birthday party last month. We decided on a blend of Wild West and Vintage Country using lace, burlap, red gingham, hay bales and plenty of Country Music! It was a great party. I knew I wanted to make a banner, and when I came across the Lucky Dip burlap pennants in my local Kaisercraft store I knew I had to have them for this very project.
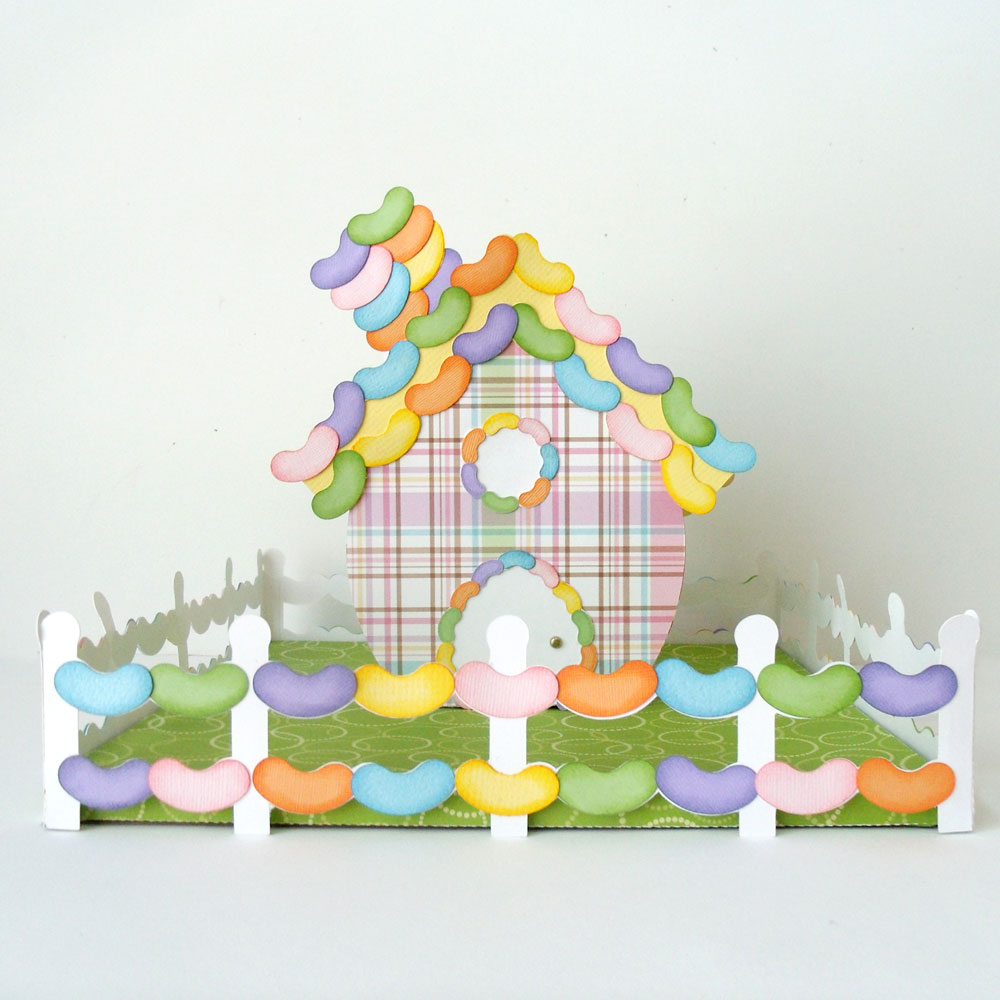
No Easter Village is complete without a Jelly Bean House. In a village full of Easter preparations there are bound to be a few extra jelly beans left over. Enjoy this house that is part of our complete Easter Village.
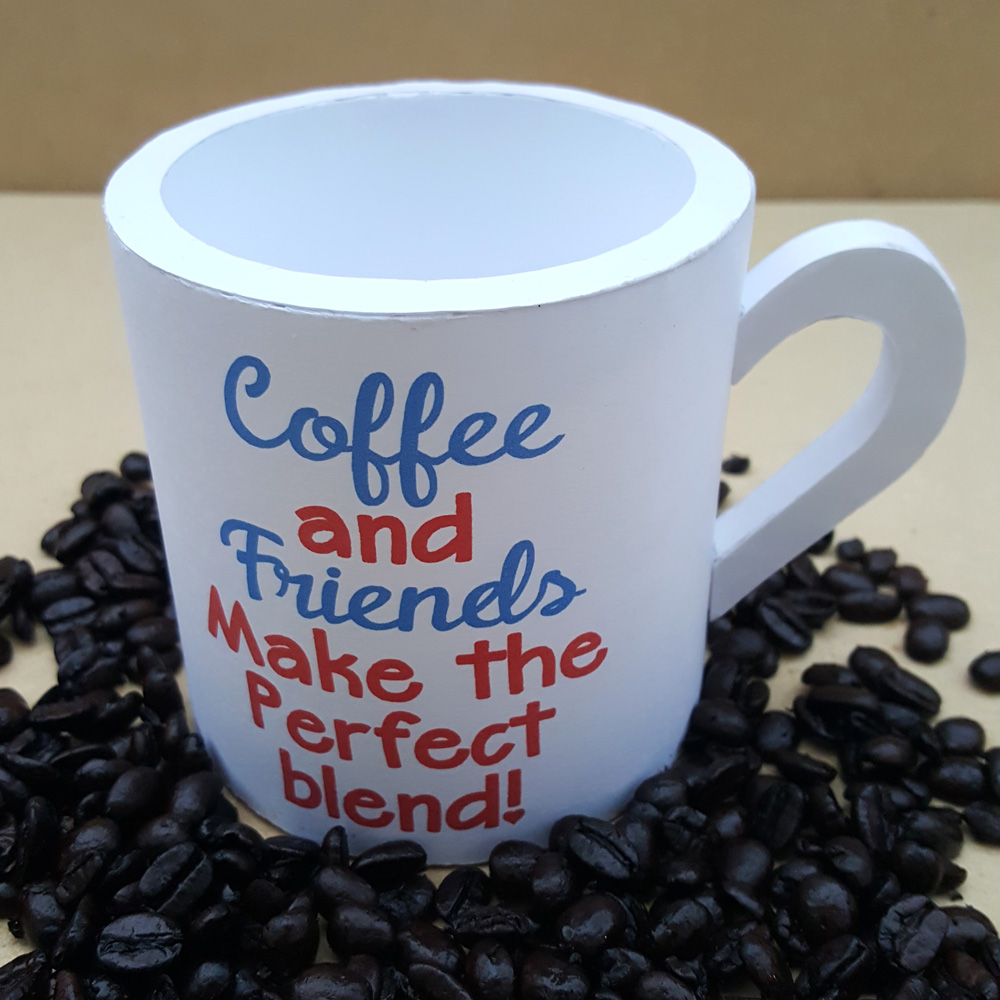
I LOVE my coffee! I head straight for the coffee pot as soon as my feet hit the floor in the morning. I actually collect coffee cups with fun sayings on them. I created this cup with my love for coffee and coffee cups in mind.
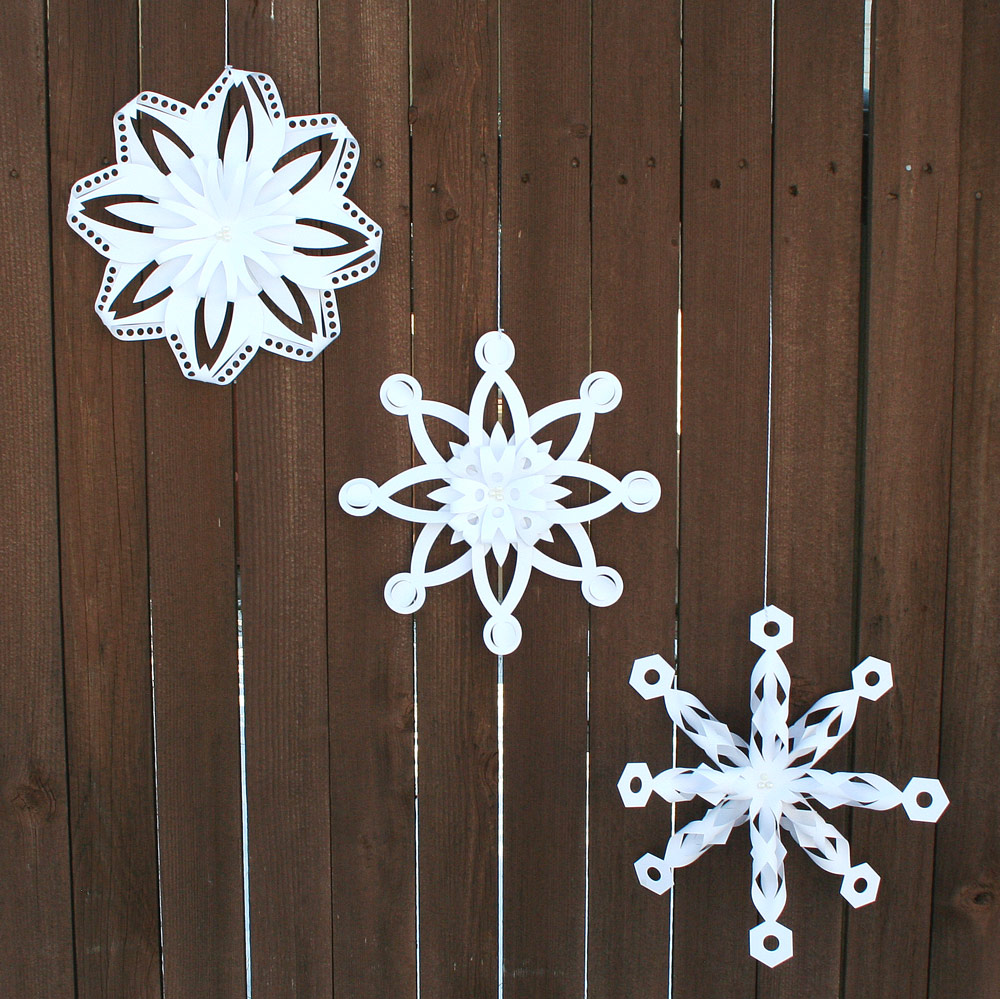
My daughter came home from an activity a few weeks ago with a super cool folded dimensional snowflake. It was unlike anything I'd seen before. She created it by folding and cutting several pieces of paper and then gluing them together in cool patterns. I knew immediately these would be a hit with grownup kids too, so I created a few for you to cut out.